1 规划
1.1 系统规划
| 磁盘名称 | 磁盘大小 | 作用 |
|---|---|---|
| /dev/sda | 50G | OS 操作系统 |
| /dev/sdb | 20G | 临时软件 |
| /dev/sdc | 50G | Oracle 软件 |
1.2 网络规划
| 节点 | IP | 名称 | 类型 | 作用 |
|---|---|---|---|---|
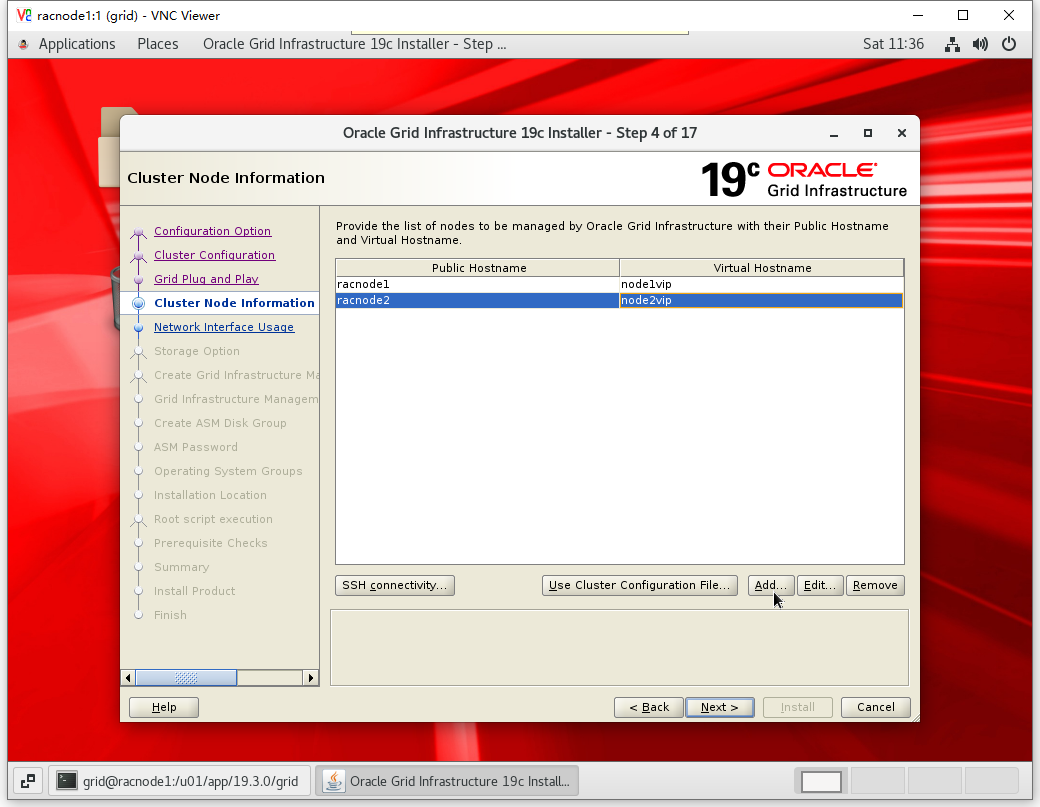
| Node1 | 192.168.31.101 | racnode1 | 公网 IP | 公司内部访问,非外网 |
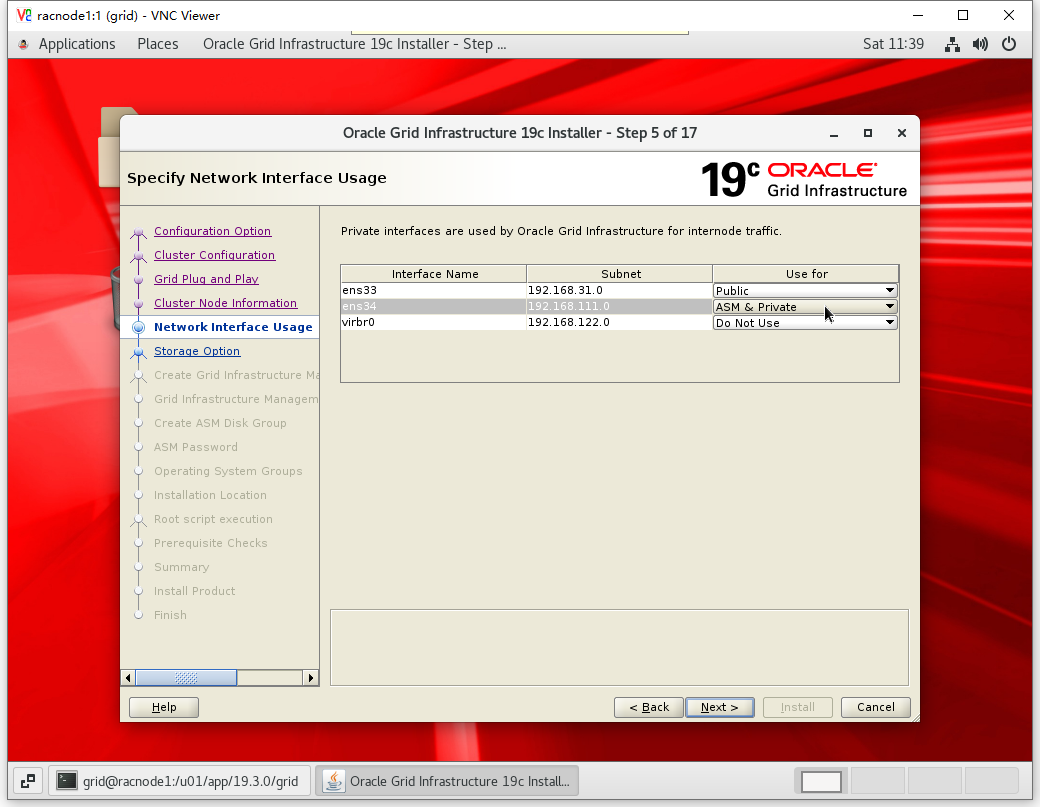
| Node1 | 192.168.111.128 | node1pri | 私有 IP | 用于 2 节点间心跳网络 |
| Node1 | 192.168.31.102 | node1vip | Virtual IP | 提供客户端访问,漂移 |
| Node2 | 192.168.31.201 | racnode2 | 公网 IP | 公司内部访问,非外网 |
| Node2 | 192.168.111.129 | node2pri | 私有 IP | 用于 1 节点间心跳网络 |
| Node2 | 192.168.31.202 | node2vip | Virtual IP | 提供客户端访问,漂移 |
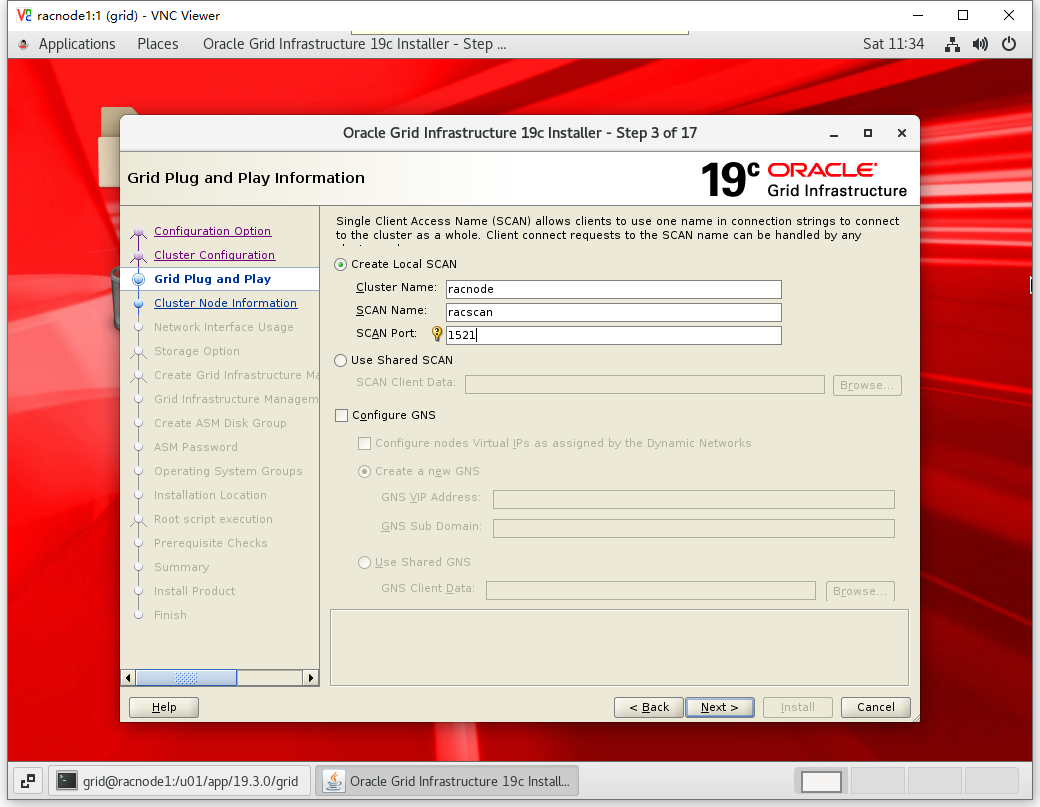
| N1+N2 | 192.168.31.100 | racscan | SCAN IP | 提供客户端访问,均衡 |
1.3 存储规划
| 磁盘名称 | 磁盘大小 | ASM磁盘名称 | 作用 |
|---|---|---|---|
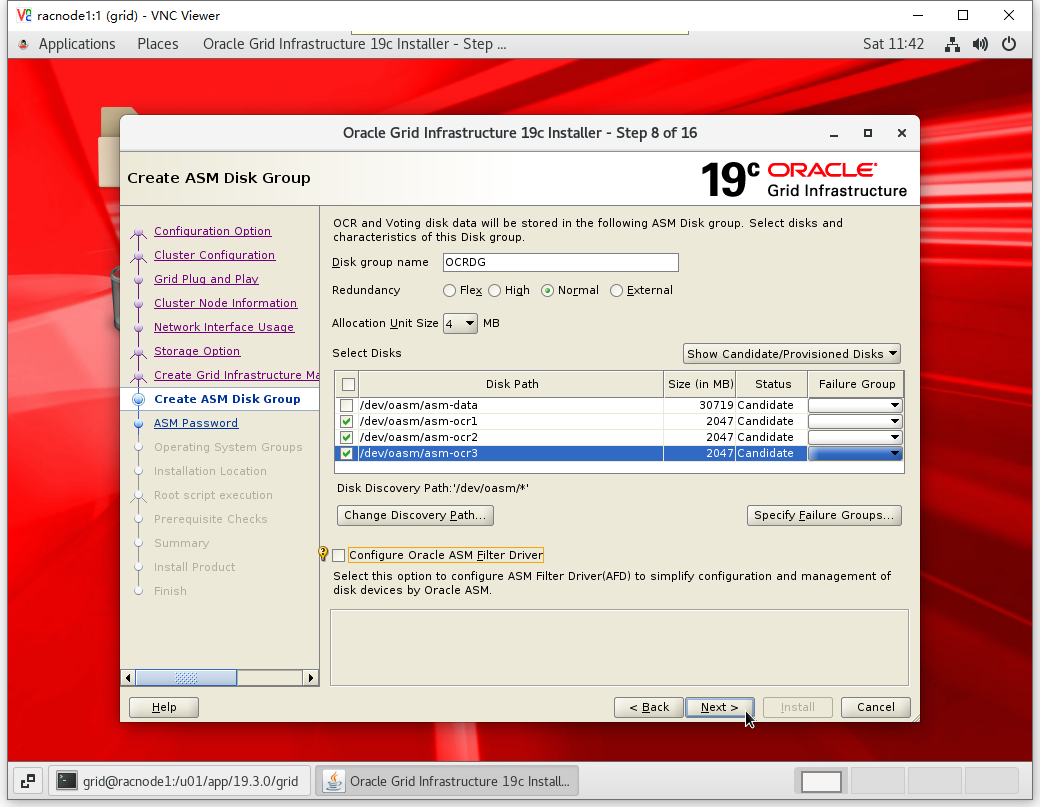
| /dev/sdd | 2G | asm-ocr1 | OCR/Voting File |
| /dev/sde | 2G | asm-ocr2 | OCR/Voting File |
| /dev/sdf | 2G | asm-ocr3 | OCR/Voting File |
| /dev/sdg | 30G | asm-data | Data Files |
2 操作系统安装(略)
参考 0 级搭建类 相关文档完成此操作
3 系统环境及参数设置
3.1 YUM仓库配置(双节点)
mv /etc/yum.repos.d/* /tmp/
echo "[local_yum]" >> /etc/yum.repos.d/henry.repo
echo "name = henry_repo" >> /etc/yum.repos.d/henry.repo
echo "baseurl = file:///mnt/" >> /etc/yum.repos.d/henry.repo
echo "enabled = 1" >> /etc/yum.repos.d/henry.repo
echo "gpgcheck = 0" >> /etc/yum.repos.d/henry.repo
mount /dev/cdrom /mnt/

yum -y install autoconf
yum -y install automake
yum -y install binutils
yum -y install binutils-devel
yum -y install bison
yum -y install cpp
yum -y install dos2unix
yum -y install ftp
yum -y install gcc
yum -y install gcc-c++
yum -y install lrzsz
yum -y install python-devel
yum -y install compat-libcap1
yum -y install compat-libstdc++-33
yum -y install compat-libstdc++-33.i686
yum -y install glibc-*
yum -y install glibc-*.i686
yum -y install libXpm-*.i686
yum -y install libXext
yum -y install libXext.i686
yum -y install libXtst
yum -y install libXtst.i686
yum -y install libX11
yum -y install libX11.i686
yum -y install libXau
yum -y install libXau.i686
yum -y install libxcb
yum -y install libxcb.i686
yum -y install libXi
yum -y install libXi.i686
yum -y install libstdc++.i686
yum -y install libstdc++-devel
yum -y install libstdc++-devel.i686
yum -y install libaio
yum -y install libaio.i686
yum -y install libaio-devel
yum -y install libaio-devel.i686
yum -y install ksh
yum -y install libXp
yum -y install libaio-devel
yum -y install numactl
yum -y install numactl-devel
yum -y install make -y
yum -y install sysstat -y
yum -y install unixODBC
yum -y install unixODBC-devel
yum -y install elfutils-libelf-devel
yum -y install redhat-lsb-core
yum -y install unzip
yum -y install libXrender
yum -y install libXrender-devel
yum -y install nfs-utils
yum -y install smartmontools
yum -y install tigervnc*
yum install -y libvirt*
3.2 编辑HOSTS文件(双节点)
vim /etc/hosts

# 添加内容

#scanip
192.168.31.100 racscan

#node1
192.168.31.101 racnode1
192.168.31.102 node1vip
192.168.111.128 node1pri

#node2
192.168.31.201 racnode2
192.168.31.202 node2vip
192.168.111.129 node2pri
3.3 创建用户和组(双节点)
/usr/sbin/groupadd -g 5001 oinstall
/usr/sbin/groupadd -g 5002 dba
/usr/sbin/groupadd -g 5003 oper
/usr/sbin/groupadd -g 5004 asmadmin
/usr/sbin/groupadd -g 5005 asmoper
/usr/sbin/groupadd -g 5006 asmdba
/usr/sbin/useradd -g oinstall -G dba,asmdba,oper -d /home/oracle -m oracle
/usr/sbin/useradd -g oinstall -G asmadmin,asmdba,asmoper,oper,dba -d /home/grid -m grid

# 修改用户 oracle 及 grid 密码

passwd oracle
passwd grid
3.4 创建文件夹及授权(双节点)
mkdir -p /u01/app/grid
mkdir -p /u01/app/19.3.0/grid
mkdir -p /u01/app/oracle/product/19.3.0/dbhome_1
mkdir -p /u01/app/oraInventory
chown -R grid:oinstall /u01/app/grid
chown -R grid:oinstall /u01/app/19.3.0
chown -R oracle:oinstall /u01/app/oracle
chown -R grid:oinstall /u01/app/oraInventory
chmod -R 775 /u01
3.5 用户资源限制配置(双节点)
vim /etc/security/limits.conf

# 添加内容

oracle soft nproc 2047
oracle hard nproc 16384
oracle soft nofile 1024
oracle hard nofile 65536
oracle soft stack 10240
oracle hard stack 32768
grid soft nproc 2047
grid hard nproc 16384
grid soft nofile 1024
grid hard nofile 65536
grid soft stack 10240
grid hard stack 32768
* soft memlock unlimited
* hard memlock unlimited
root soft stack 10240
root hard stack 32768
3.6 将资源限制加入验证模块(双节点)
echo "session required pam_limits.so" >> /etc/pam.d/login
3.7 修改内核参数(双节点)
vim /etc/sysctl.conf

# 编辑文件添加以下内容
fs.aio-max-nr = 1048576
fs.file-max = 6815744
kernel.sem = 250 32000 100 128
net.ipv4.ip_local_port_range = 9000 65500
net.core.rmem_default = 262144
net.core.rmem_max = 4194304
net.core.wmem_default = 262144
net.core.wmem_max = 1048586
kernel.panic_on_oops = 1
kernel.shmmax = 7730941132
kernel.shmall = 1887436
kernel.shmmni = 4096

# 执行命令刷新生效
sysctl -p
3.8 关闭交换页面(双节点)
vim /etc/rc.d/rc.local

# 添加内容

if test -f /sys/kernel/mm/transparent_hugepage/enabled; then
echo never > /sys/kernel/mm/transparent_hugepage/enabled
fi
if test -f /sys/kernel/mm/transparent_hugepage/defrag; then
echo never > /sys/kernel/mm/transparent_hugepage/defrag
fi
3.9 关闭防火墙(双节点)
systemctl stop firewalld.service
systemctl disable firewalld.service
3.10 关闭SELinux(双节点)
vim /etc/sysconfig/selinux

# 修改内容

SELINUX=disabled
3.11 关闭其他不需要的服务(双节点-可选)
systemctl stop avahi-dnsconfd
systemctl stop avahi-daemon
systemctl stop cups
systemctl stop postfix
systemctl stop smartd
systemctl disable avahi-dnsconfd
systemctl disable avahi-daemon
systemctl disable cups
systemctl disable postfix
systemctl disable smartd
4 编辑用户环境变量
4.1 GRID用户环境变量
4.1.1 节点1
su - grid
vim .bash_profile
# 添加内容
PS1="[`whoami`@`hostname`:"'$PWD]$'
export PS1
umask 022
export TMP=/tmp
export TMPDIR=$TMP
export ORACLE_HOSTNAME=racnode1
ORACLE_SID=+ASM1; export ORACLE_SID
ORACLE_TERM=xterm; export ORACLE_TERM
ORACLE_BASE=/u01/app/grid; export ORACLE_BASE
ORACLE_HOME=/u01/app/19.3.0/grid; export ORACLE_HOME
NLS_DATE_FORMAT="yyyy-mm-dd HH24:MI:SS"; export NLS_DATE_FORMAT
PATH=.:$PATH:$HOME/bin:$ORACLE_HOME/bin; export PATH
THREADS_FLAG=native; export THREADS_FLAG
if [ $USER = "oracle" ] || [ $USER = "grid" ]; then
if [ $SHELL = "/bin/ksh" ]; then
ulimit -p 16384
ulimit -n 65536
else
ulimit -u 16384 -n 65536
fi
umask 022
fi
4.1.2 节点2
su - grid
vim .bash_profile
# 添加内容
PS1="[`whoami`@`hostname`:"'$PWD]$'
export PS1
umask 022
export TMP=/tmp
export TMPDIR=$TMP
export ORACLE_HOSTNAME=racnode2
ORACLE_SID=+ASM2; export ORACLE_SID
ORACLE_TERM=xterm; export ORACLE_TERM
ORACLE_BASE=/u01/app/grid; export ORACLE_BASE
ORACLE_HOME=/u01/app/19.3.0/grid; export ORACLE_HOME
NLS_DATE_FORMAT="yyyy-mm-dd HH24:MI:SS"; export NLS_DATE_FORMAT
PATH=.:$PATH:$HOME/bin:$ORACLE_HOME/bin; export PATH
THREADS_FLAG=native; export THREADS_FLAG
if [ $USER = "oracle" ] || [ $USER = "grid" ]; then
if [ $SHELL = "/bin/ksh" ]; then
ulimit -p 16384
ulimit -n 65536
else
ulimit -u 16384 -n 65536
fi
umask 022
fi
4.2 ORACLE用户环境变量
4.2.1 节点1
su - oracle
vim .bash_profile
# 添加内容
PS1="[`whoami`@`hostname`:"'$PWD]$'
export PS1
export TMP=/tmp
export TMPDIR=$TMP
export ORACLE_HOSTNAME=racnode1
export ORACLE_UNQNAME=SALESERP
ORACLE_BASE=/u01/app/oracle; export ORACLE_BASE
ORACLE_HOME=$ORACLE_BASE/product/19.3.0/dbhome_1; export ORACLE_HOME
ORACLE_SID=SALES1; export ORACLE_SID
ORACLE_TERM=xterm; export ORACLE_TERM
NLS_DATE_FORMAT="yyyy-mm-dd HH24:MI:SS"; export NLS_DATE_FORMAT
NLS_LANG=AMERICAN_AMERICA.ZHS16GBK;export NLS_LANG
PATH=.:$PATH:$HOME/bin:$ORACLE_BASE/product/19.3.0/dbhome_1/bin:$ORACLE_HOME/bin; export
PATH
THREADS_FLAG=native; export THREADS_FLAG
if [ $USER = "oracle" ] || [ $USER = "grid" ]; then
if [ $SHELL = "/bin/ksh" ]; then
ulimit -p 16384
ulimit -n 65536
else
ulimit -u 16384 -n 65536
fi
umask 022
fi
4.2.2 节点2
su - oracle
vim .bash_profile
# 添加内容
PS1="[`whoami`@`hostname`:"'$PWD]$'
export PS1
export TMP=/tmp
export TMPDIR=$TMP
export ORACLE_HOSTNAME=racnode2
export ORACLE_UNQNAME=SALESERP
ORACLE_BASE=/u01/app/oracle; export ORACLE_BASE
ORACLE_HOME=$ORACLE_BASE/product/19.3.0/dbhome_1; export ORACLE_HOME
ORACLE_SID=SALES2; export ORACLE_SID
ORACLE_TERM=xterm; export ORACLE_TERM
NLS_DATE_FORMAT="yyyy-mm-dd HH24:MI:SS"; export NLS_DATE_FORMAT
NLS_LANG=AMERICAN_AMERICA.ZHS16GBK;export NLS_LANG
PATH=.:$PATH:$HOME/bin:$ORACLE_BASE/product/19.3.0/dbhome_1/bin:$ORACLE_HOME/bin; export
PATH
THREADS_FLAG=native; export THREADS_FLAG
if [ $USER = "oracle" ] || [ $USER = "grid" ]; then
if [ $SHELL = "/bin/ksh" ]; then
ulimit -p 16384
ulimit -n 65536
else
ulimit -u 16384 -n 65536
fi
umask 022
fi
5 SSH 互信
5.1 GRID用户互信
5.1.1 节点1
su - grid
rm -rf ~/.ssh
mkdir ~/.ssh
ssh-keygen -t rsa
ssh-keygen -t dsa
5.1.2 节点2
su - grid
rm -rf ~/.ssh
mkdir ~/.ssh
ssh-keygen -t rsa
ssh-keygen -t dsa
5.1.3 节点1追加互信并拷贝至节点2
cat ~/.ssh/id_rsa.pub >> ~/.ssh/authorized_keys
cat ~/.ssh/id_dsa.pub >> ~/.ssh/authorized_keys
ssh racnode2 cat ~/.ssh/id_rsa.pub >> ~/.ssh/authorized_keys
ssh racnode2 cat ~/.ssh/id_dsa.pub >> ~/.ssh/authorized_keys
scp /home/grid/.ssh/authorized_keys racnode2:~/.ssh/authorized_keys
5.1.4 节点1验证互信(无需密码)
ssh racnode1 date
ssh racnode2 date
ssh node1pri date
ssh node2pri date
5.1.5 节点2验证互信(无需密码)
ssh racnode1 date
ssh racnode2 date
ssh node1pri date
ssh node2pri date
5.2 ORACLE用户互信
5.2.1 节点1
su - oracle
rm -rf ~/.ssh
mkdir ~/.ssh
ssh-keygen -t rsa
ssh-keygen -t dsa
5.2.2 节点2
su - oracle
rm -rf ~/.ssh
mkdir ~/.ssh
ssh-keygen -t rsa
ssh-keygen -t dsa
5.2.3 节点1追加互信并拷贝至节点2
cat ~/.ssh/id_rsa.pub >> ~/.ssh/authorized_keys
cat ~/.ssh/id_dsa.pub >> ~/.ssh/authorized_keys
ssh racnode2 cat ~/.ssh/id_rsa.pub >> ~/.ssh/authorized_keys
ssh racnode2 cat ~/.ssh/id_dsa.pub >> ~/.ssh/authorized_keys
scp /home/oracle/.ssh/authorized_keys racnode2:~/.ssh/authorized_keys
5.2.4 节点1验证互信(无需密码)
ssh racnode1 date
ssh racnode2 date
ssh node1pri date
ssh node2pri date
5.2.5 节点2验证互信(无需密码)
ssh racnode1 date
ssh racnode2 date
ssh node1pri date
ssh node2pri date
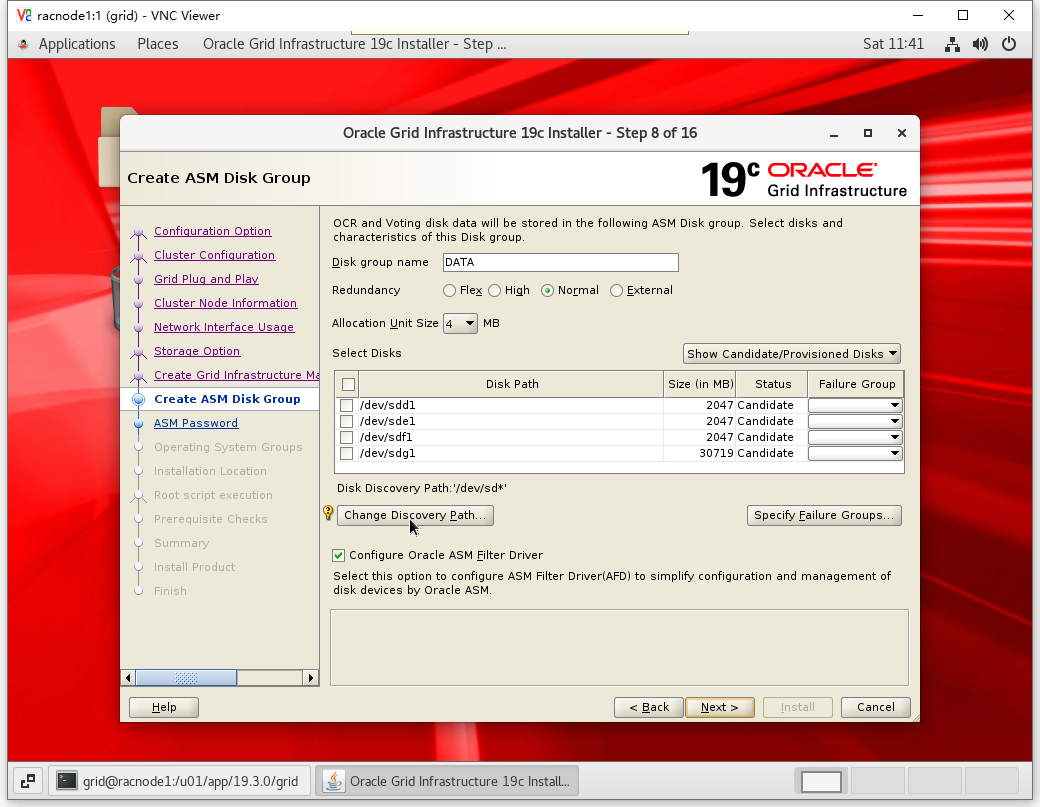
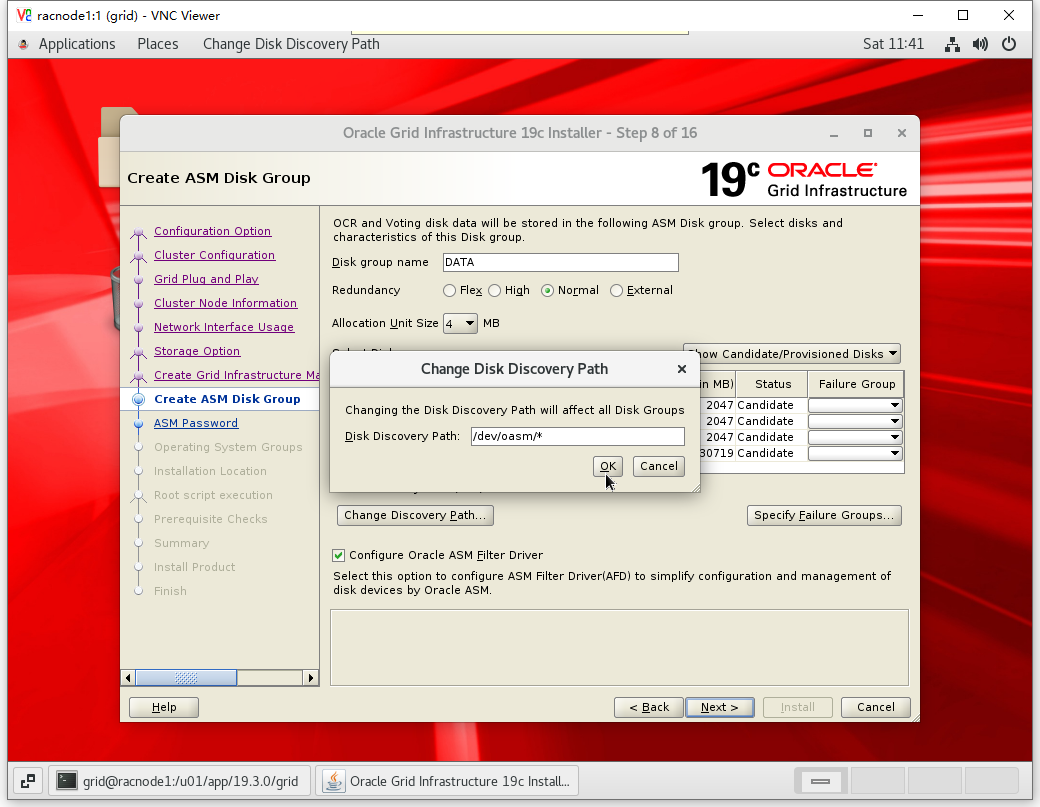
6 ASM 磁盘配置(UDEV)
本文使用 VMWare Workstation 15.5 虚拟机进行配置
# 关闭节点1和节点2

systemctl poweroff

# 创建独立的共享磁盘文件夹

sharedisk
6.1 节点1添加磁盘
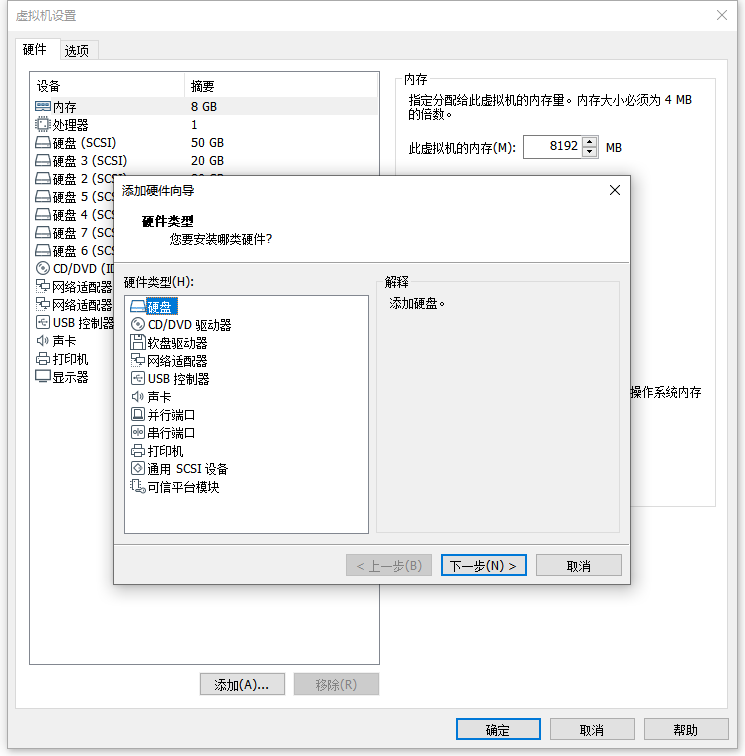
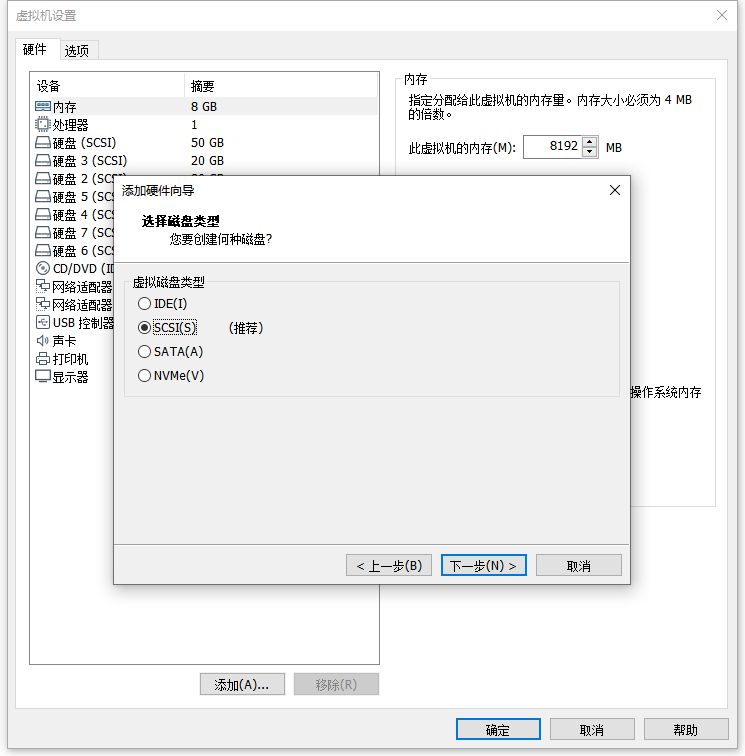
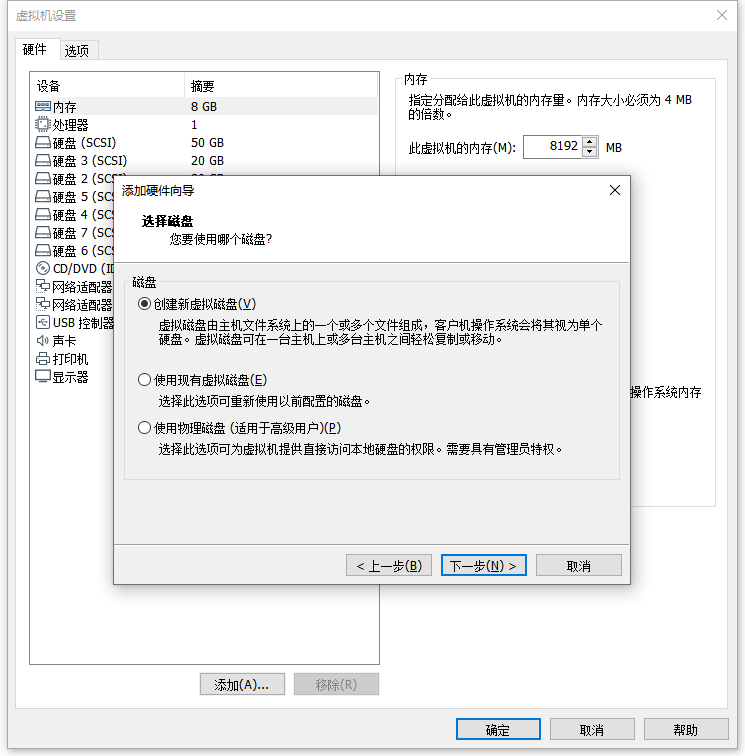
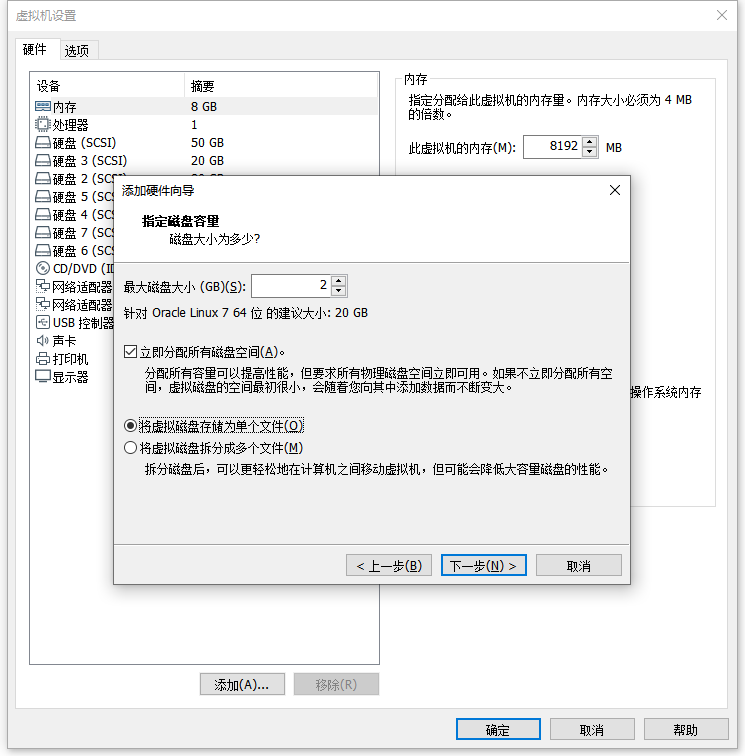
按照 1.3 规划,添加 4 块硬盘
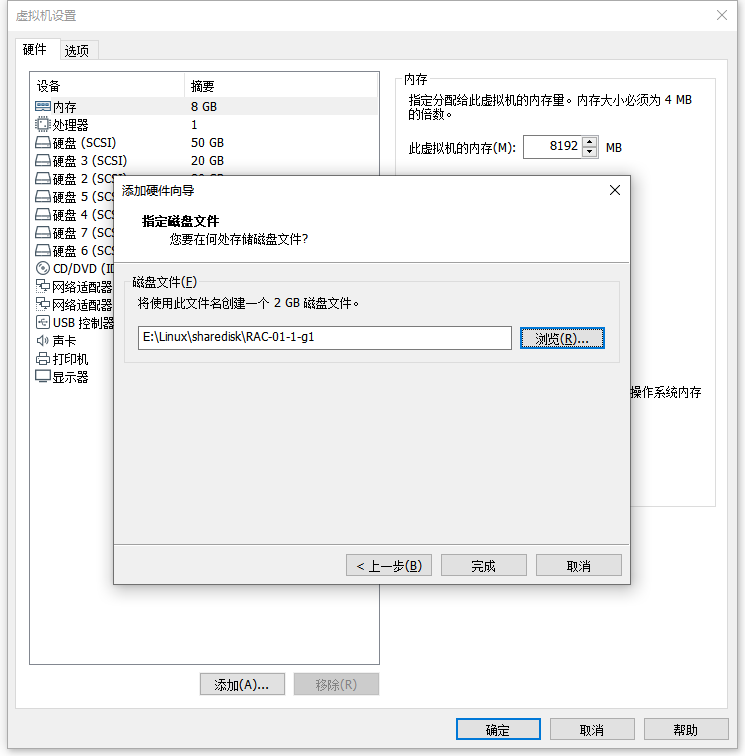
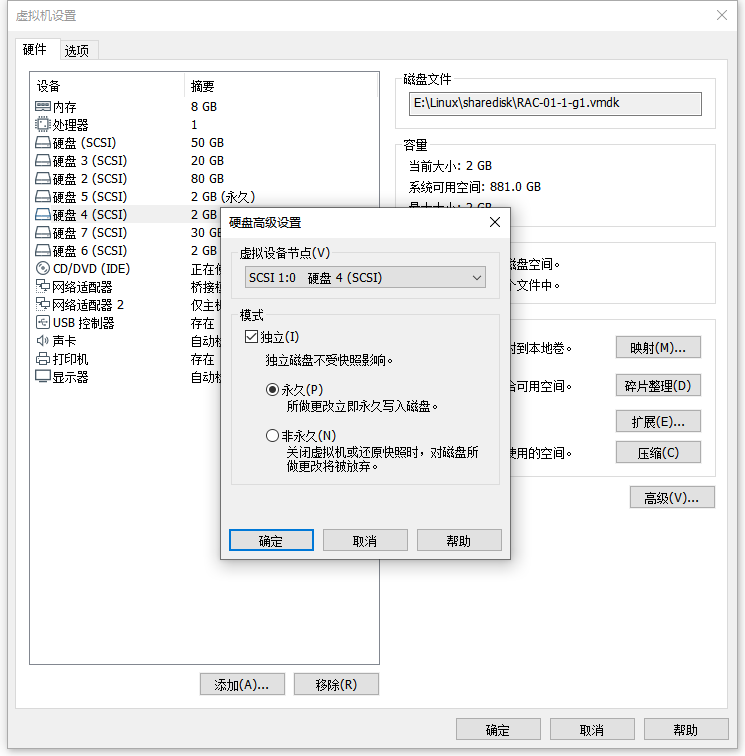
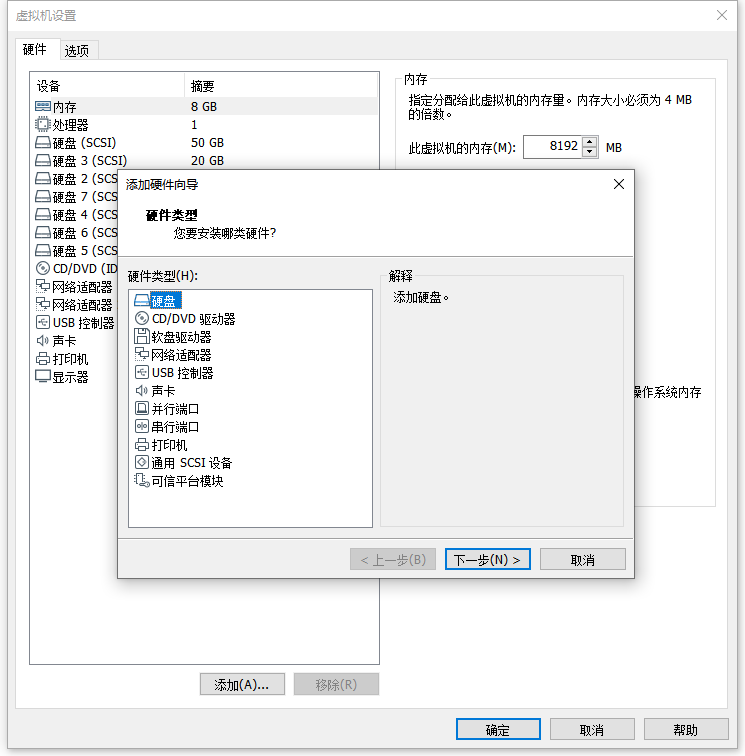
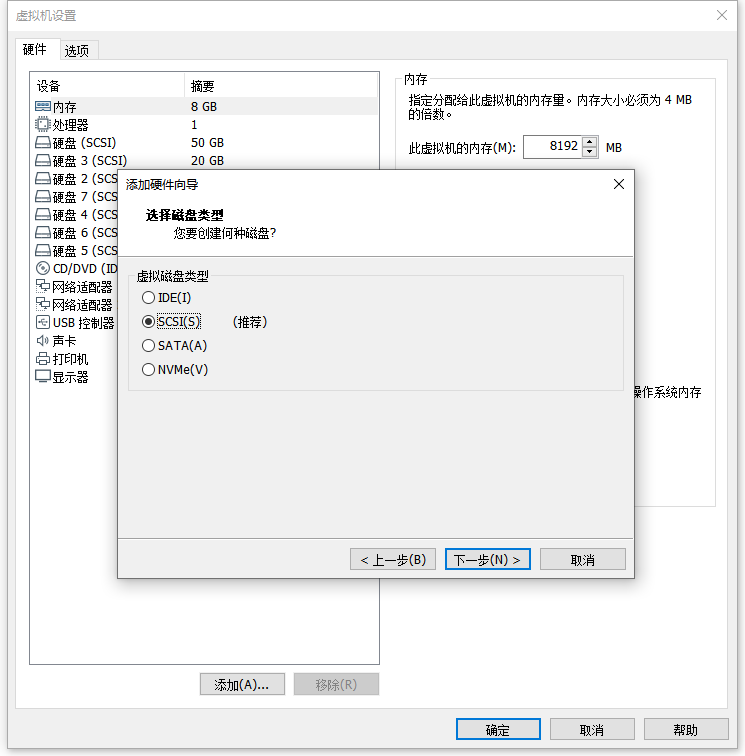
1:编辑虚拟机设置 - 添加 - 硬盘 - SCSI - 创建新虚拟磁盘 - 磁盘大小:2G/立即分配所有磁盘空间 - 浏览路径:E:\Linux\sharedisk - 文件名:RAC-01-1-g1 - 保存/完成 - 高级 - 虚拟设备节点:SCSI 1:0 - 模式:勾选 独立/永久 - 确定
2:添加 - 硬盘 - SCSI - 创建新虚拟磁盘 - 磁盘大小:2G/立即分配所有磁盘空间 - 浏览路径:E:\Linux\sharedisk - 文件名:RAC-01-1-g2 - 保存/完成 - 高级 - 虚拟设备节点:SCSI 1:1 - 模式:勾选 独立/永久 - 确定
3:添加 - 硬盘 - SCSI - 创建新虚拟磁盘 - 磁盘大小:2G/立即分配所有磁盘空间 - 浏览路径:E:\Linux\sharedisk - 文件名:RAC-01-1-g3 - 保存/完成 - 高级 - 虚拟设备节点:SCSI 1:2 - 模式:勾选 独立/永久 - 确定
4:添加 - 硬盘 - SCSI - 创建新虚拟磁盘 - 磁盘大小:30G/立即分配所有磁盘空间 - 浏览路径:E:\Linux\sharedisk - 文件名:RAC-01-1-data - 保存/完成 - 高级 - 虚拟设备节点:SCSI 1:3 - 模式:勾选 独立/永久 - 确定
注意:虚拟机设置永久模式前提是不允许存在虚拟机快照,如存在,请删除
图示(以此类推)
6.2 节点2添加磁盘
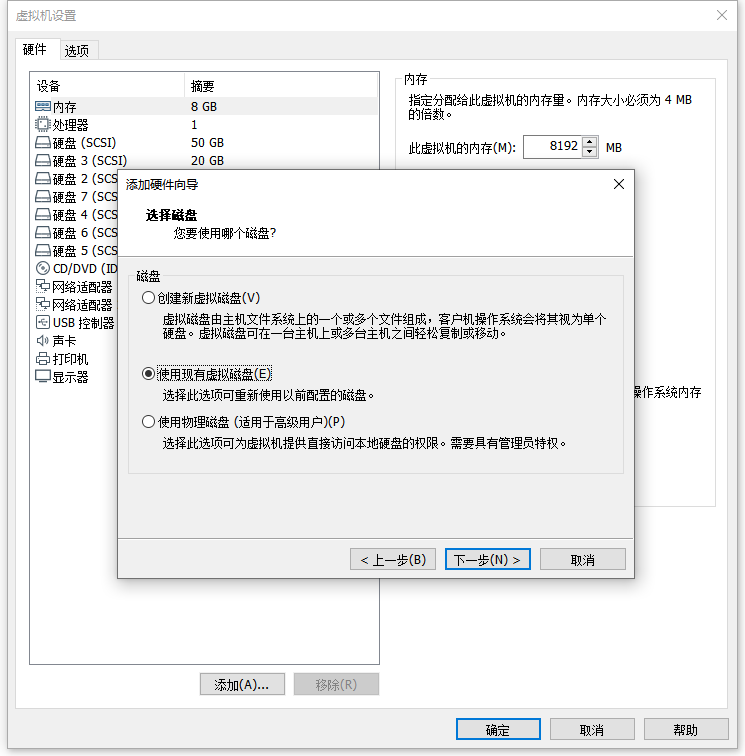
节点2添加共享磁盘注意两点
一是添加磁盘选择 使用现有虚拟磁盘
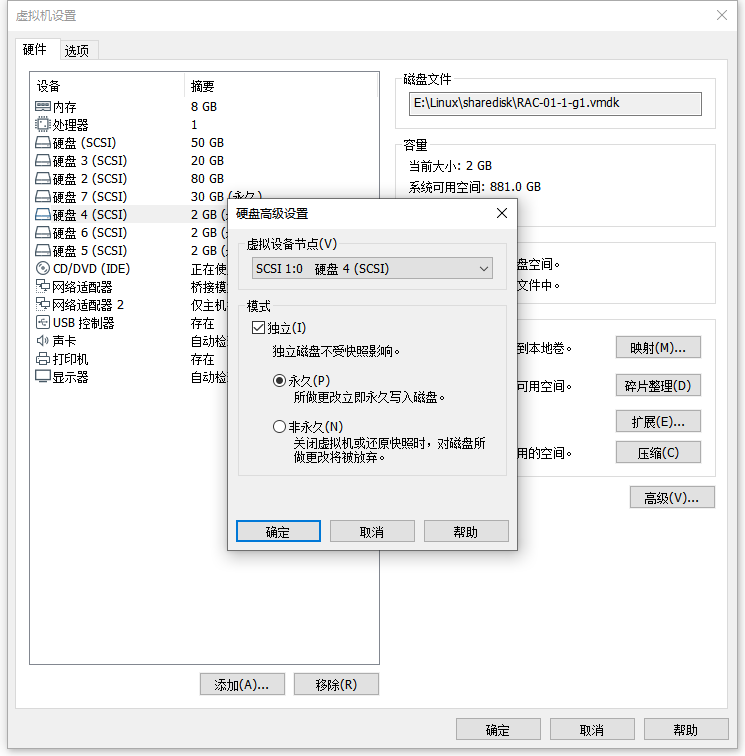
二是节点2的磁盘选择和虚拟设备号和节点1要保持一致
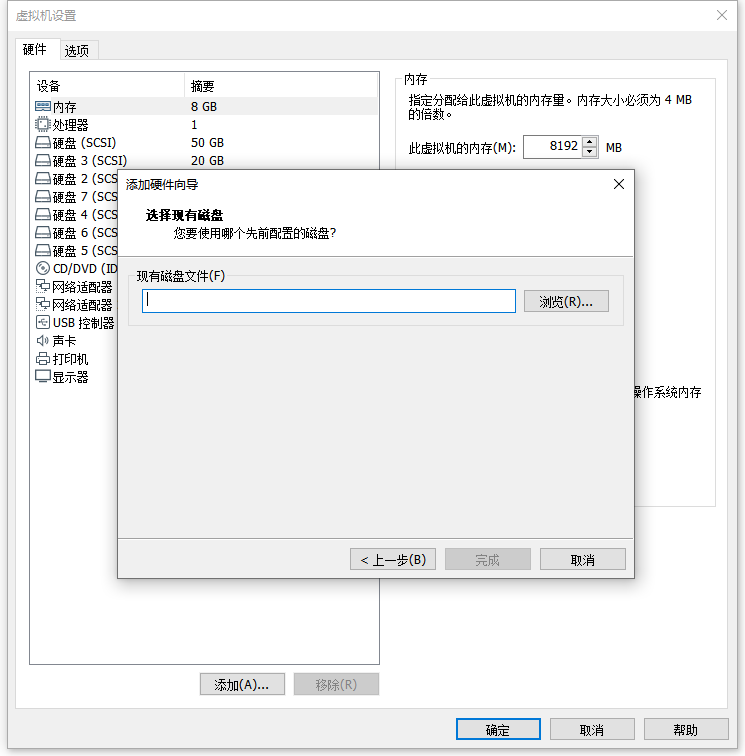
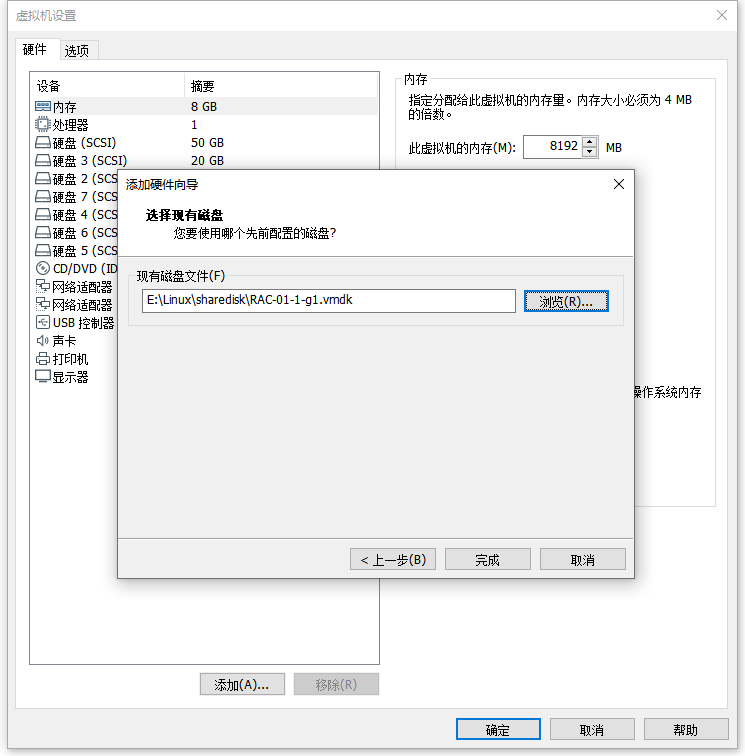
1:编辑虚拟机设置 - 添加 - 硬盘 - SCSI - 使用现有虚拟磁盘 - 浏览:选择 E:\Linux\sharedisk\RAC-01-1-g1.vmdk - 完成 - 高级 - 虚拟设备节点:SCSI 1:0 - 模式:勾选 独立/永久 - 确定
2:添加 - 硬盘 - SCSI - 使用现有虚拟磁盘 - 浏览:选择 E:\Linux\sharedisk\RAC-01-1-g2.vmdk - 完成 - 高级 - 虚拟设备节点:SCSI 1:1 - 模式:勾选 独立/永久 - 确定
3:添加 - 硬盘 - SCSI - 使用现有虚拟磁盘 - 浏览:选择 E:\Linux\sharedisk\RAC-01-1-g3.vmdk - 完成 - 高级 - 虚拟设备节点:SCSI 1:2 - 模式:勾选 独立/永久 - 确定
4:添加 - 硬盘 - SCSI - 使用现有虚拟磁盘 - 浏览:选择 E:\Linux\sharedisk\RAC-01-1-data.vmdk - 完成 - 高级 - 虚拟设备节点:SCSI 1:3 - 模式:勾选 独立/永久 - 确定
图示(以此类推)
6.3 节点2虚拟机添加代码段
# 节点二虚拟机配置文件中添加以下代码段,避免同时开启锁定磁盘

disk.locking = "FALSE"
diskLib.dataCacheMaxSize= "0"
scsi1.sharedBus ="virtual"
diskLib.dataCacheMaxReadAheadSize = "0"
diskLib.DataCacheMinReadAheadSize = "0"
diskLib.dataCachePageSize = "4096"
diskLib.maxUnsyncedWrites = "0"
disk.EnableUUID = "TRUE"
6.4 节点1分区
fdisk /dev/sdd
fdisk /dev/sde
fdisk /dev/sdf
fdisk /dev/sdg
6.5 节点1确认SCSI标识符
通过命令 /usr/lib/udev/scsi_id -g -u -d 分区名 确认标识符,最终对应关系如下
| 分区 | 标识符 |
|---|---|
| /usr/lib/udev/scsi_id -g -u -d /dev/sdd1 | 36000c29c627c4e18666e2ba340715dc9 |
| /usr/lib/udev/scsi_id -g -u -d /dev/sde1 | 36000c295b648ea51ee6b56b006825def |
| /usr/lib/udev/scsi_id -g -u -d /dev/sdf1 | 36000c29d97a96e82fcd40598caba8115 |
| /usr/lib/udev/scsi_id -g -u -d /dev/sdg1 | 36000c2990c196f54a57085a995e97d9d |
6.6 节点1编辑UDEV规则文件
创建文件
vim /etc/udev/rules.d/99-oracle-asmdevices.rules,按以下格式编辑条目,替换RESULT对应的SCSI标识符
KERNEL=="sd?1", SUBSYSTEM=="block", PROGRAM=="/usr/lib/udev/scsi_id -g -u -d /dev/$parent", RESULT=="36000c29c627c4e18666e2ba340715dc9", SYMLINK+="oasm/asm-ocr1", OWNER="grid", GROUP="asmadmin", MODE="0660"KERNEL=="sd?1", SUBSYSTEM=="block", PROGRAM=="/usr/lib/udev/scsi_id -g -u -d /dev/$parent", RESULT=="36000c295b648ea51ee6b56b006825def", SYMLINK+="oasm/asm-ocr2", OWNER="grid", GROUP="asmadmin", MODE="0660"KERNEL=="sd?1", SUBSYSTEM=="block", PROGRAM=="/usr/lib/udev/scsi_id -g -u -d /dev/$parent", RESULT=="36000c29d97a96e82fcd40598caba8115", SYMLINK+="oasm/asm-ocr3", OWNER="grid", GROUP="asmadmin", MODE="0660"KERNEL=="sd?1", SUBSYSTEM=="block", PROGRAM=="/usr/lib/udev/scsi_id -g -u -d /dev/$parent", RESULT=="36000c2990c196f54a57085a995e97d9d", SYMLINK+="oasm/asm-data", OWNER="grid", GROUP="asmadmin", MODE="0660"
执行 partprobe 识别
/sbin/partprobe /dev/sdd1
/sbin/partprobe /dev/sde1
/sbin/partprobe /dev/sdf1
/sbin/partprobe /dev/sdg1
查看磁盘
请确保所有链接磁盘均可见,并具有对应的正确权限,否则,在进行下一步之前请解决该问题。
[root@racnode1 ~]# ls -lathr /dev/oasm/*
lrwxrwxrwx 1 root root 7 Oct 10 10:26 /dev/oasm/asm-ocr1 -> ../sdd1
lrwxrwxrwx 1 root root 7 Oct 10 10:26 /dev/oasm/asm-ocr2 -> ../sde1
lrwxrwxrwx 1 root root 7 Oct 10 10:26 /dev/oasm/asm-ocr3 -> ../sdf1
lrwxrwxrwx 1 root root 7 Oct 10 10:26 /dev/oasm/asm-data -> ../sdg1

上面链接归 root 用户所有,但是链接所指向的磁盘是拥有正确权限的。
[root@racnode1 ~]# ls -lathr /dev/sd*1 |grep -v sda1 |grep -v sdb1 |grep -v sdc1
brw-rw---- 1 grid asmadmin 8, 49 Oct 10 10:26 /dev/sdd1
brw-rw---- 1 grid asmadmin 8, 65 Oct 10 10:26 /dev/sde1
brw-rw---- 1 grid asmadmin 8, 81 Oct 10 10:26 /dev/sdf1
brw-rw---- 1 grid asmadmin 8, 97 Oct 10 10:26 /dev/sdg1
6.7 拷贝节点1 UDEV文件至节点2
[root@racnode1 ~]# scp /etc/udev/rules.d/99-oracle-asmdevices.rules racnode2:/etc/udev/rules.d/

The authenticity of host 'racnode2 (192.168.31.201)' can't be established.
ECDSA key fingerprint is SHA256:Yj1vqmj9gGZ5pSF7E9B4kCce/C1TF6HvWHjzWVXMSuE.
ECDSA key fingerprint is MD5:bc:97:90:73:c2:a8:a6:5c:d0:9d:20:9e:6f:4c:d2:9a.
Are you sure you want to continue connecting (yes/no)? yes
Warning: Permanently added 'racnode2,192.168.31.201' (ECDSA) to the list of known hosts.
root@racnode2's password:
99-oracle-asmdevices.rules                         100%  828     1.2MB/s   00:00
6.8 节点2重启UDEV服务
systemctl restart systemd-udevd.service
udevadm control --reload-rules
udevadm trigger --type=devices --action=add

[root@racnode2 ~]# ls -lathr /dev/oasm/*
lrwxrwxrwx 1 root root 7 Oct 10 10:34 /dev/oasm/asm-ocr1 -> ../sdd1
lrwxrwxrwx 1 root root 7 Oct 10 10:34 /dev/oasm/asm-ocr2 -> ../sde1
lrwxrwxrwx 1 root root 7 Oct 10 10:34 /dev/oasm/asm-ocr3 -> ../sdf1
lrwxrwxrwx 1 root root 7 Oct 10 10:34 /dev/oasm/asm-data -> ../sdg1

[root@racnode2 ~]# ls -lathr /dev/sd*1 |grep -v sda1 |grep -v sdb1 |grep -v sdc1
brw-rw---- 1 grid asmadmin 8, 49 Oct 10 10:34 /dev/sdd1
brw-rw---- 1 grid asmadmin 8, 65 Oct 10 10:34 /dev/sde1
brw-rw---- 1 grid asmadmin 8, 81 Oct 10 10:34 /dev/sdf1
brw-rw---- 1 grid asmadmin 8, 97 Oct 10 10:34 /dev/sdg1

# 强烈建议直接重启 systemctl reboot
学习实验配置RAC共享磁盘,建议使用 VirtualBox
7 Grid Infrastructure 配置安装
7.1 节点1解压GI软件
[root@racnode1 ~]# chmod -R 777 /soft/
[root@racnode1 ~]# su - grid
Last login: Wed Sep 30 10:18:34 CST 2020 on pts/0

[grid@racnode1:/home/grid]$cd $ORACLE_HOME
[grid@racnode1:/u01/app/19.3.0/grid]$unzip -q /soft/LINUX.X64_193000_grid_home.zip
7.2 节点1安装集群检测包
[root@racnode1 ~]# cd /u01/app/19.3.0/grid/cv/rpm/
[root@racnode1 rpm]# rpm -ivh cvuqdisk-1.0.10-1.rpm
Preparing...                          ################################# [100%]
Using default group oinstall to install package
Updating / installing...
   1:cvuqdisk-1.0.10-1                ################################# [100%]
7.3 节点2安装集群检测包
# 拷贝至节点2

[root@racnode1 rpm]# scp cvuqdisk-1.0.10-1.rpm racnode2:/tmp
root@racnode2's password:
cvuqdisk-1.0.10-1.rpm                       100%   11KB  10.7MB/s   00:00

# 节点2安装

[root@racnode2 ~]# cd /tmp/
[root@racnode2 tmp]# rpm -ivh cvuqdisk-1.0.10-1.rpm
Preparing...                          ################################# [100%]
Using default group oinstall to install package
Updating / installing...
   1:cvuqdisk-1.0.10-1                ################################# [100%]
7.4 解压更新OPatch工具
如不考虑打补丁,可跳过本小节
# 截至文章发布,GI软件最新RU补丁版本为 2020.07.14 发布的 19.8.0.0.200714(补丁号 Patch 31305339),该补丁要求 OPatch 工具最低版本为 12.2.0.1.21

# 查看当前 OPatch 工具版本

[grid@racnode1:/home/grid]$cd $ORACLE_HOME
[grid@racnode1:/u01/app/19.3.0/grid]$OPatch/opatch version
OPatch Version: 12.2.0.1.17

OPatch succeeded.

# 下载最新 OPatch 工具解压覆盖

[grid@racnode1:/u01/app/19.3.0/grid]$unzip -q /soft/p6880880_121010_Linux-x86-64.zip

replace OPatch/emdpatch.pl? [y]es, [n]o, [A]ll, [N]one, [r]ename: A

# 查看最新 OPatch 工具版本

[grid@racnode1:/u01/app/19.3.0/grid]$OPatch/opatch version
OPatch Version: 12.2.0.1.21

OPatch succeeded.
7.5 解压GI软件最新RU补丁
如不考虑打补丁,可跳过本小节
[grid@racnode1:/home/grid]$cd /soft/

[grid@racnode1:/soft]$mkdir ogi

[grid@racnode1:/soft]$unzip -q p31305339_190000_Linux-x86-64.zip -d ogi
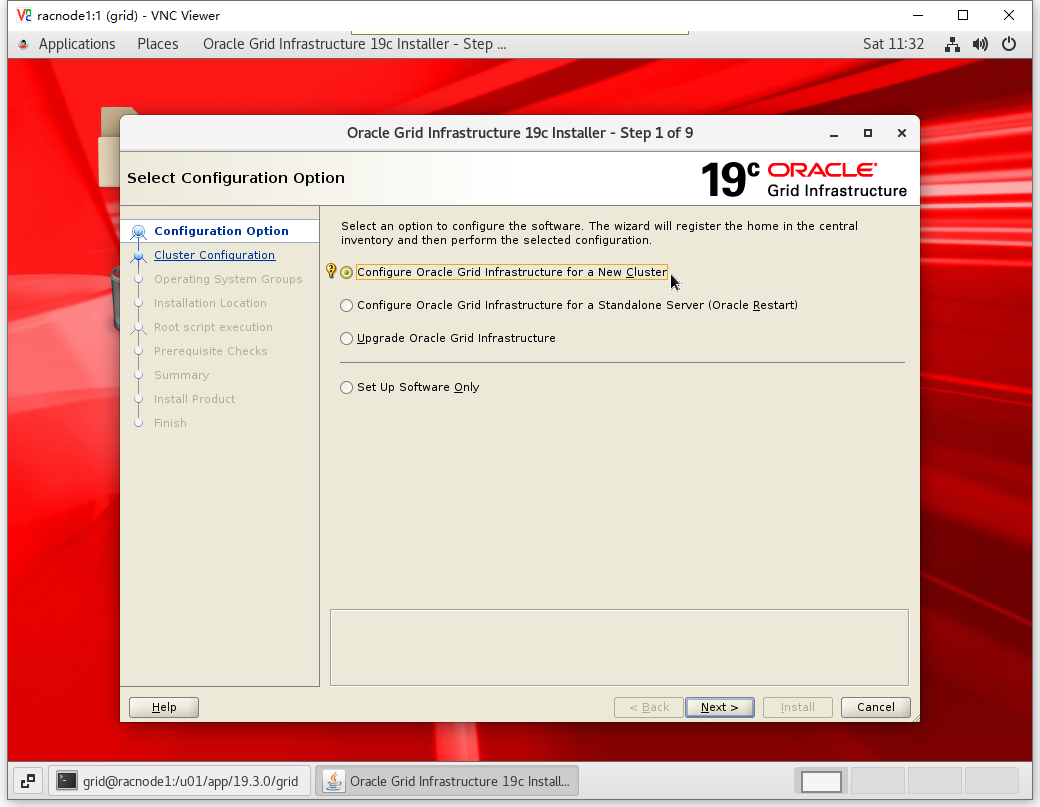
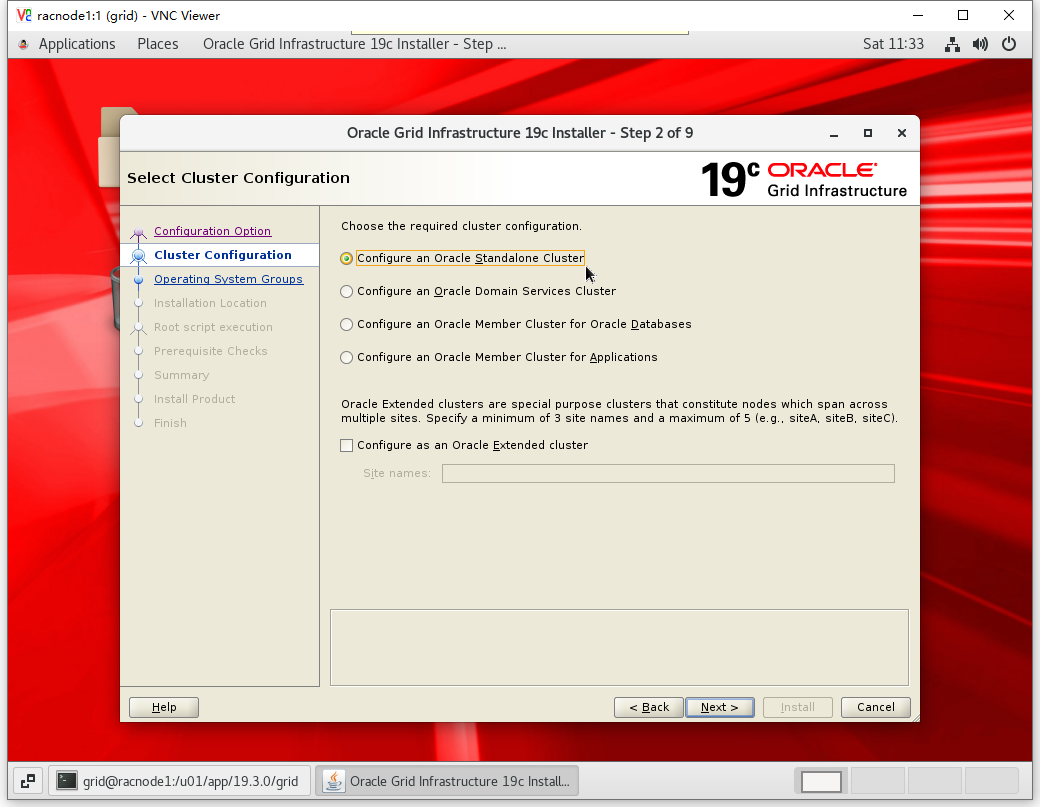
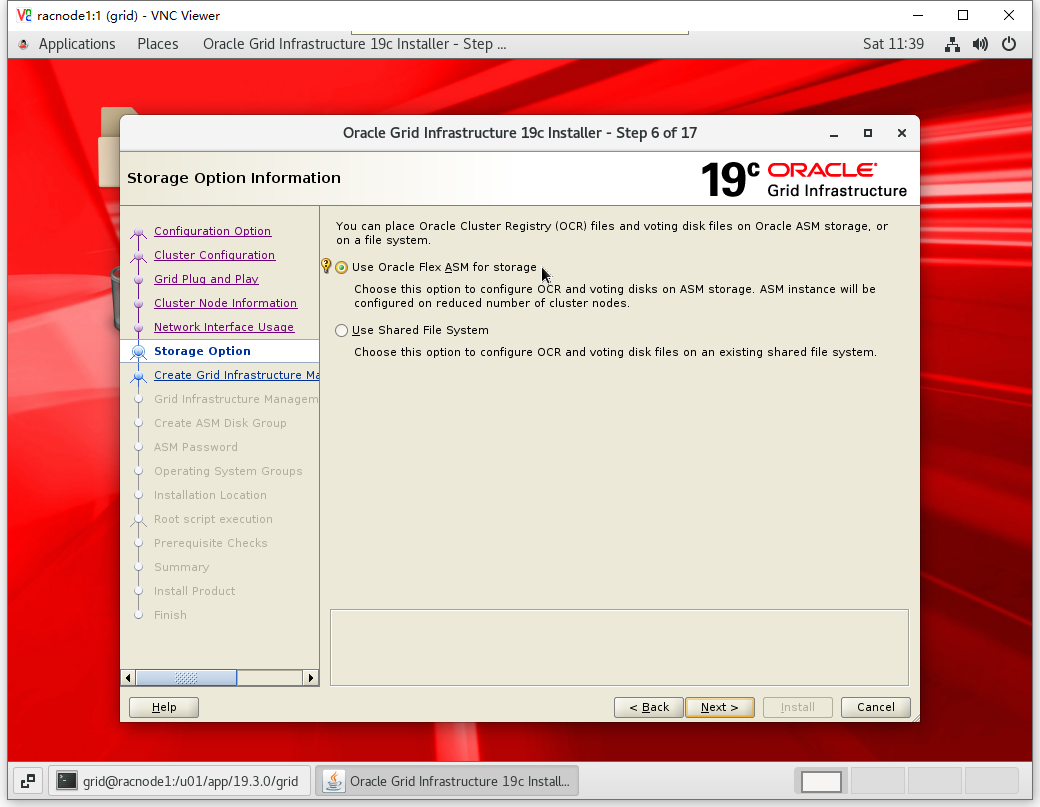
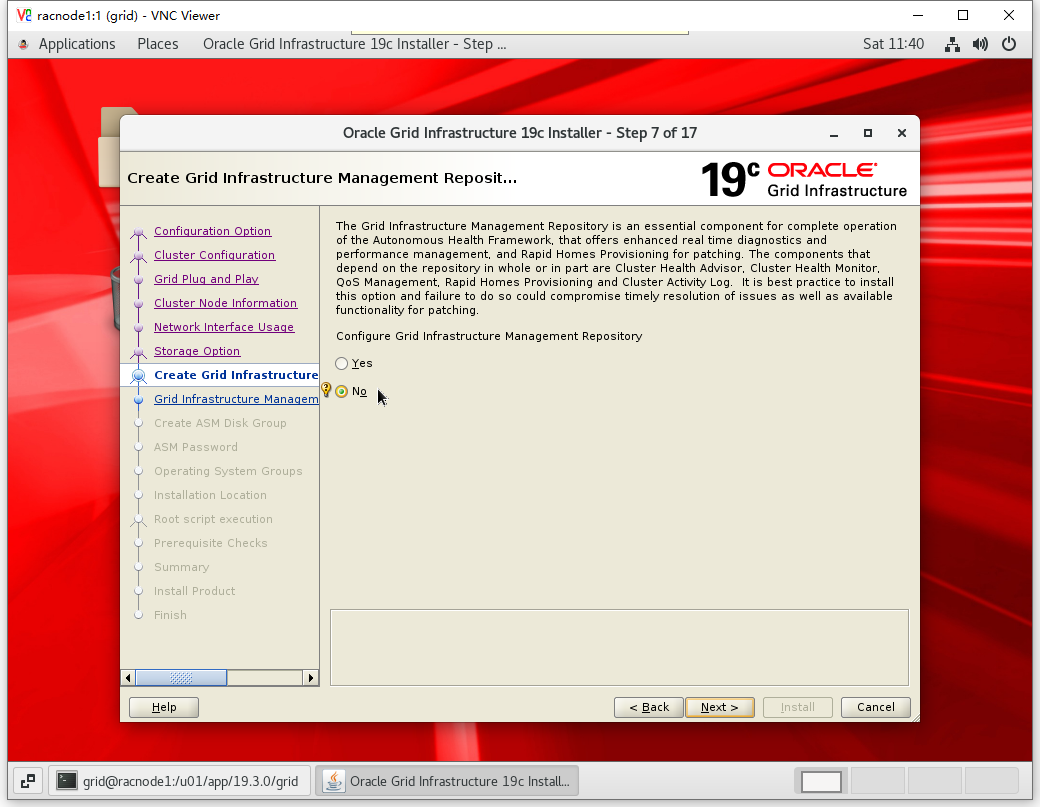
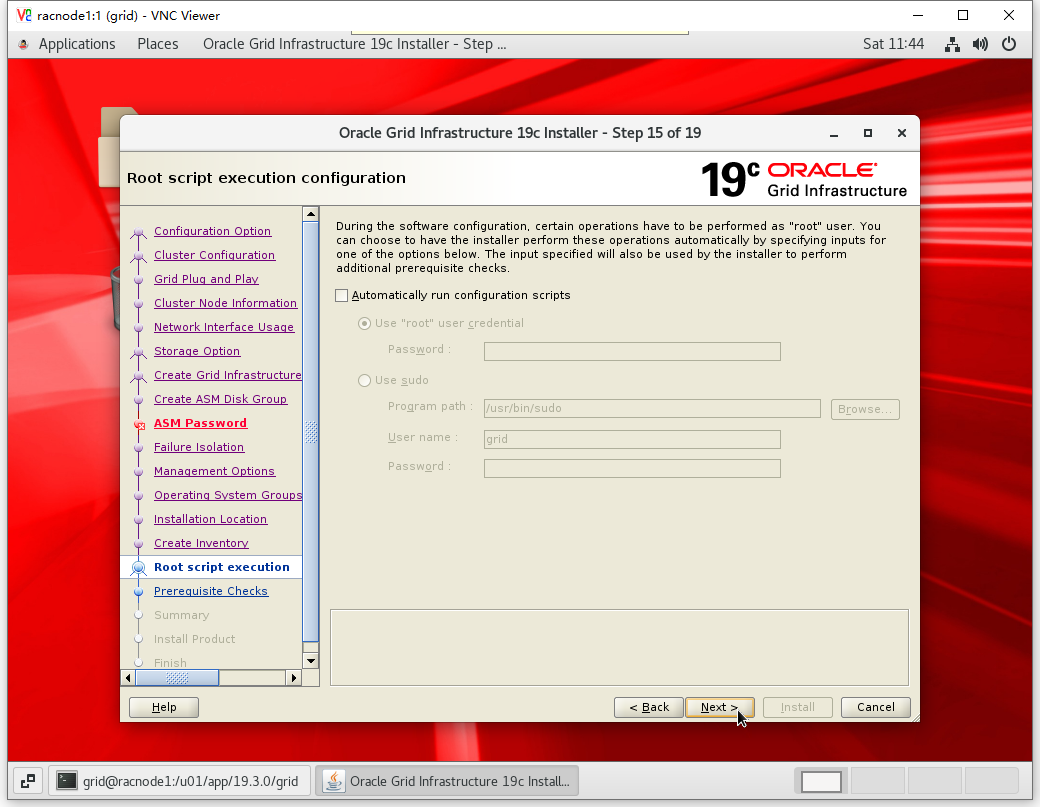
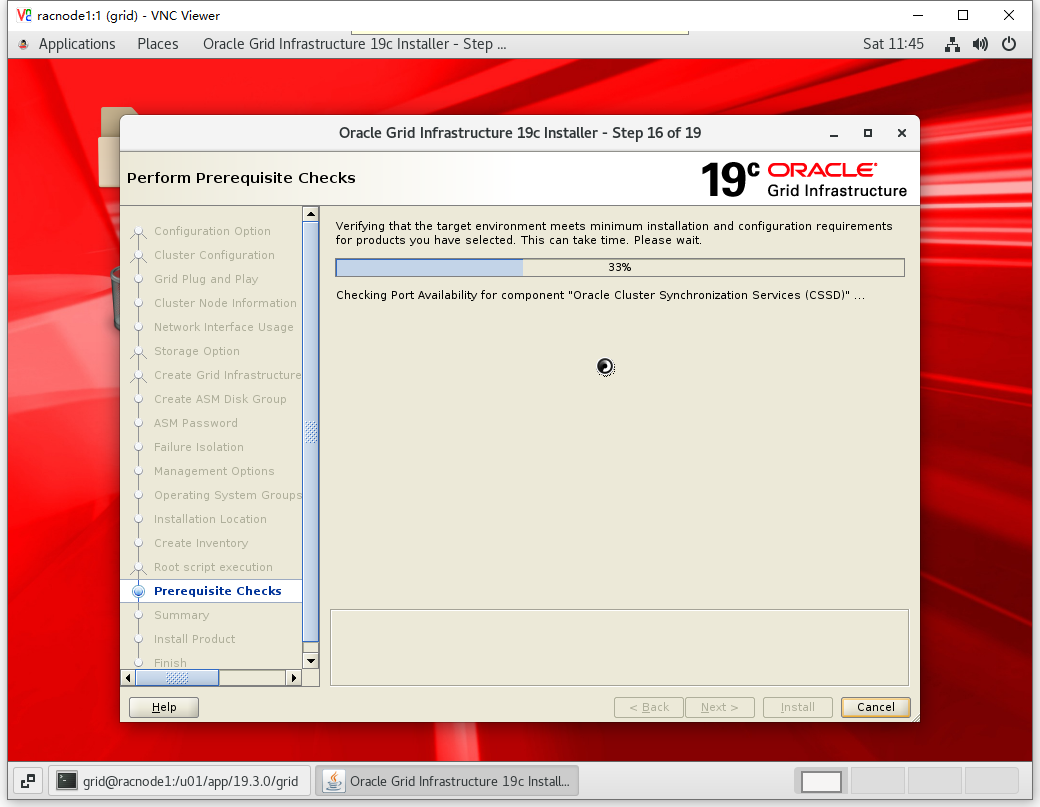
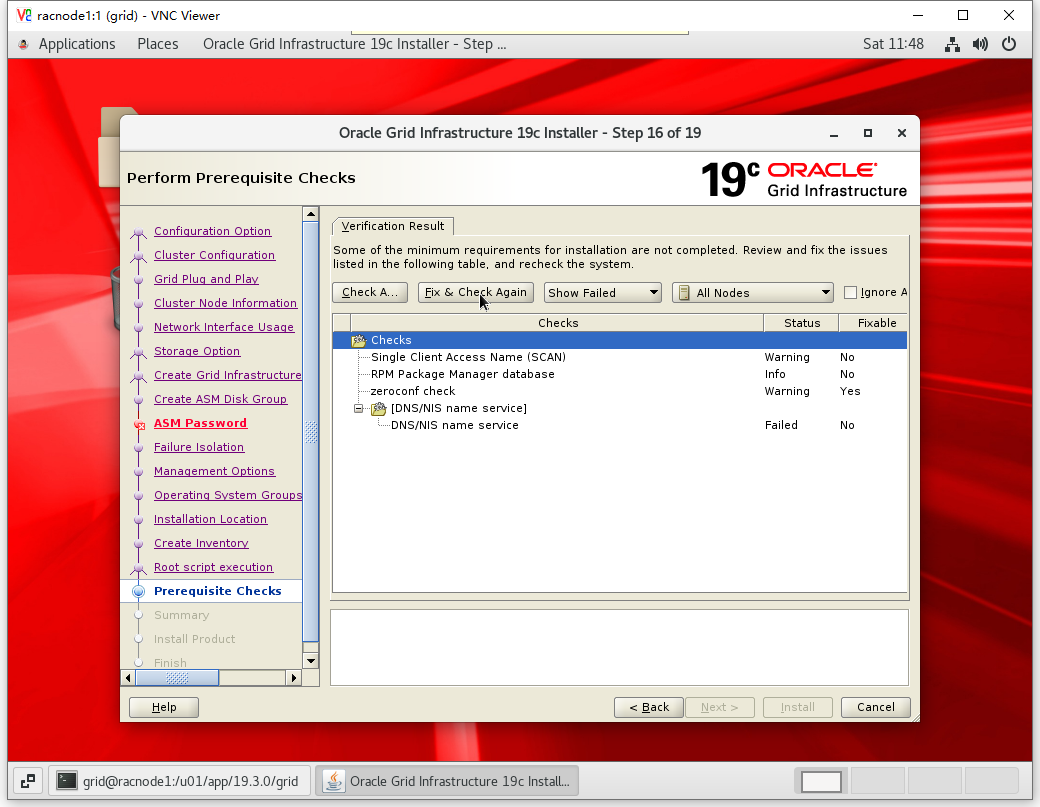
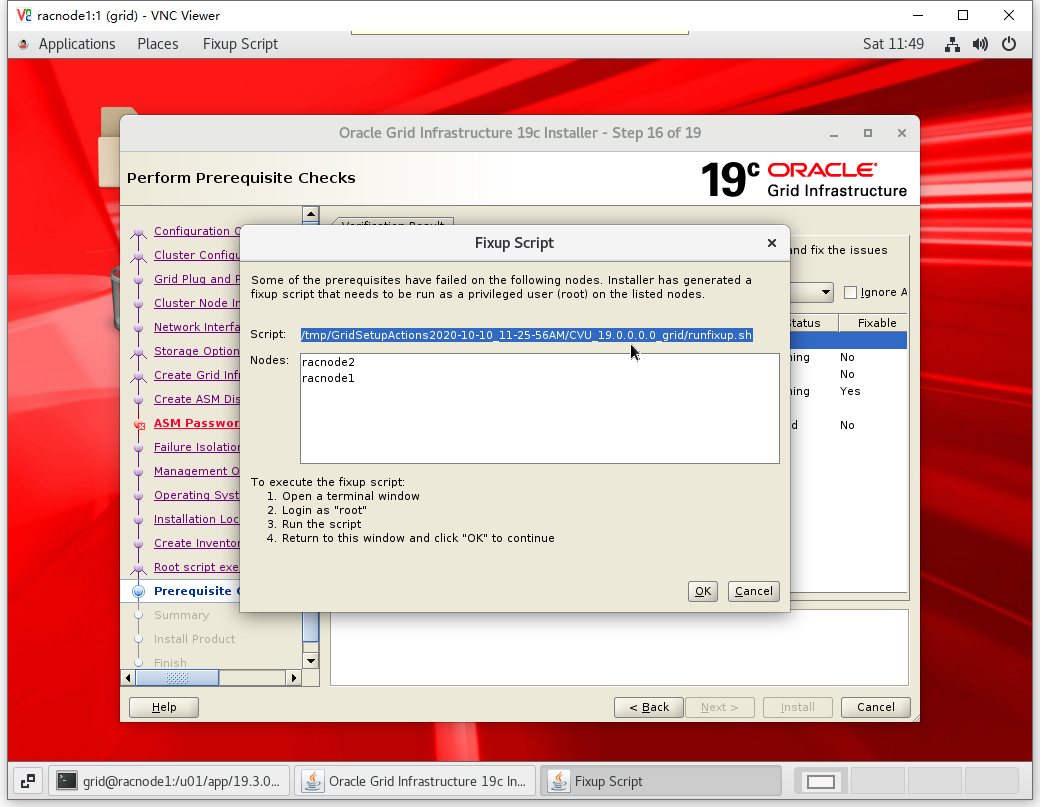
7.6 图形化安装GI软件
# 进入图形化桌面(打补丁)

[grid@racnode1 ~]$ cd $ORACLE_HOME
[grid@racnode1 grid]$ ./gridSetup.sh -applyRU /soft/ogi/31305339/

Preparing the home to patch...
Applying the patch /soft/ogi/31305339/...
Successfully applied the patch.
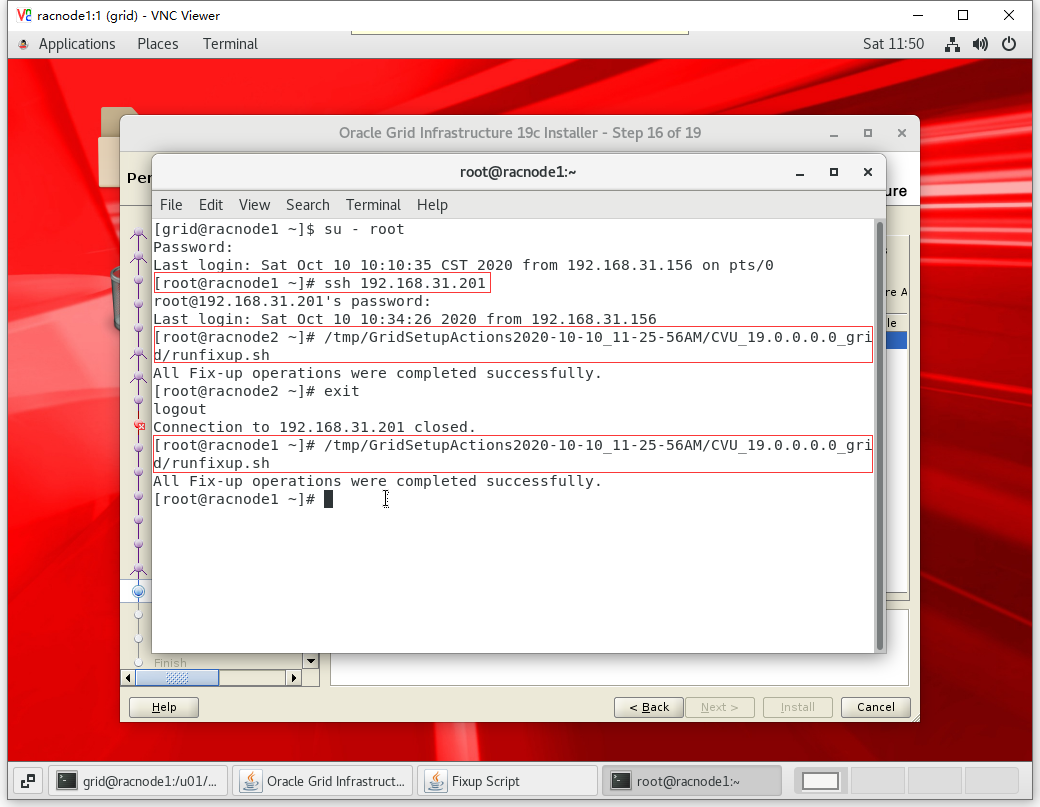
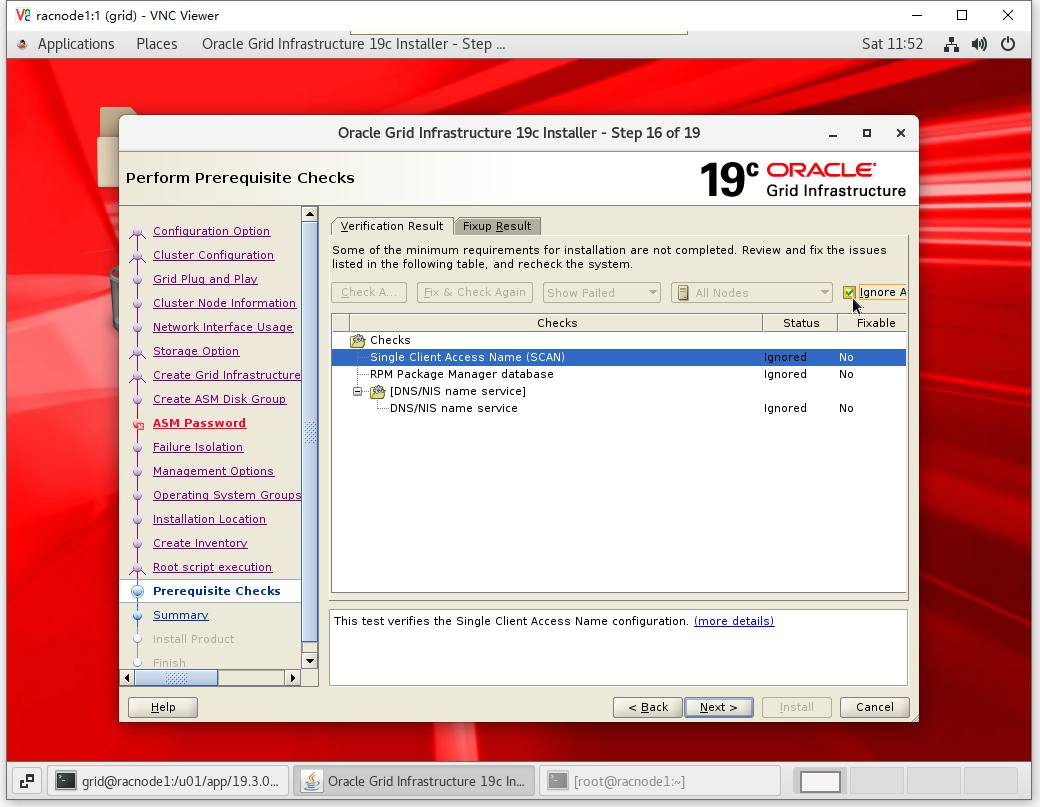
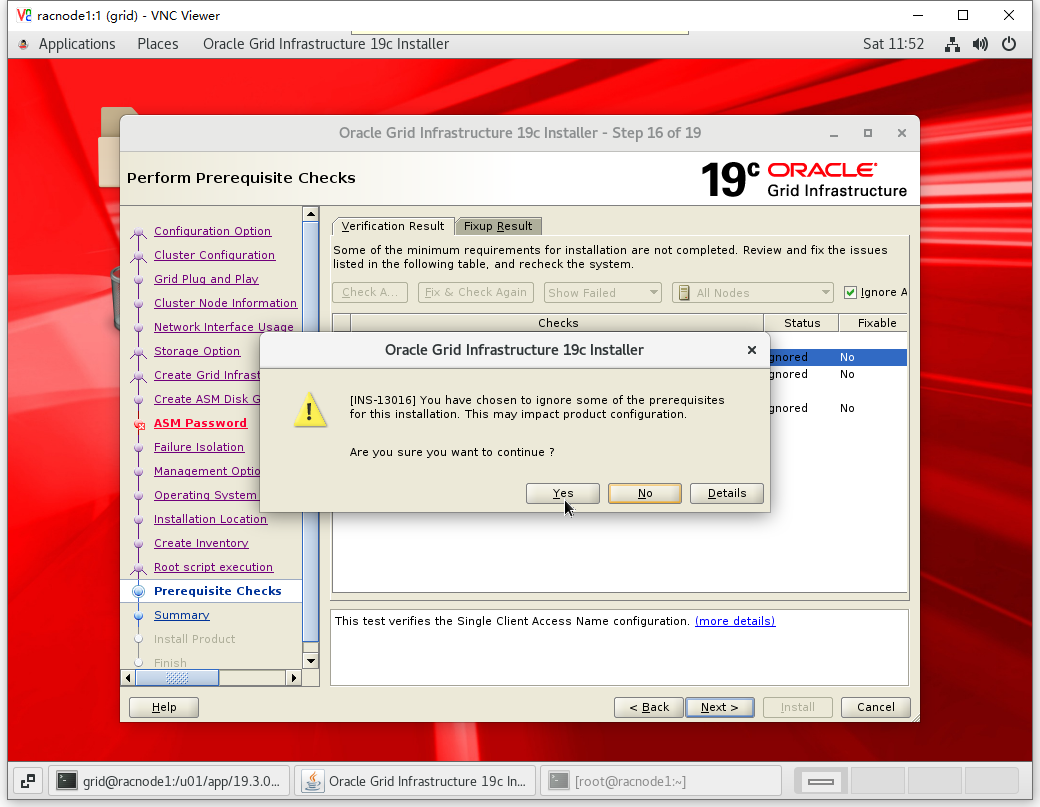
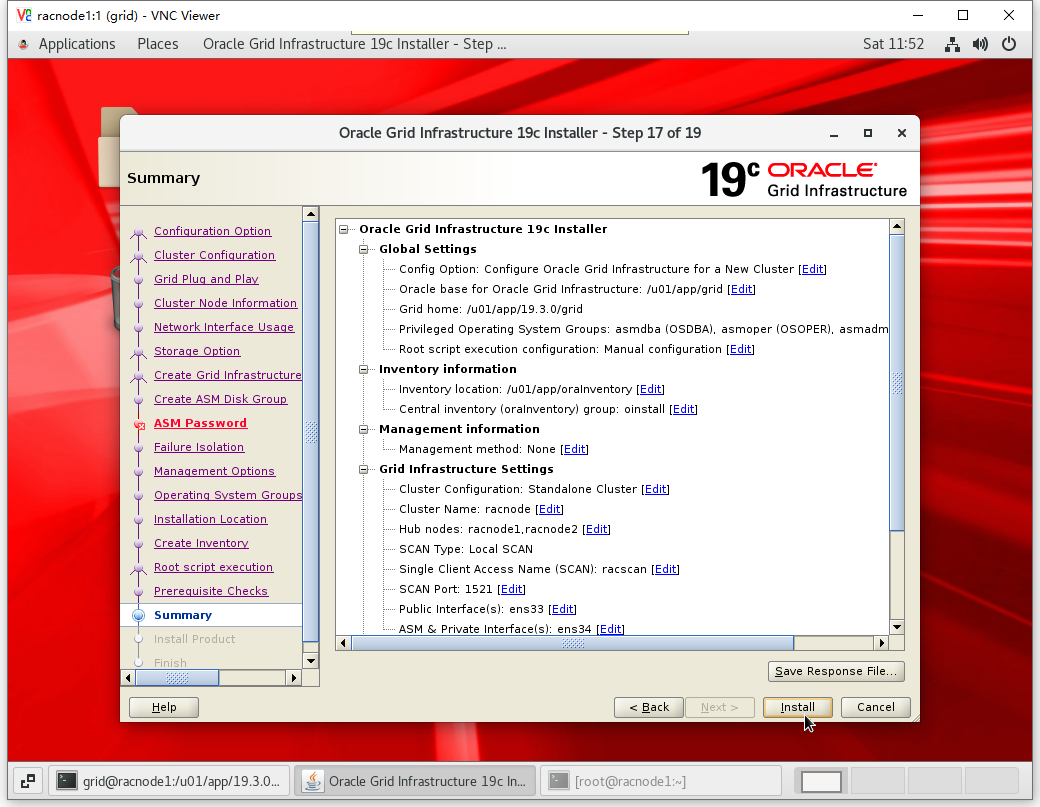
The log can be found at: /tmp/GridSetupActions2020-10-10_11-25-56AM/installerPatchActions_2020-10-10_11-25-56AM.log
Launching Oracle Grid Infrastructure Setup Wizard...


# 进入图形化桌面(不打补丁)

[grid@racnode1 ~]$ cd $ORACLE_HOME
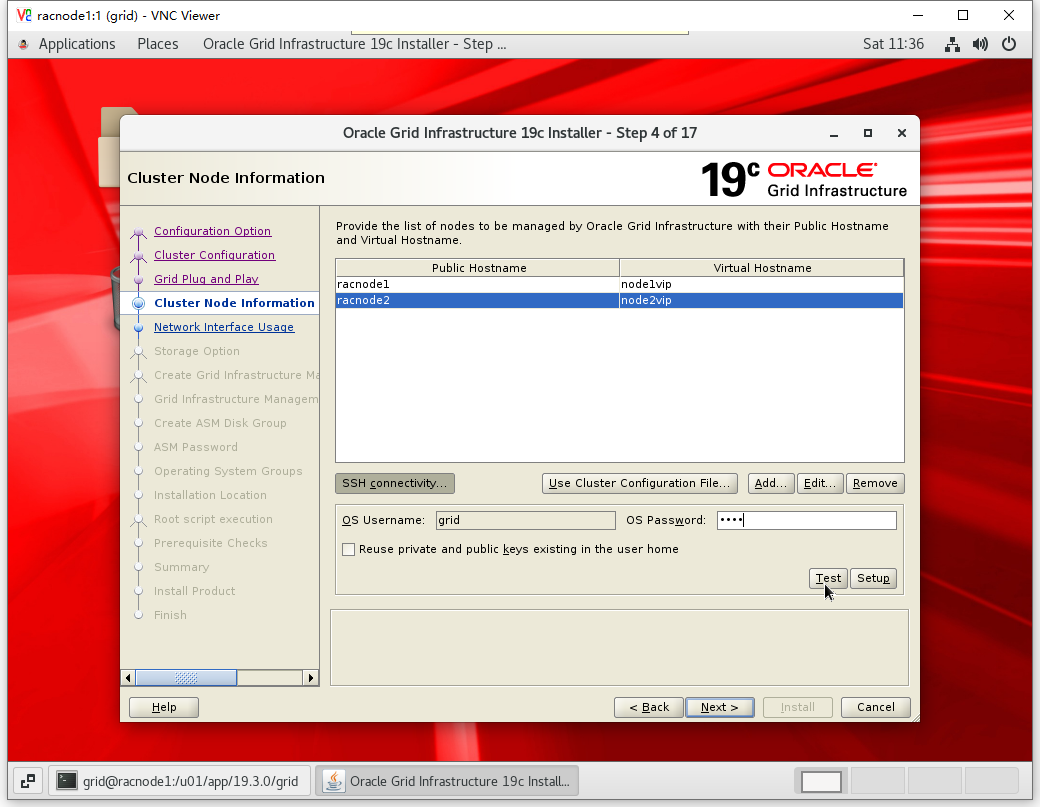
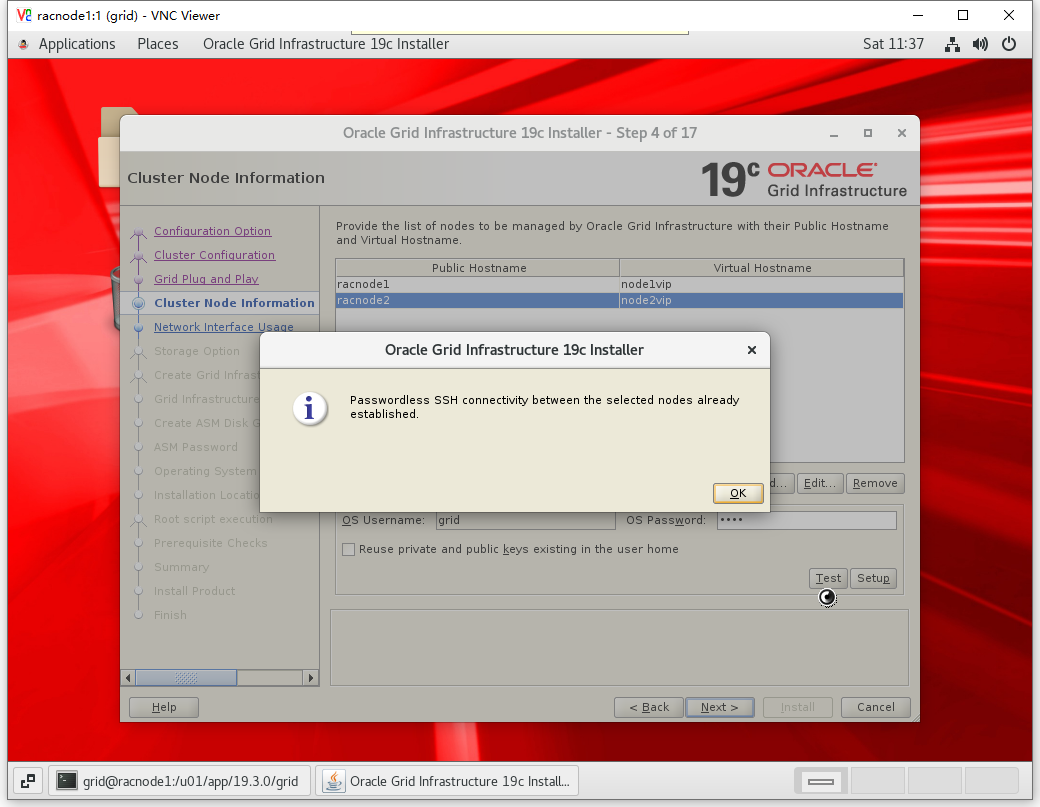
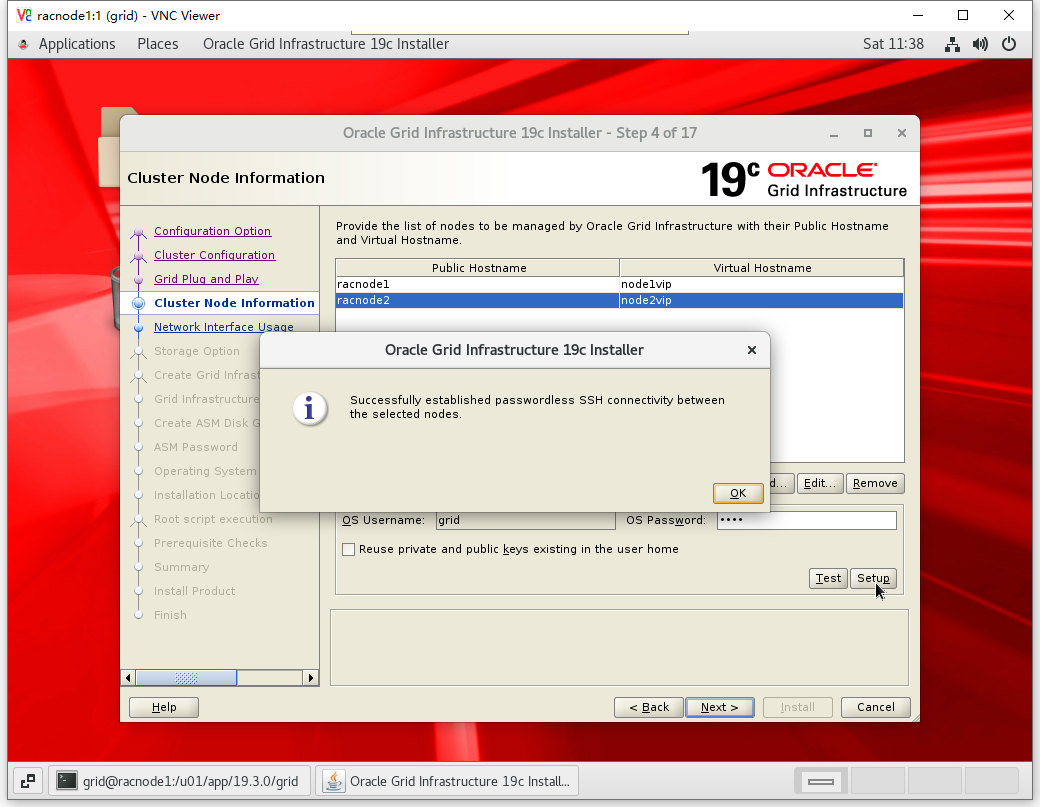
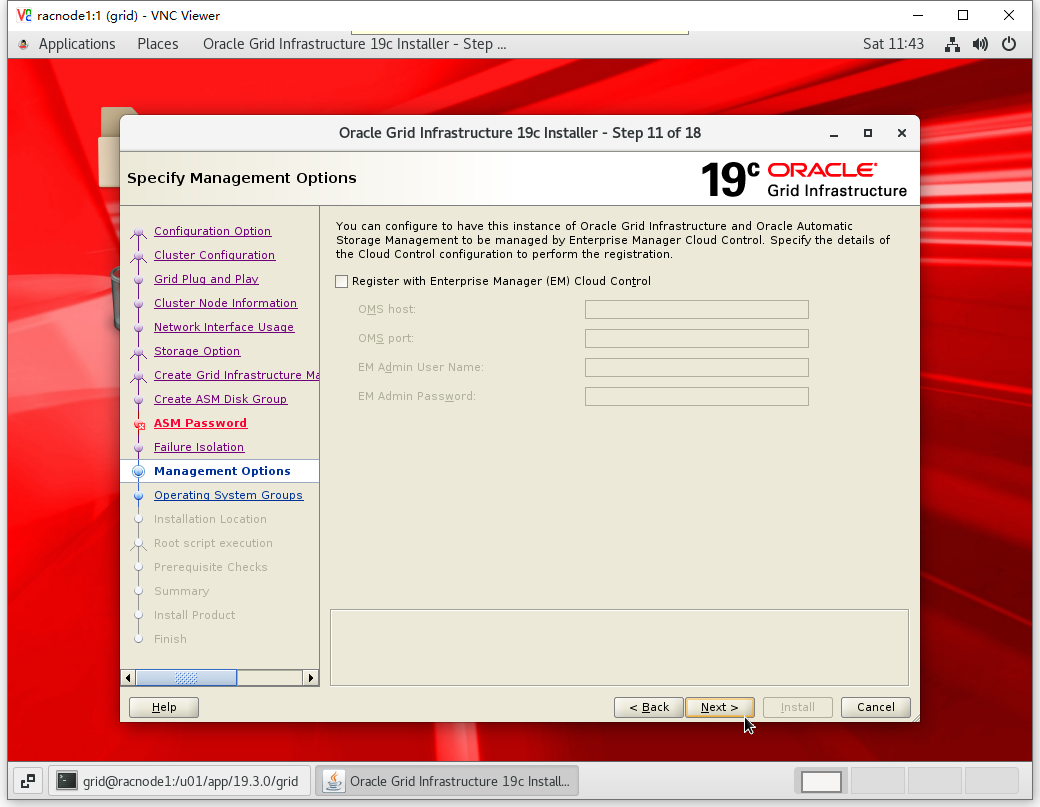
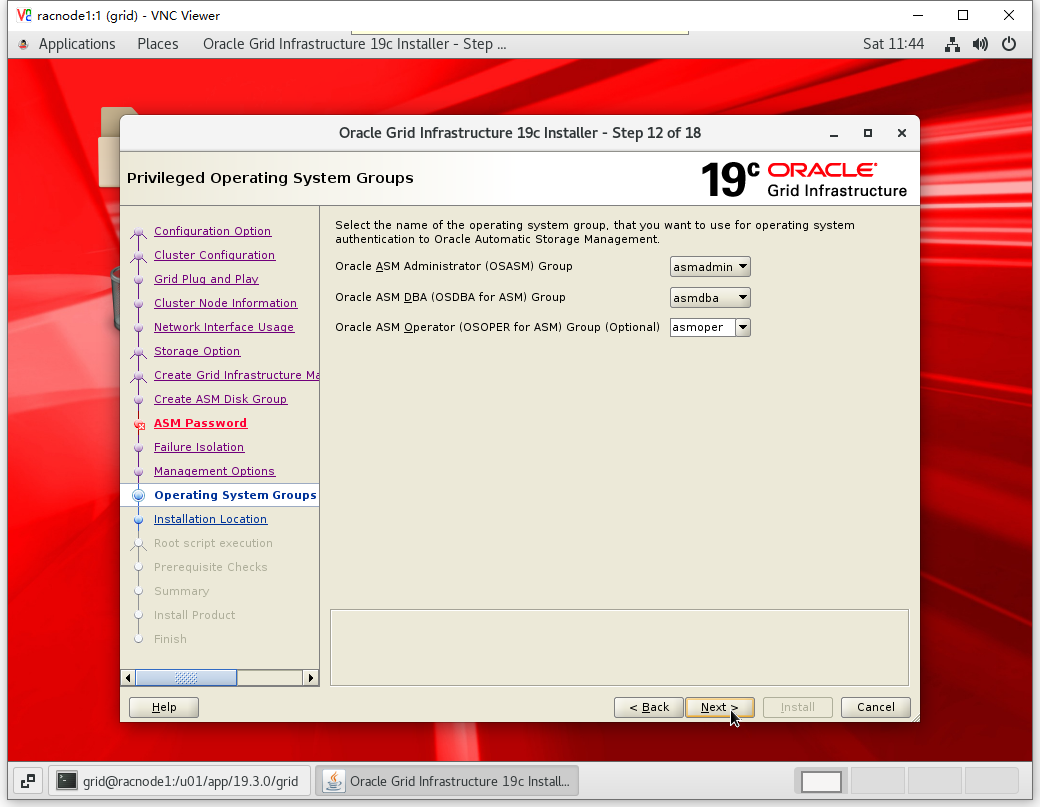
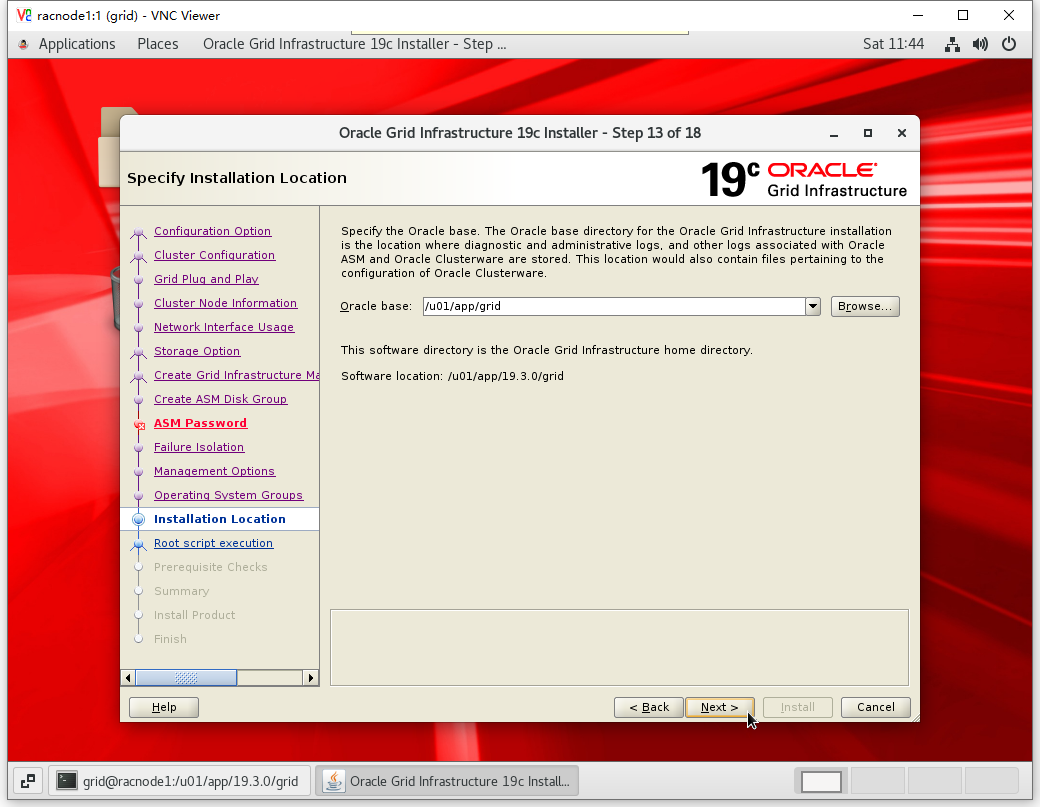
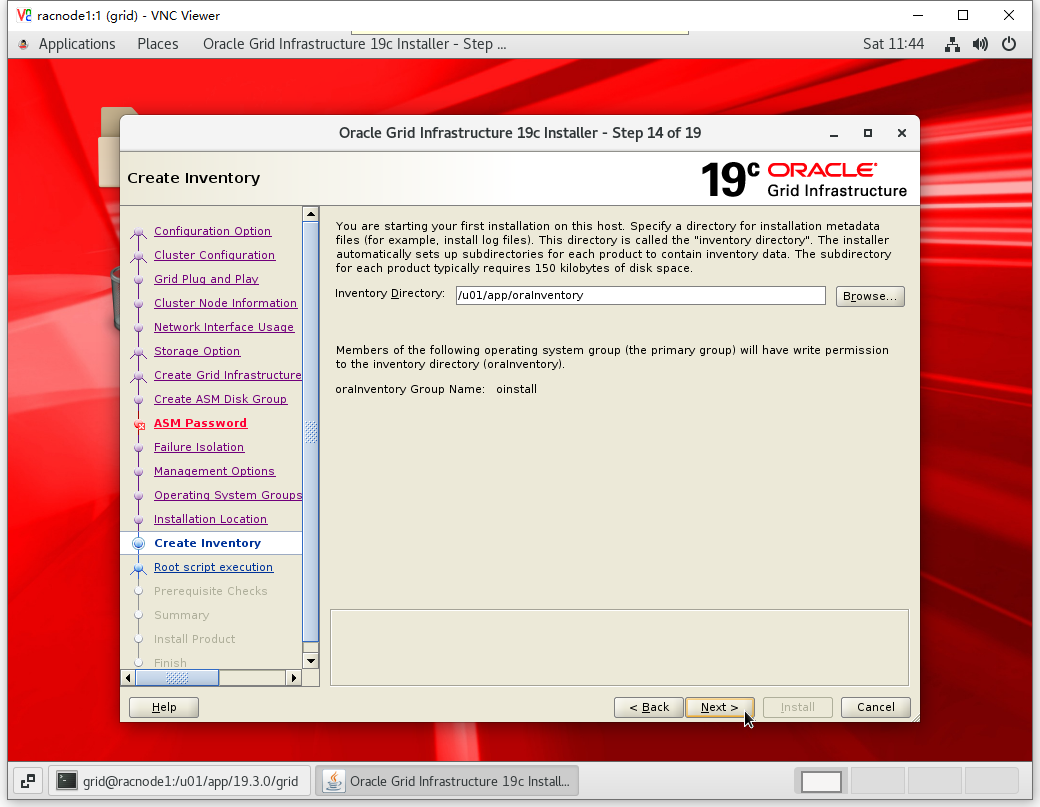
[grid@racnode1 grid]$ ./gridSetup.sh
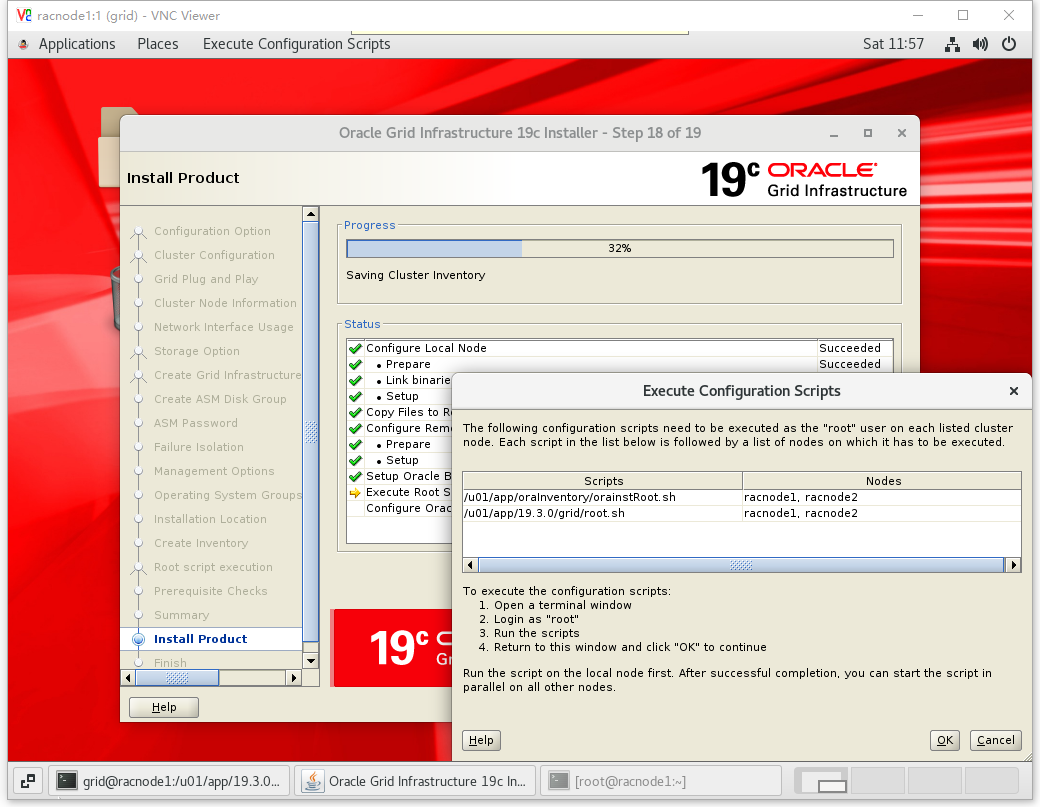
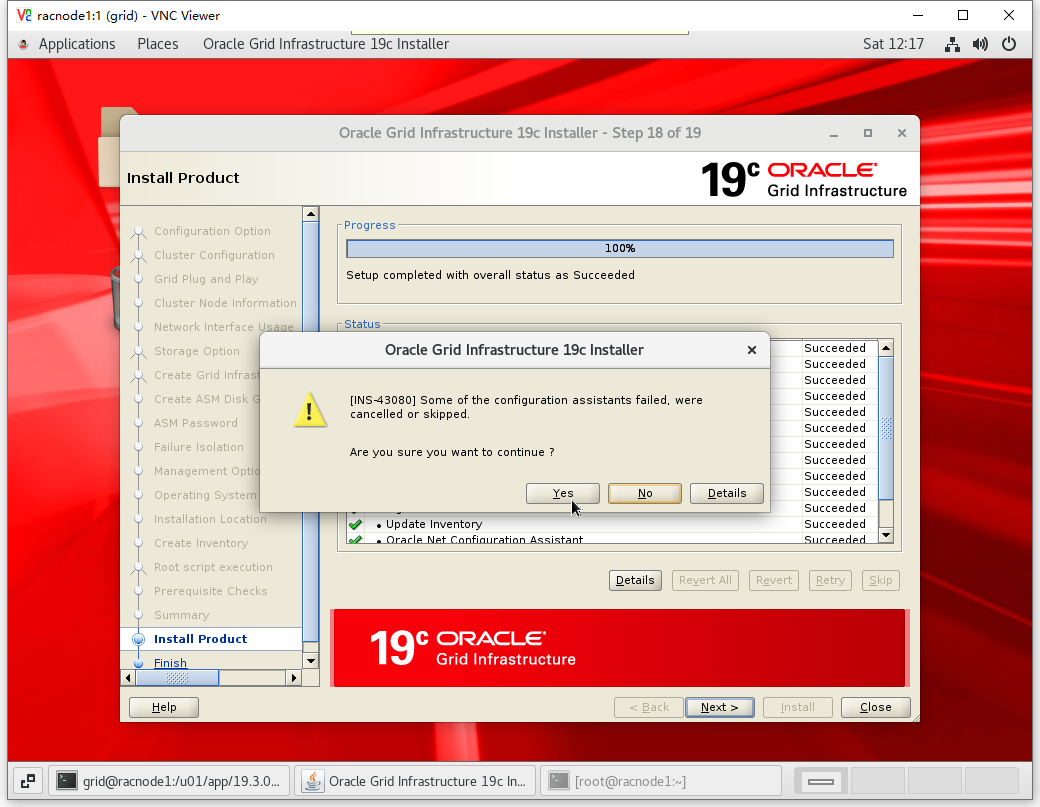
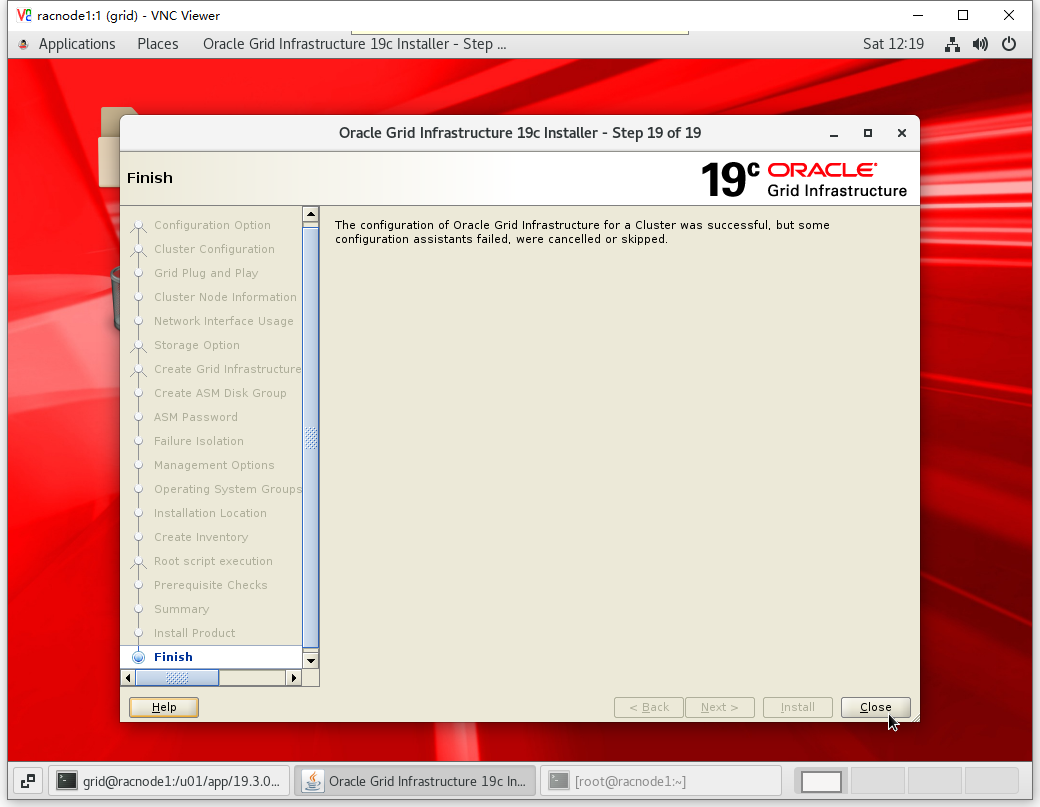
节点1执行1脚本
[root@racnode1 ~]# /u01/app/oraInventory/orainstRoot.sh
Changing permissions of /u01/app/oraInventory.
Adding read,write permissions for group.
Removing read,write,execute permissions for world.

Changing groupname of /u01/app/oraInventory to oinstall.
The execution of the script is complete.
节点2执行1脚本
[root@racnode2 ~]# /u01/app/oraInventory/orainstRoot.sh
Changing permissions of /u01/app/oraInventory.
Adding read,write permissions for group.
Removing read,write,execute permissions for world.

Changing groupname of /u01/app/oraInventory to oinstall.
The execution of the script is complete.
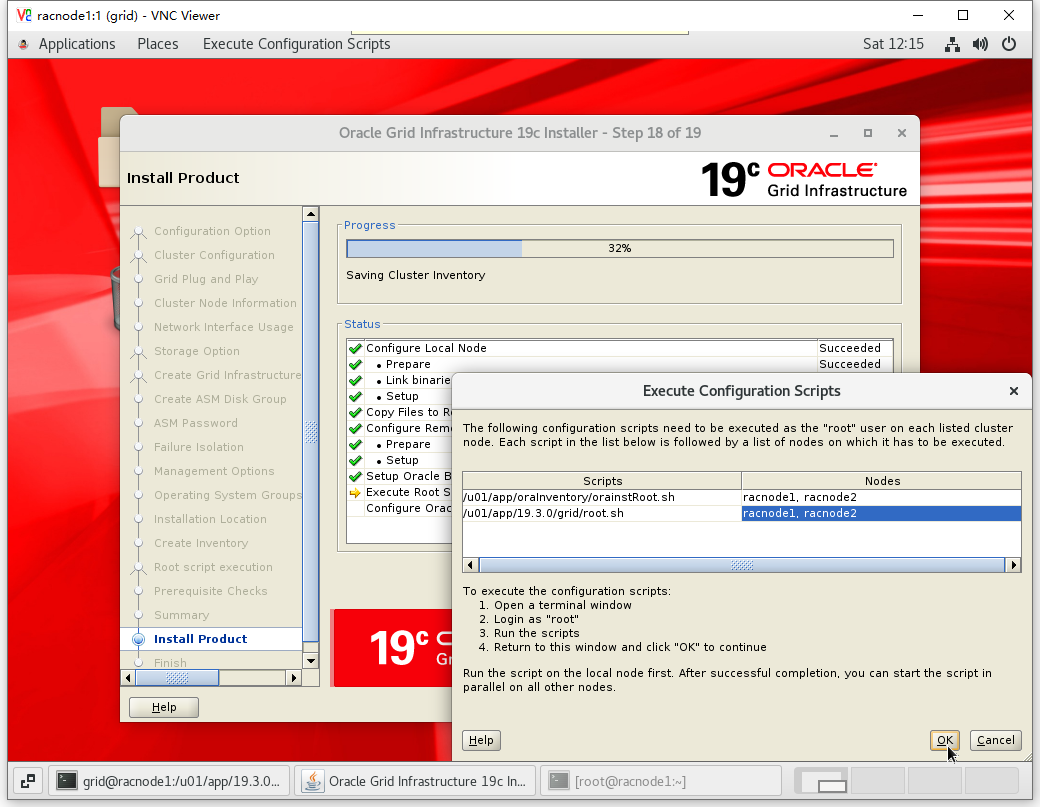
节点1执行2脚本(等待执行完毕)
[root@racnode1 ~]# /u01/app/oraInventory/orainstRoot.sh
Changing permissions of /u01/app/oraInventory.
Adding read,write permissions for group.
Removing read,write,execute permissions for world.

Changing groupname of /u01/app/oraInventory to oinstall.
The execution of the script is complete.
[root@racnode1 ~]# /u01/app/19.3.0/grid/root.sh
Performing root user operation.

The following environment variables are set as:
    ORACLE_OWNER= grid
    ORACLE_HOME=  /u01/app/19.3.0/grid

Enter the full pathname of the local bin directory: [/usr/local/bin]:
   Copying dbhome to /usr/local/bin ...
   Copying oraenv to /usr/local/bin ...
   Copying coraenv to /usr/local/bin ...


Creating /etc/oratab file...
Entries will be added to the /etc/oratab file as needed by
Database Configuration Assistant when a database is created
Finished running generic part of root script.
Now product-specific root actions will be performed.
Relinking oracle with rac_on option
Using configuration parameter file: /u01/app/19.3.0/grid/crs/install/crsconfig_params
The log of current session can be found at:
  /u01/app/grid/crsdata/racnode1/crsconfig/rootcrs_racnode1_2020-10-10_12-00-08AM.log
2020/10/10 12:00:15 CLSRSC-594: Executing installation step 1 of 19: 'SetupTFA'.
2020/10/10 12:00:15 CLSRSC-594: Executing installation step 2 of 19: 'ValidateEnv'.
2020/10/10 12:00:15 CLSRSC-363: User ignored prerequisites during installation
2020/10/10 12:00:15 CLSRSC-594: Executing installation step 3 of 19: 'CheckFirstNode'.
2020/10/10 12:00:18 CLSRSC-594: Executing installation step 4 of 19: 'GenSiteGUIDs'.
2020/10/10 12:00:19 CLSRSC-594: Executing installation step 5 of 19: 'SetupOSD'.
2020/10/10 12:00:19 CLSRSC-594: Executing installation step 6 of 19: 'CheckCRSConfig'.
2020/10/10 12:00:20 CLSRSC-594: Executing installation step 7 of 19: 'SetupLocalGPNP'.
2020/10/10 12:00:36 CLSRSC-594: Executing installation step 8 of 19: 'CreateRootCert'.
2020/10/10 12:00:42 CLSRSC-594: Executing installation step 9 of 19: 'ConfigOLR'.
2020/10/10 12:01:04 CLSRSC-594: Executing installation step 10 of 19: 'ConfigCHMOS'.
2020/10/10 12:01:05 CLSRSC-594: Executing installation step 11 of 19: 'CreateOHASD'.
2020/10/10 12:01:14 CLSRSC-594: Executing installation step 12 of 19: 'ConfigOHASD'.
2020/10/10 12:01:15 CLSRSC-330: Adding Clusterware entries to file 'oracle-ohasd.service'
2020/10/10 12:01:34 CLSRSC-594: Executing installation step 13 of 19: 'InstallAFD'.
2020/10/10 12:01:34 CLSRSC-594: Executing installation step 14 of 19: 'InstallACFS'.
2020/10/10 12:01:38 CLSRSC-4002: Successfully installed Oracle Trace File Analyzer (TFA) Collector.
2020/10/10 12:02:04 CLSRSC-594: Executing installation step 15 of 19: 'InstallKA'.
2020/10/10 12:02:08 CLSRSC-594: Executing installation step 16 of 19: 'InitConfig'.
Redirecting to /bin/systemctl restart rsyslog.service

ASM has been created and started successfully.

[DBT-30001] Disk groups created successfully. Check /u01/app/grid/cfgtoollogs/asmca/asmca-201010PM120239.log for details.

2020/10/10 12:03:32 CLSRSC-482: Running command: '/u01/app/19.3.0/grid/bin/ocrconfig -upgrade grid oinstall'
CRS-4256: Updating the profile
Successful addition of voting disk be92bb6d24b14f3dbf20624b176c5a05.
Successful addition of voting disk 67641d8f6cc84f32bfb50207eac7d87e.
Successful addition of voting disk 84be0f12ad1c4f6fbf08a9aca3d5a3d3.
Successfully replaced voting disk group with +OCRDG.
CRS-4256: Updating the profile
CRS-4266: Voting file(s) successfully replaced
##  STATE    File Universal Id                File Name Disk group
--  -----    -----------------                --------- ---------
 1. ONLINE   be92bb6d24b14f3dbf20624b176c5a05 (/dev/oasm/asm-ocr1) [OCRDG]
 2. ONLINE   67641d8f6cc84f32bfb50207eac7d87e (/dev/oasm/asm-ocr2) [OCRDG]
 3. ONLINE   84be0f12ad1c4f6fbf08a9aca3d5a3d3 (/dev/oasm/asm-ocr3) [OCRDG]
Located 3 voting disk(s).
2020/10/10 12:04:35 CLSRSC-594: Executing installation step 17 of 19: 'StartCluster'.
2020/10/10 12:05:41 CLSRSC-343: Successfully started Oracle Clusterware stack
2020/10/10 12:05:41 CLSRSC-594: Executing installation step 18 of 19: 'ConfigNode'.
2020/10/10 12:07:16 CLSRSC-594: Executing installation step 19 of 19: 'PostConfig'.
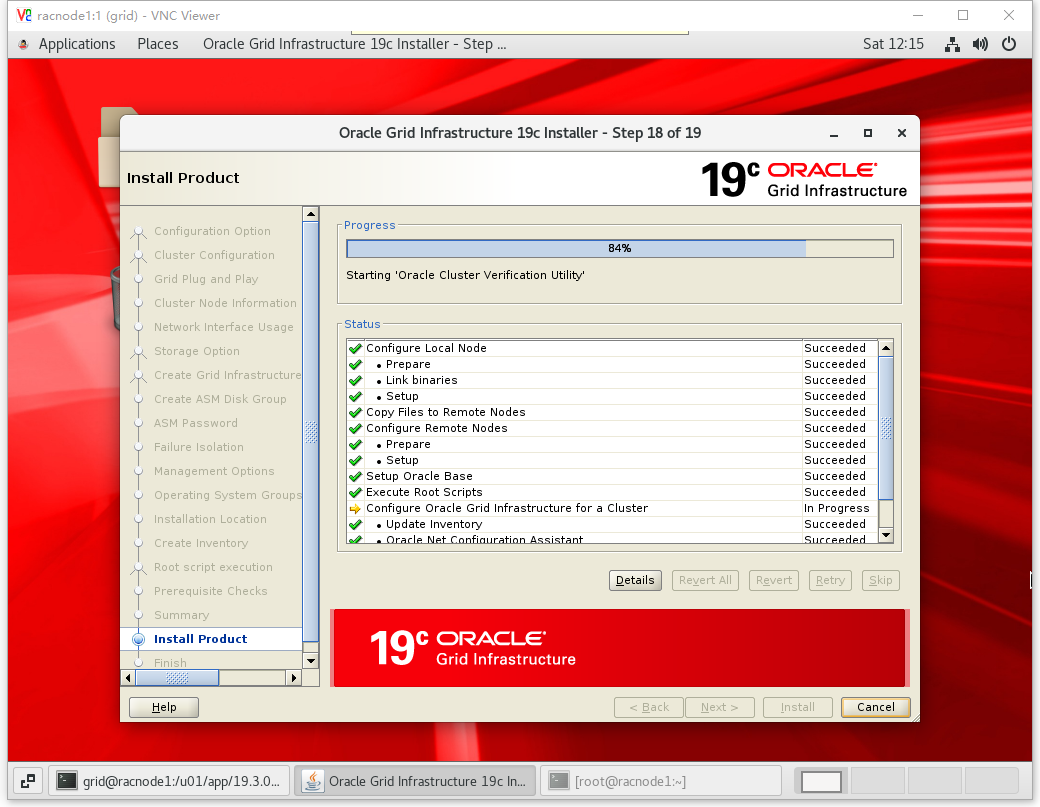
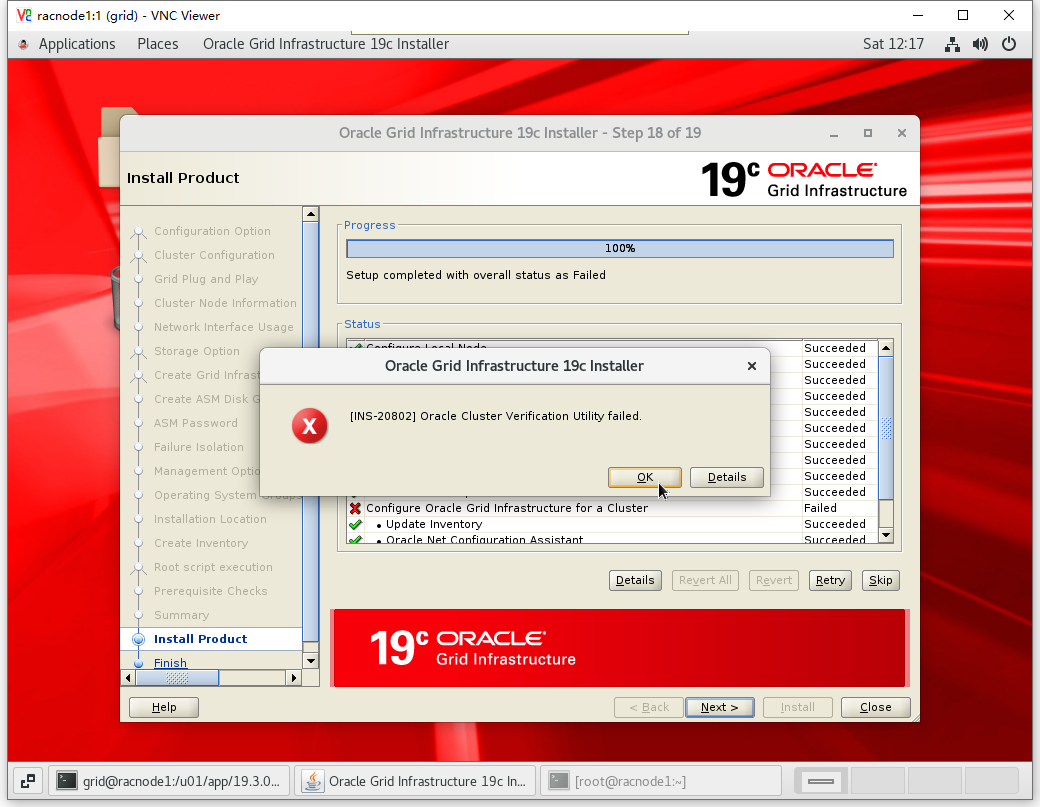
2020/10/10 12:07:53 CLSRSC-325: Configure Oracle Grid Infrastructure for a Cluster ... succeeded
节点2执行2脚本
[root@racnode2 ~]# /u01/app/19.3.0/grid/root.sh
Performing root user operation.

The following environment variables are set as:
    ORACLE_OWNER= grid
    ORACLE_HOME=  /u01/app/19.3.0/grid

Enter the full pathname of the local bin directory: [/usr/local/bin]:
   Copying dbhome to /usr/local/bin ...
   Copying oraenv to /usr/local/bin ...
   Copying coraenv to /usr/local/bin ...


Creating /etc/oratab file...
Entries will be added to the /etc/oratab file as needed by
Database Configuration Assistant when a database is created
Finished running generic part of root script.
Now product-specific root actions will be performed.
Relinking oracle with rac_on option
Using configuration parameter file: /u01/app/19.3.0/grid/crs/install/crsconfig_params
The log of current session can be found at:
  /u01/app/grid/crsdata/racnode2/crsconfig/rootcrs_racnode2_2020-10-10_12-11-18AM.log
2020/10/10 12:11:20 CLSRSC-594: Executing installation step 1 of 19: 'SetupTFA'.
2020/10/10 12:11:20 CLSRSC-594: Executing installation step 2 of 19: 'ValidateEnv'.
2020/10/10 12:11:20 CLSRSC-363: User ignored prerequisites during installation
2020/10/10 12:11:20 CLSRSC-594: Executing installation step 3 of 19: 'CheckFirstNode'.
2020/10/10 12:11:22 CLSRSC-594: Executing installation step 4 of 19: 'GenSiteGUIDs'.
2020/10/10 12:11:22 CLSRSC-594: Executing installation step 5 of 19: 'SetupOSD'.
2020/10/10 12:11:23 CLSRSC-594: Executing installation step 6 of 19: 'CheckCRSConfig'.
2020/10/10 12:11:24 CLSRSC-594: Executing installation step 7 of 19: 'SetupLocalGPNP'.
2020/10/10 12:11:26 CLSRSC-594: Executing installation step 8 of 19: 'CreateRootCert'.
2020/10/10 12:11:27 CLSRSC-594: Executing installation step 9 of 19: 'ConfigOLR'.
2020/10/10 12:11:41 CLSRSC-594: Executing installation step 10 of 19: 'ConfigCHMOS'.
2020/10/10 12:11:41 CLSRSC-594: Executing installation step 11 of 19: 'CreateOHASD'.
2020/10/10 12:11:43 CLSRSC-594: Executing installation step 12 of 19: 'ConfigOHASD'.
2020/10/10 12:11:43 CLSRSC-330: Adding Clusterware entries to file 'oracle-ohasd.service'
2020/10/10 12:12:02 CLSRSC-594: Executing installation step 13 of 19: 'InstallAFD'.
2020/10/10 12:12:02 CLSRSC-594: Executing installation step 14 of 19: 'InstallACFS'.
2020/10/10 12:12:45 CLSRSC-594: Executing installation step 15 of 19: 'InstallKA'.
2020/10/10 12:12:46 CLSRSC-594: Executing installation step 16 of 19: 'InitConfig'.
Redirecting to /bin/systemctl restart rsyslog.service
2020/10/10 12:12:55 CLSRSC-594: Executing installation step 17 of 19: 'StartCluster'.
2020/10/10 12:12:55 CLSRSC-4002: Successfully installed Oracle Trace File Analyzer (TFA) Collector.
2020/10/10 12:13:42 CLSRSC-343: Successfully started Oracle Clusterware stack
2020/10/10 12:13:43 CLSRSC-594: Executing installation step 18 of 19: 'ConfigNode'.
2020/10/10 12:13:58 CLSRSC-594: Executing installation step 19 of 19: 'PostConfig'.
2020/10/10 12:14:05 CLSRSC-325: Configure Oracle Grid Infrastructure for a Cluster ... succeeded
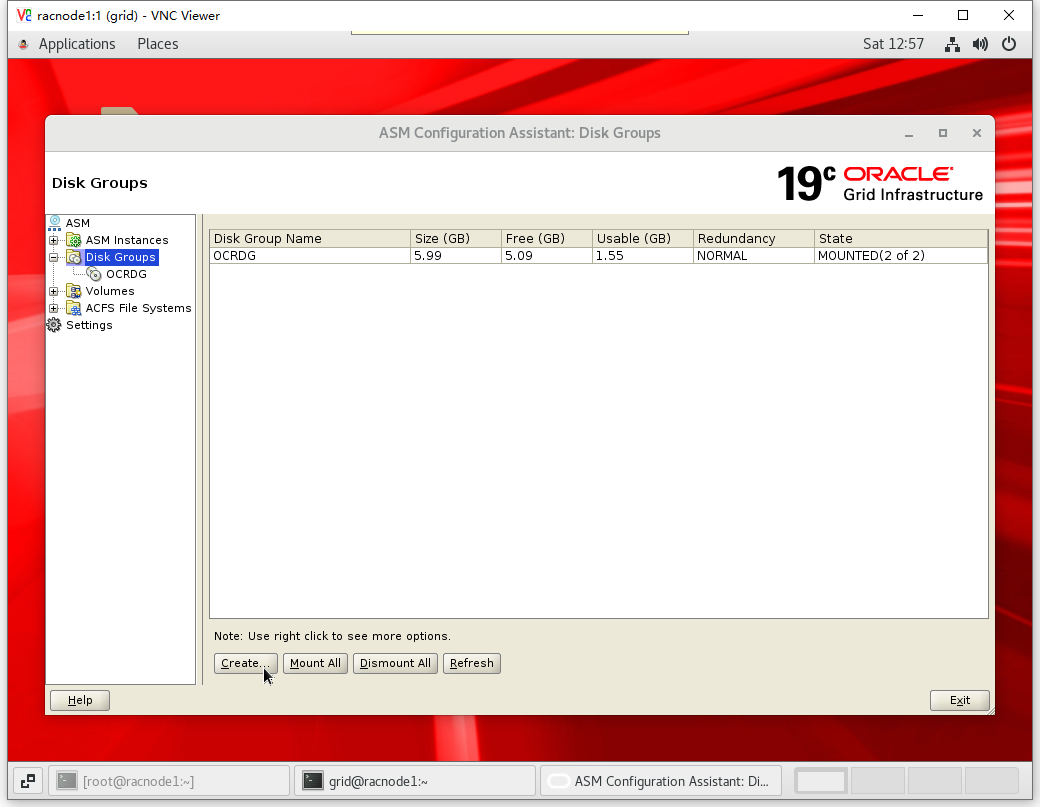
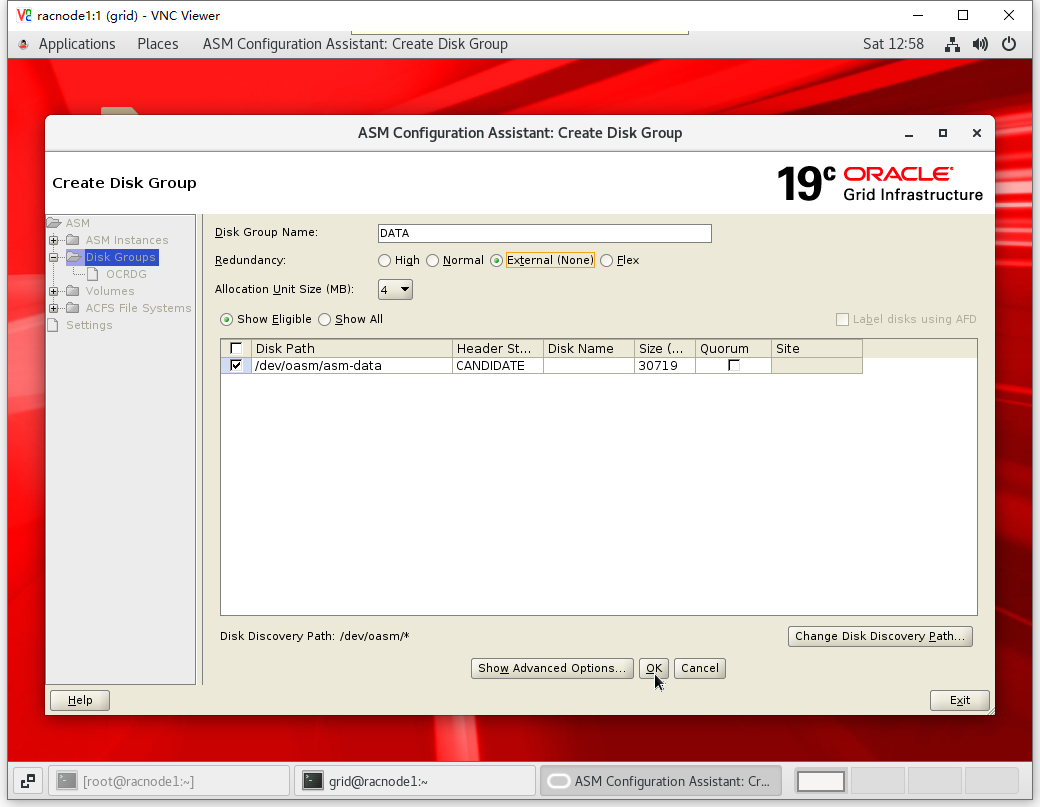
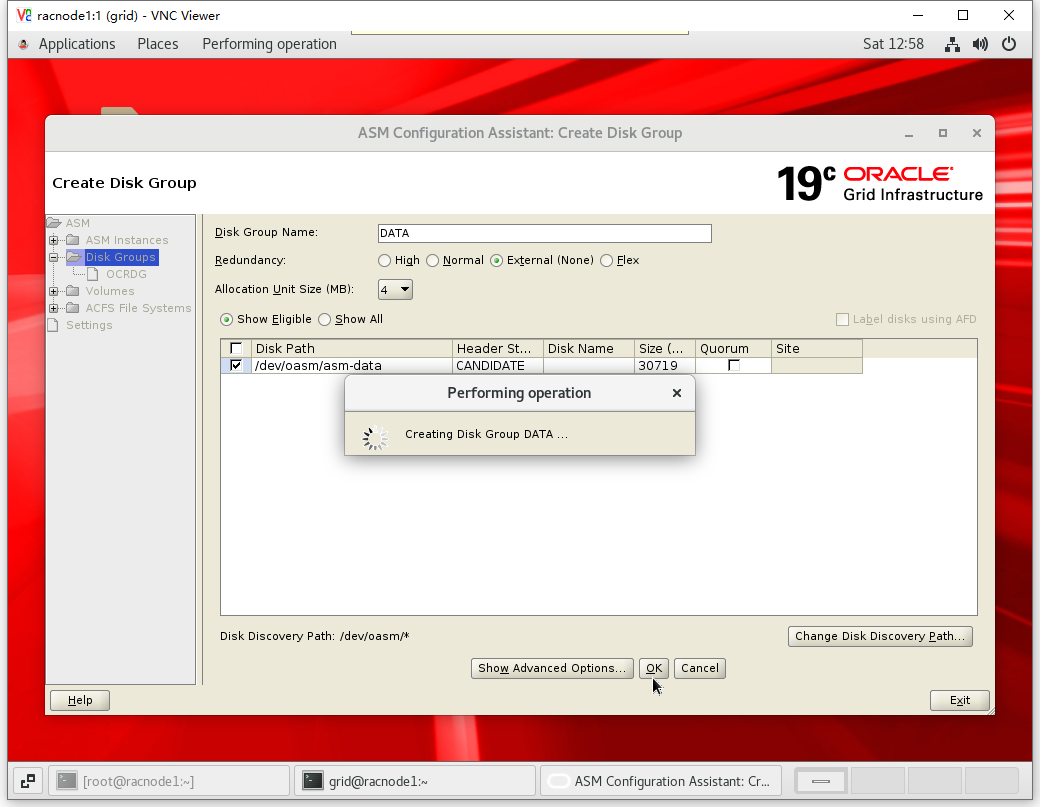
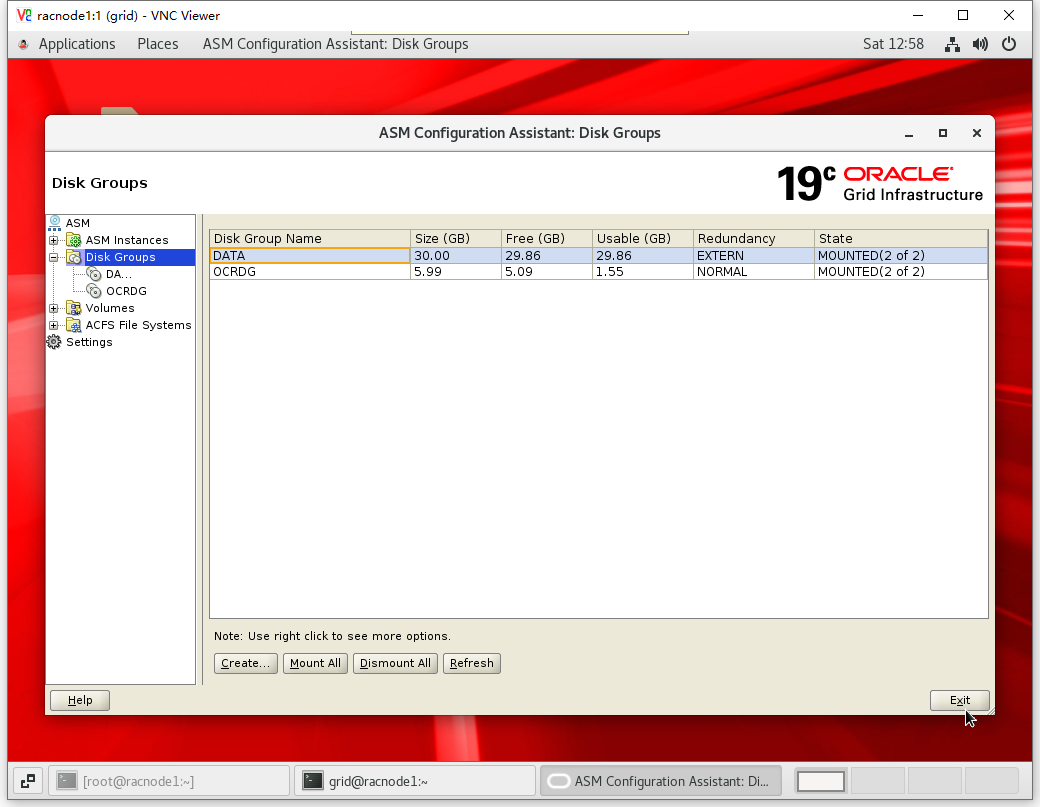
7.7 添加 ASM 磁盘
[grid@racnode1 ~]$ asmca
7.8 查看集群组件状态
[grid@racnode1:/home/grid]$crsctl stat res -t
--------------------------------------------------------------------------------
Name           Target  State        Server                   State details
--------------------------------------------------------------------------------
Local Resources
--------------------------------------------------------------------------------
ora.LISTENER.lsnr
               ONLINE  ONLINE       racnode1                 STABLE
               ONLINE  ONLINE       racnode2                 STABLE
ora.chad
               ONLINE  ONLINE       racnode1                 STABLE
               ONLINE  ONLINE       racnode2                 STABLE
ora.net1.network
               ONLINE  ONLINE       racnode1                 STABLE
               ONLINE  ONLINE       racnode2                 STABLE
ora.ons
               ONLINE  ONLINE       racnode1                 STABLE
               ONLINE  ONLINE       racnode2                 STABLE
ora.proxy_advm
               OFFLINE OFFLINE      racnode1                 STABLE
               OFFLINE OFFLINE      racnode2                 STABLE
--------------------------------------------------------------------------------
Cluster Resources
--------------------------------------------------------------------------------
ora.ASMNET1LSNR_ASM.lsnr(ora.asmgroup)
      1        ONLINE  ONLINE       racnode1                 STABLE
      2        ONLINE  ONLINE       racnode2                 STABLE
ora.DATA.dg(ora.asmgroup)
      1        ONLINE  ONLINE       racnode1                 STABLE
      2        ONLINE  ONLINE       racnode2                 STABLE
ora.LISTENER_SCAN1.lsnr
      1        ONLINE  ONLINE       racnode1                 STABLE
ora.OCRDG.dg(ora.asmgroup)
      1        ONLINE  ONLINE       racnode1                 STABLE
      2        ONLINE  ONLINE       racnode2                 STABLE
ora.asm(ora.asmgroup)
      1        ONLINE  ONLINE       racnode1                 Started,STABLE
      2        ONLINE  ONLINE       racnode2                 Started,STABLE
ora.asmnet1.asmnetwork(ora.asmgroup)
      1        ONLINE  ONLINE       racnode1                 STABLE
      2        ONLINE  ONLINE       racnode2                 STABLE
ora.cvu
      1        ONLINE  ONLINE       racnode1                 STABLE
ora.qosmserver
      1        ONLINE  ONLINE       racnode1                 STABLE
ora.racnode1.vip
      1        ONLINE  ONLINE       racnode1                 STABLE
ora.racnode2.vip
      1        ONLINE  ONLINE       racnode2                 STABLE
ora.scan1.vip
      1        ONLINE  ONLINE       racnode1                 STABLE
--------------------------------------------------------------------------------
8 Oracle Database 配置安装
8.1 节点1解压DB软件
[oracle@racnode1 ~]$ cd $ORACLE_HOME
[oracle@racnode1 dbhome_1]$ unzip -q /soft/LINUX.X64_193000_db_home.zip
8.2 解压更新OPatch工具
如不考虑打补丁,可跳过本小节
# 截至文章发布,DB软件最新RU补丁版本为 2020.07.14 发布的 19.8.0.0.200714(补丁号 Patch Patch 31281355),该补丁要求 OPatch 工具最低版本为 12.2.0.1.21

# 查看当前 OPatch 工具版本

[oracle@racnode1 ~]$ cd $ORACLE_HOME
[oracle@racnode1 dbhome_1]$ OPatch/opatch version
OPatch Version: 12.2.0.1.17

OPatch succeeded.

# 下载最新 OPatch 工具解压覆盖

[oracle@racnode1 dbhome_1]$ unzip -q /soft/p6880880_121010_Linux-x86-64.zip
replace OPatch/emdpatch.pl? [y]es, [n]o, [A]ll, [N]one, [r]ename: A

# 查看最新 OPatch 工具版本

[oracle@racnode1 dbhome_1]$ OPatch/opatch version
OPatch Version: 12.2.0.1.21

OPatch succeeded.
8.3 解压DB软件最新RU补丁
如不考虑打补丁,可跳过本小节
[oracle@racnode1 dbhome_1]$ cd /soft/

[oracle@racnode1 soft]$ mkdir odb

[oracle@racnode1 soft]$ unzip -q p31281355_190000_Linux-x86-64.zip -d odb
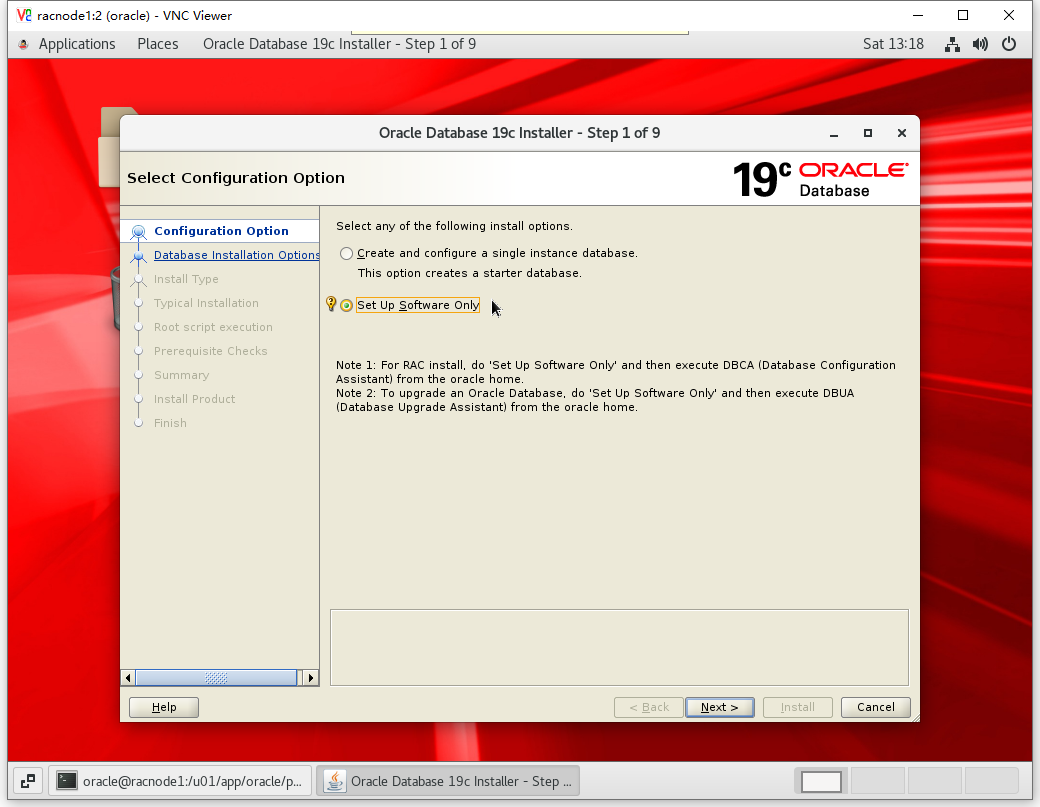
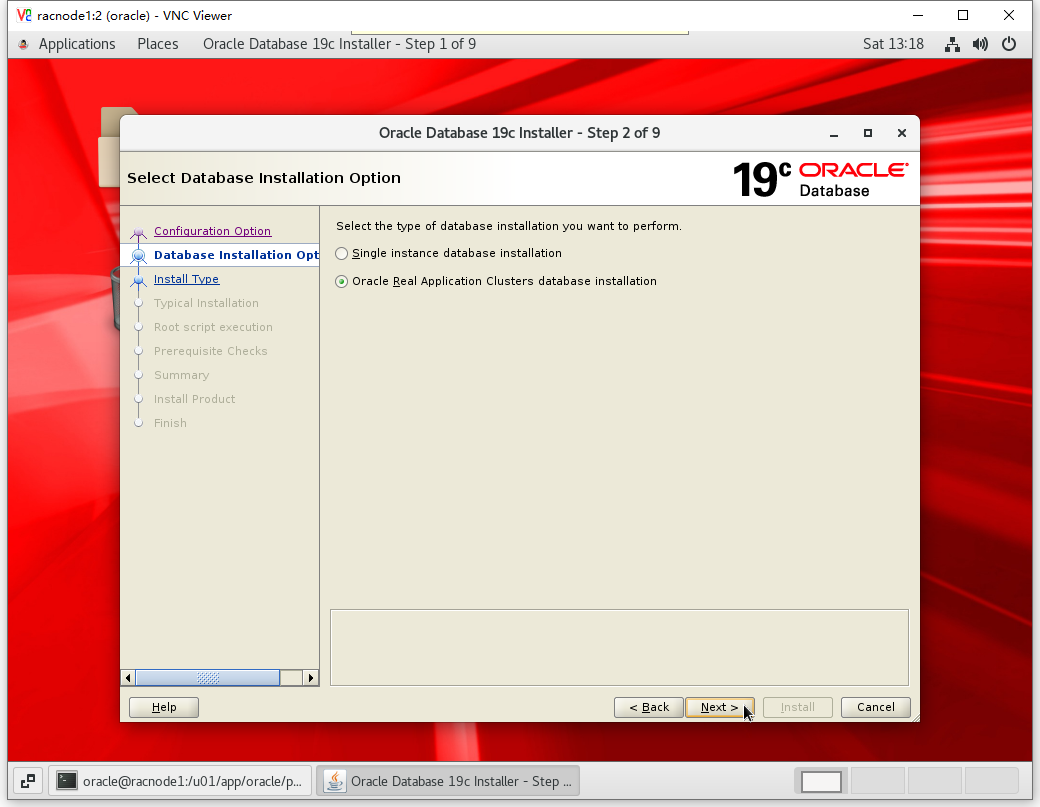
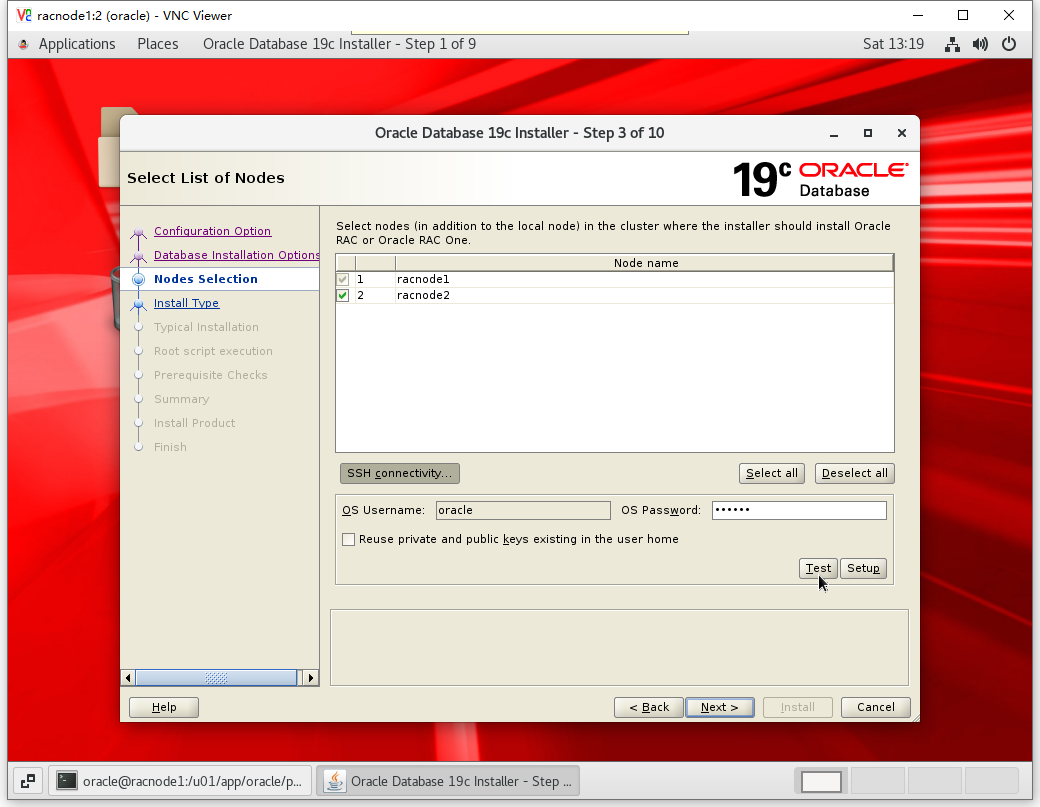
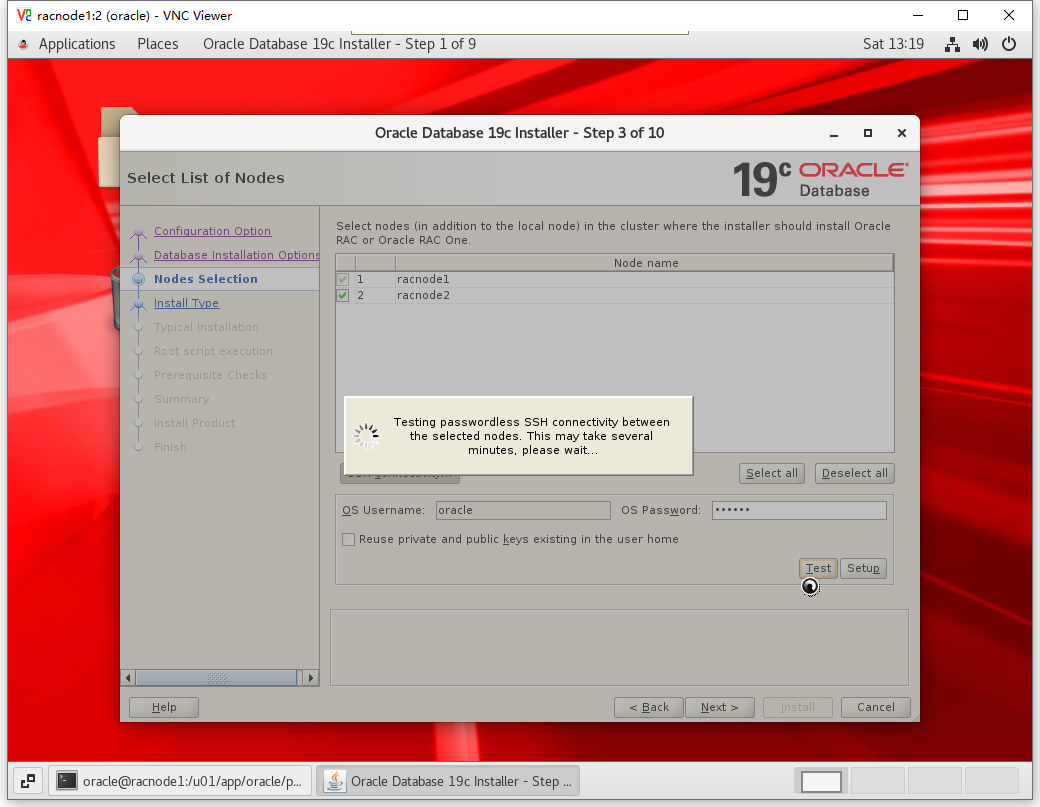
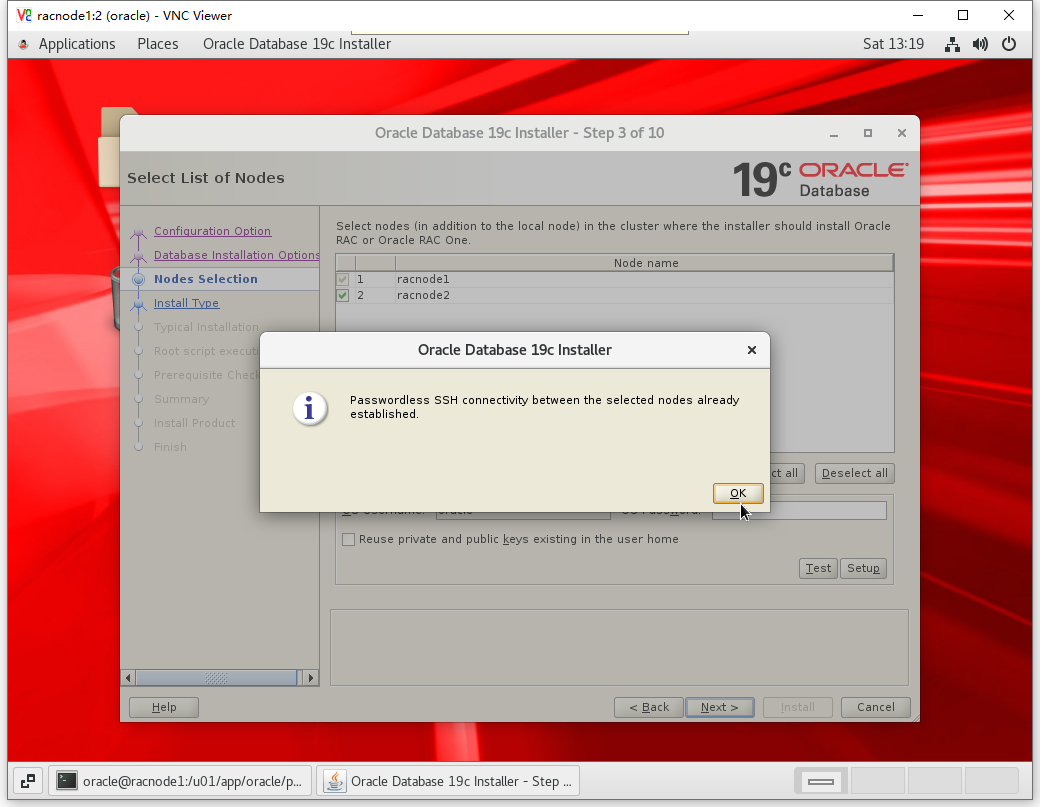
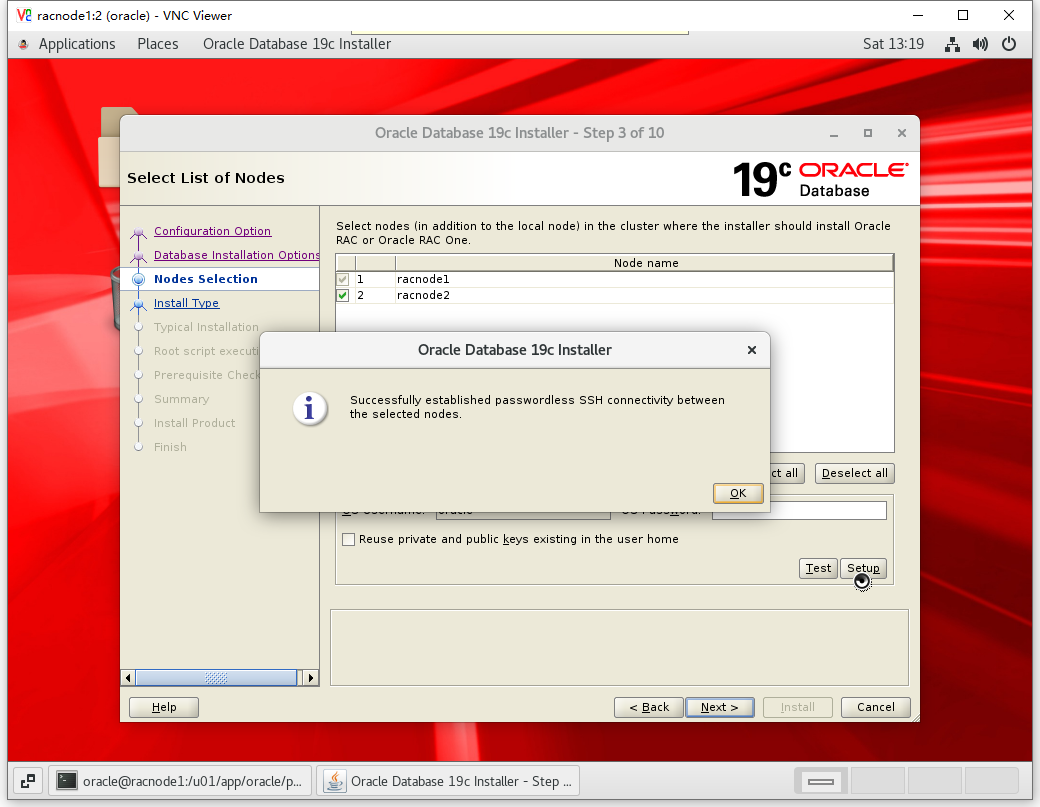
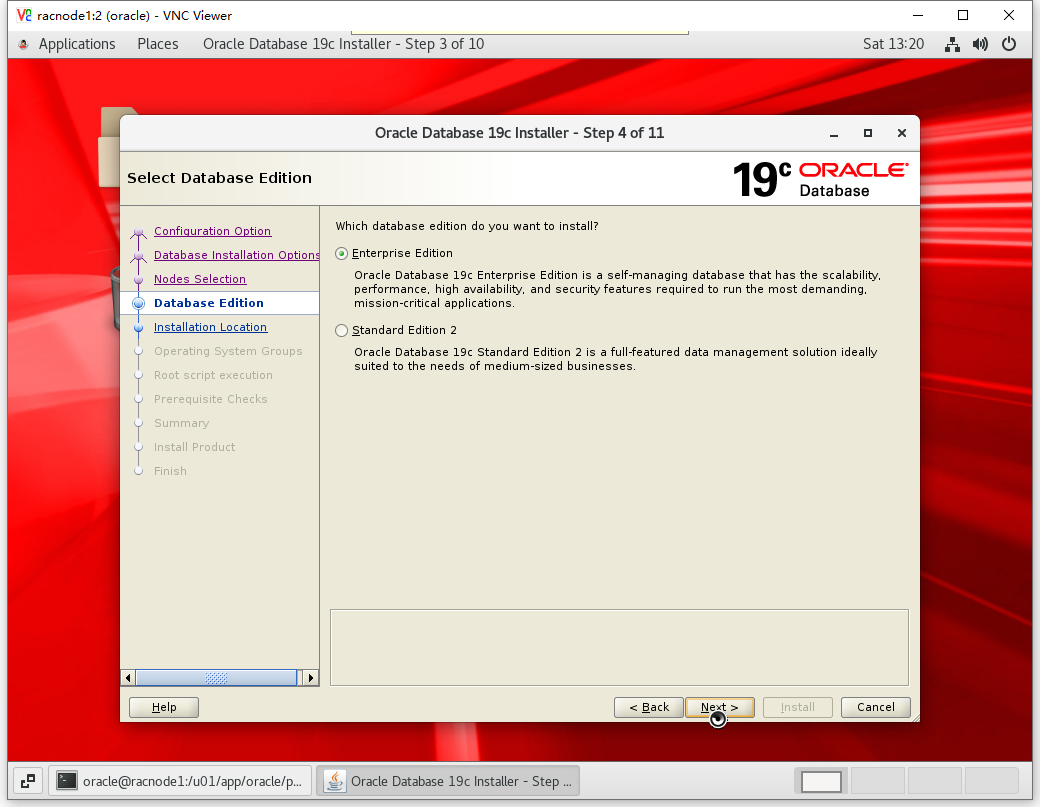
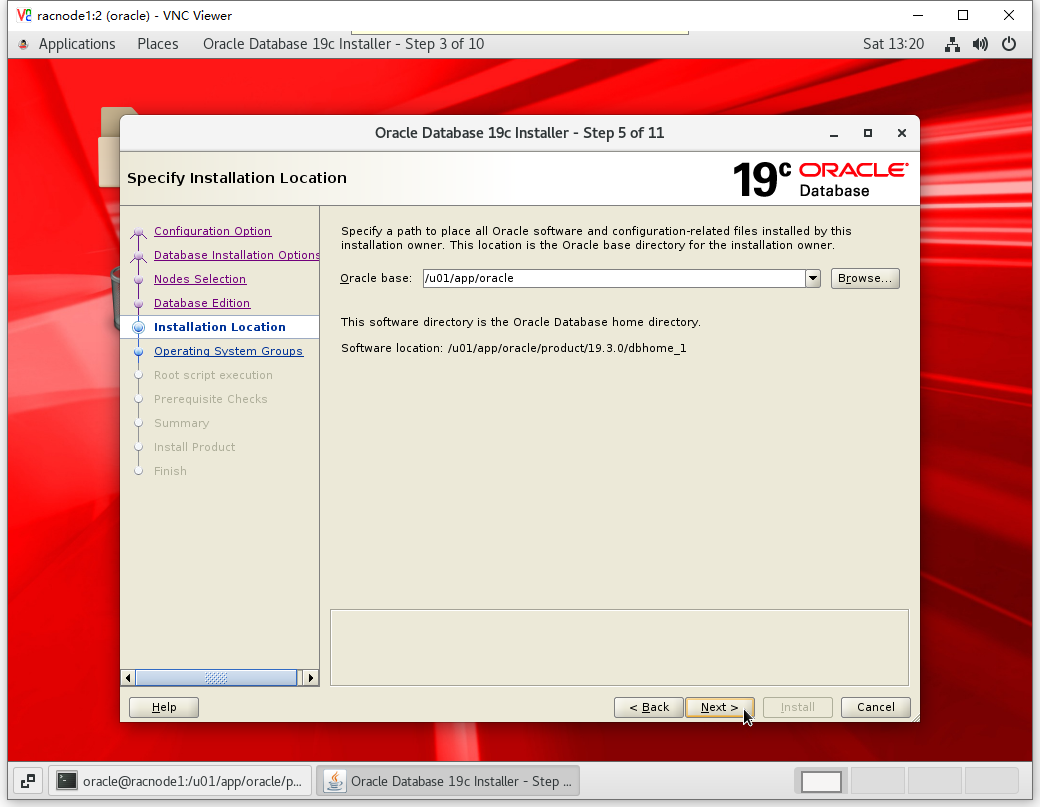
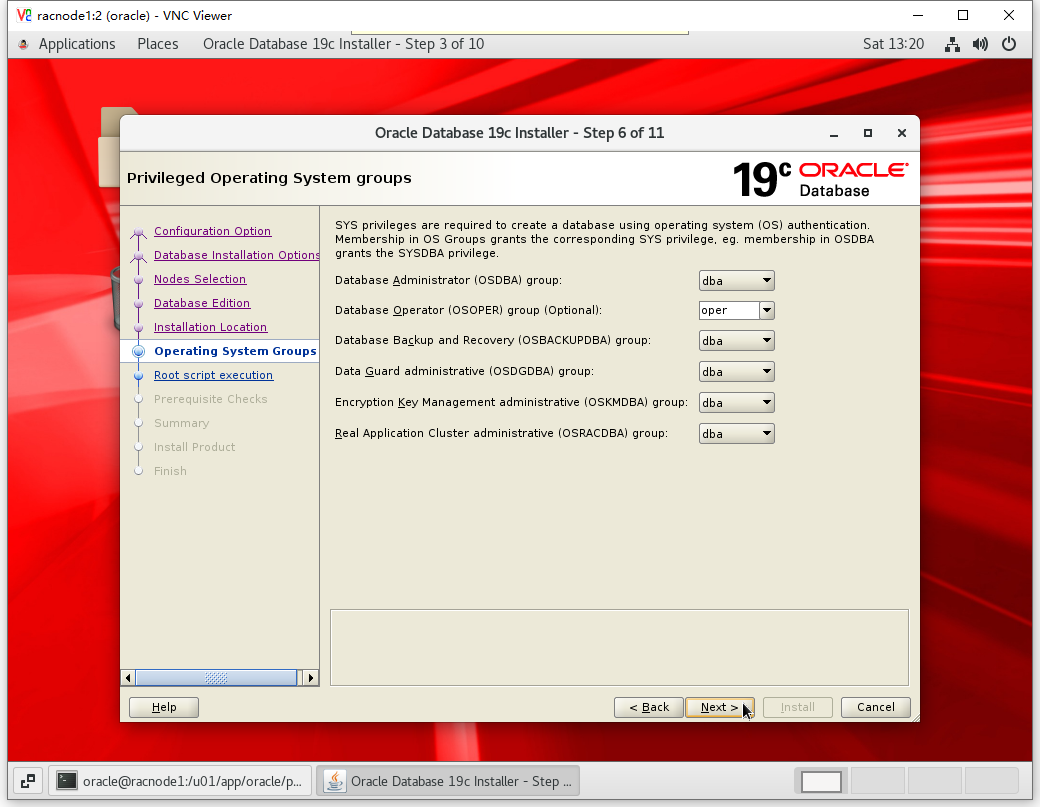
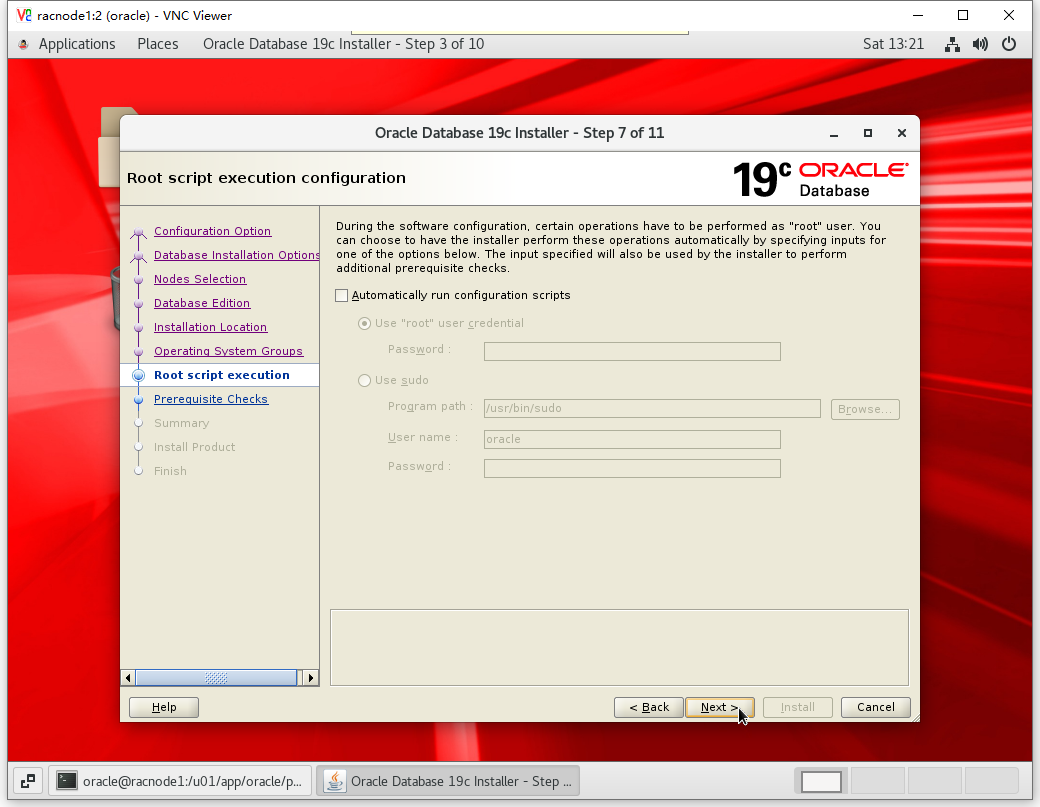
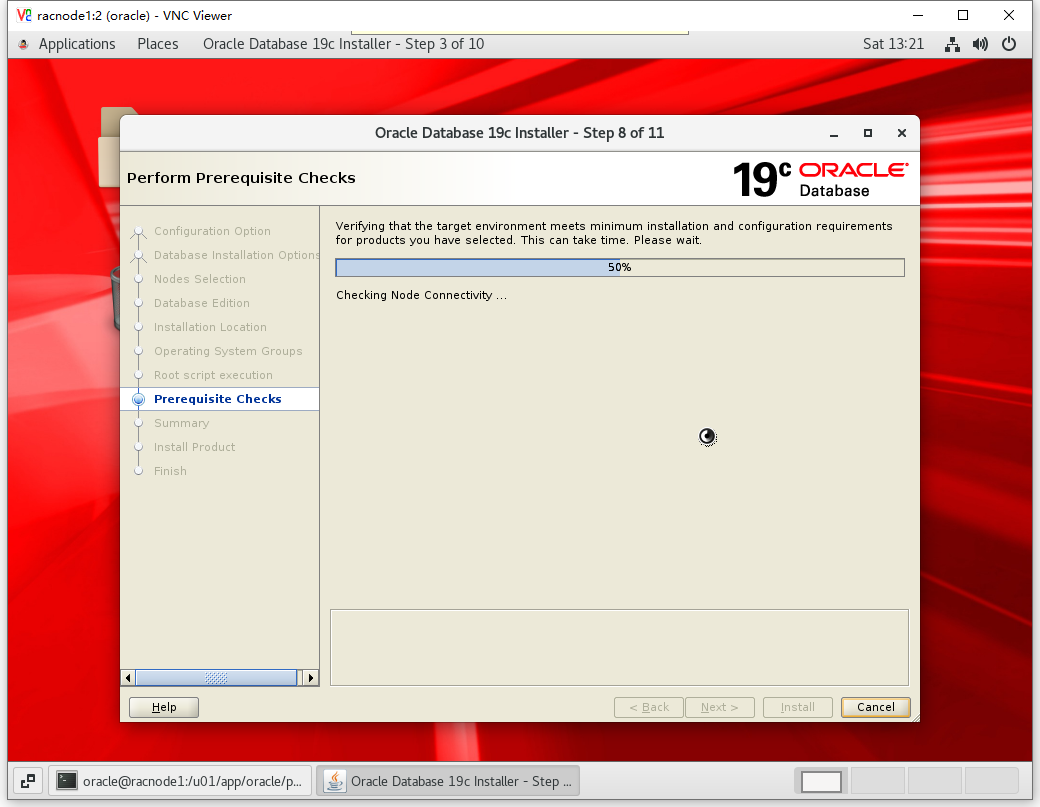
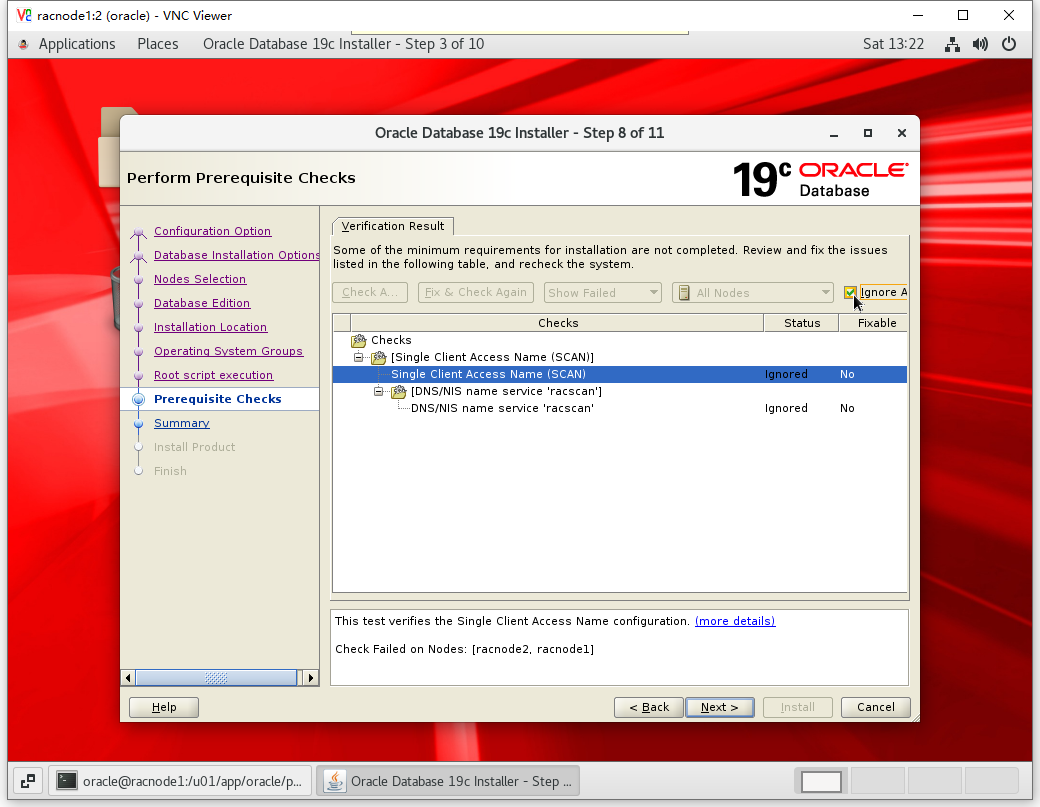
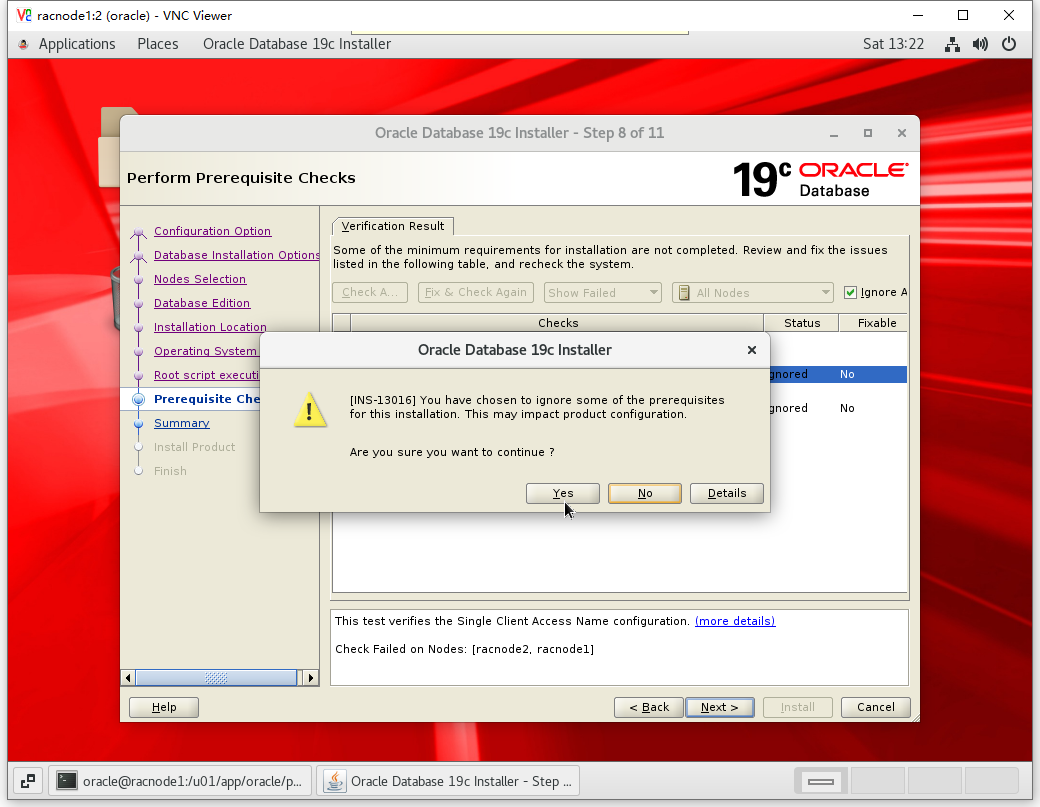
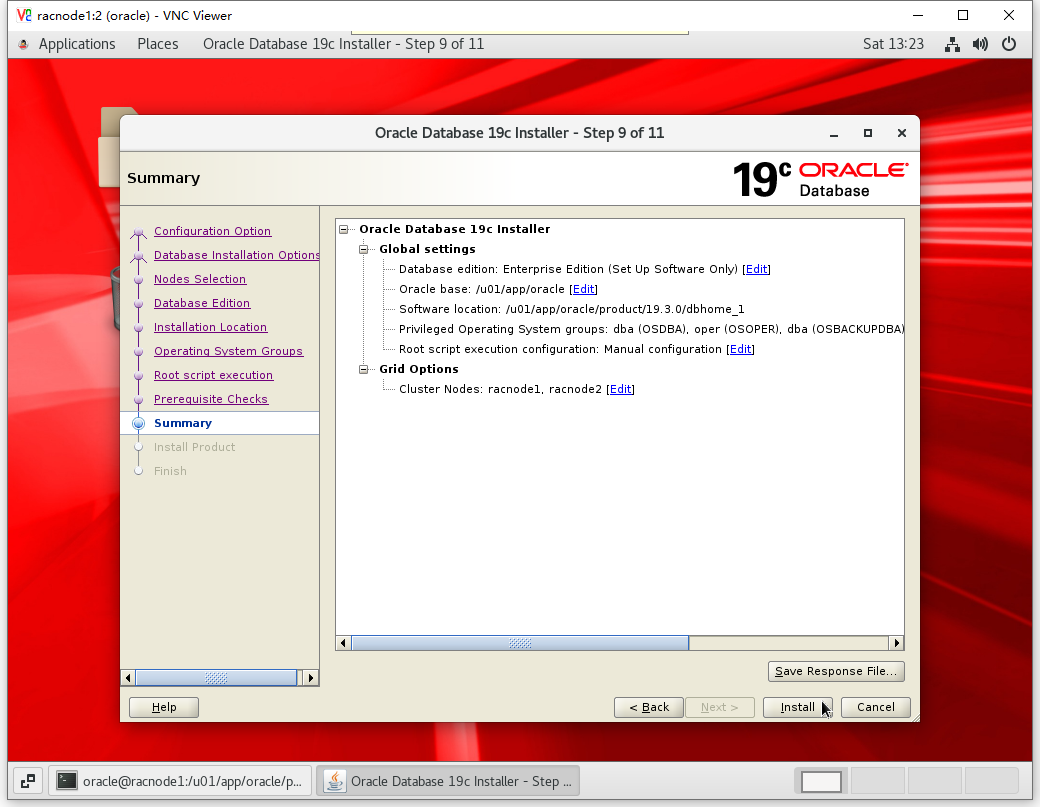
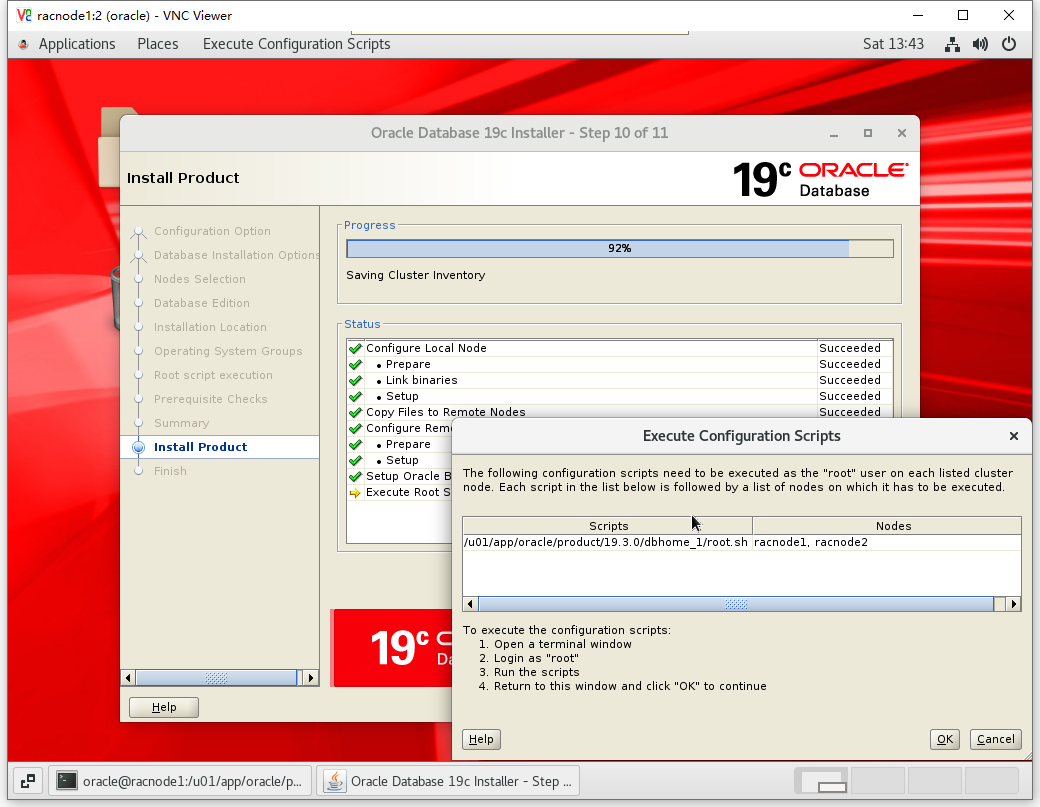
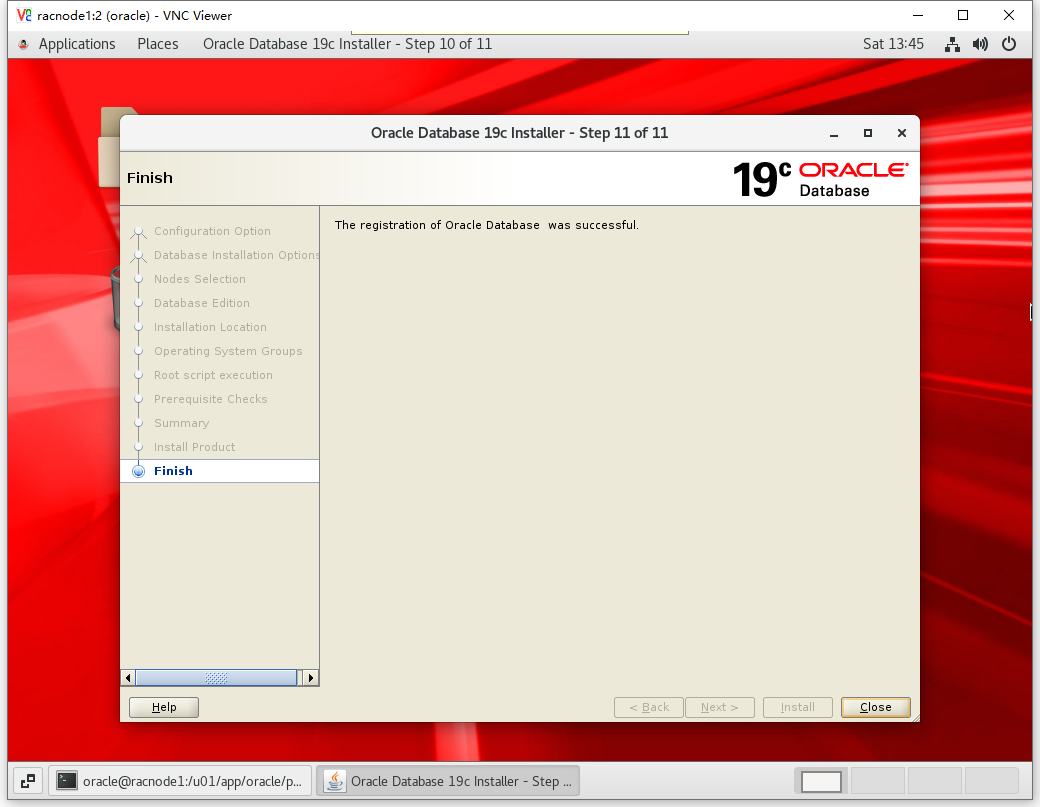
8.4 图形化安装DB软件
# 进入图形化桌面(打补丁)

[oracle@racnode1 ~]$ cd $ORACLE_HOME
[oracle@racnode1 dbhome_1]$ ./runInstaller -applyRU /soft/odb/31281355/

Preparing the home to patch...
Applying the patch /soft/odb/31281355/...
Successfully applied the patch.
The log can be found at: /u01/app/oraInventory/logs/InstallActions2020-10-10_01-12-49PM/installerPat    chActions_2020-10-10_01-12-49PM.log
Launching Oracle Database Setup Wizard...


# 进入图形化桌面(不打补丁)

[oracle@racnode1 ~]$ cd $ORACLE_HOME
[oracle@racnode1 dbhome_1]$ ./runInstaller
节点1执行脚本
[root@racnode1 ~]# /u01/app/oracle/product/19.3.0/dbhome_1/root.sh
Performing root user operation.

The following environment variables are set as:
    ORACLE_OWNER= oracle
    ORACLE_HOME=  /u01/app/oracle/product/19.3.0/dbhome_1

Enter the full pathname of the local bin directory: [/usr/local/bin]:
The contents of "dbhome" have not changed. No need to overwrite.
The contents of "oraenv" have not changed. No need to overwrite.
The contents of "coraenv" have not changed. No need to overwrite.

Entries will be added to the /etc/oratab file as needed by
Database Configuration Assistant when a database is created
Finished running generic part of root script.
Now product-specific root actions will be performed.
节点2执行脚本
[root@racnode2 ~]# /u01/app/oracle/product/19.3.0/dbhome_1/root.sh
Performing root user operation.

The following environment variables are set as:
    ORACLE_OWNER= oracle
    ORACLE_HOME=  /u01/app/oracle/product/19.3.0/dbhome_1

Enter the full pathname of the local bin directory: [/usr/local/bin]:
The contents of "dbhome" have not changed. No need to overwrite.
The contents of "oraenv" have not changed. No need to overwrite.
The contents of "coraenv" have not changed. No need to overwrite.

Entries will be added to the /etc/oratab file as needed by
Database Configuration Assistant when a database is created
Finished running generic part of root script.
Now product-specific root actions will be performed.
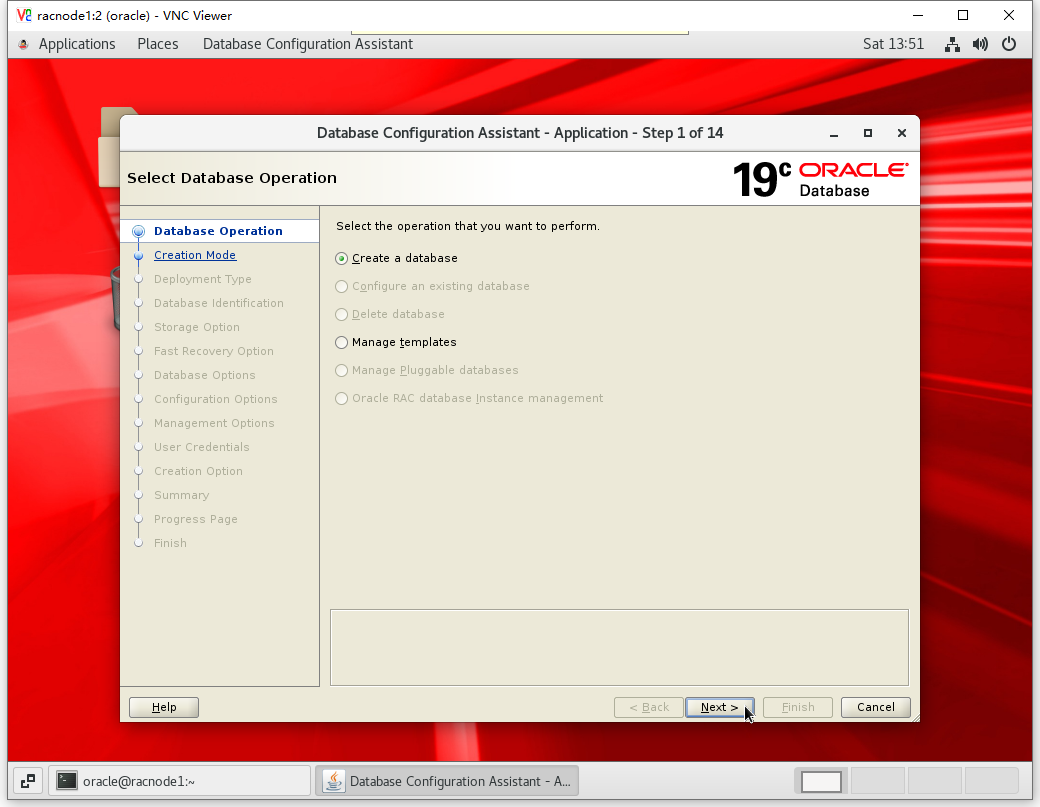
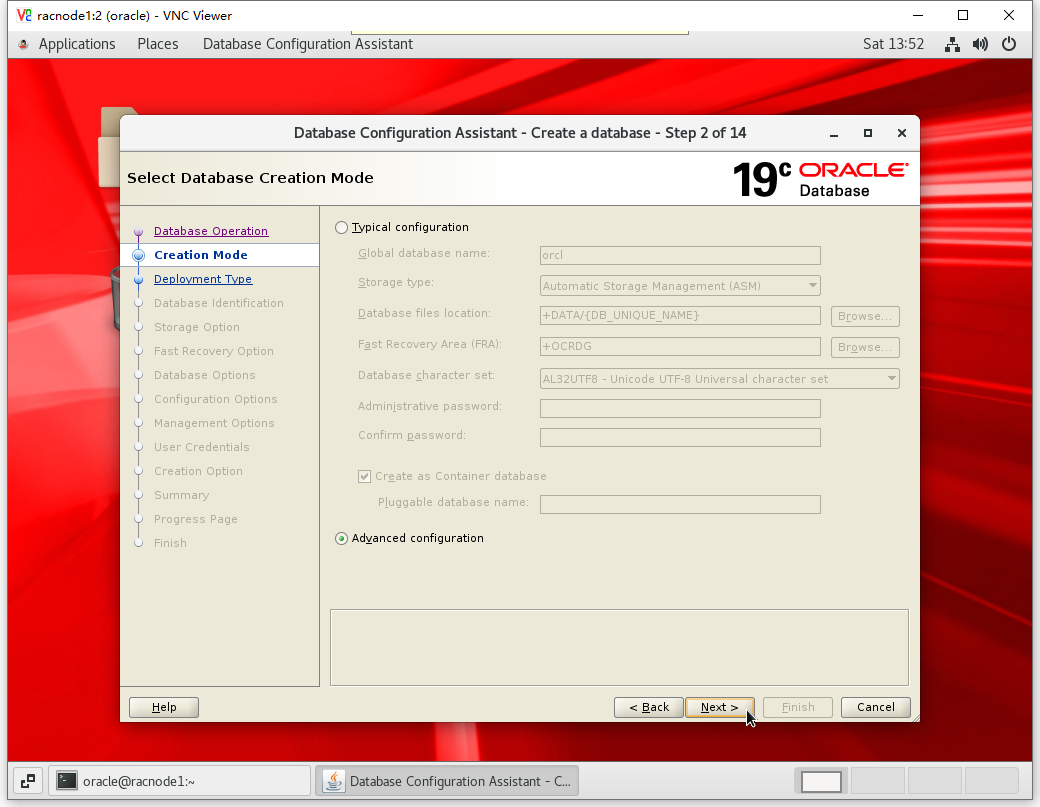
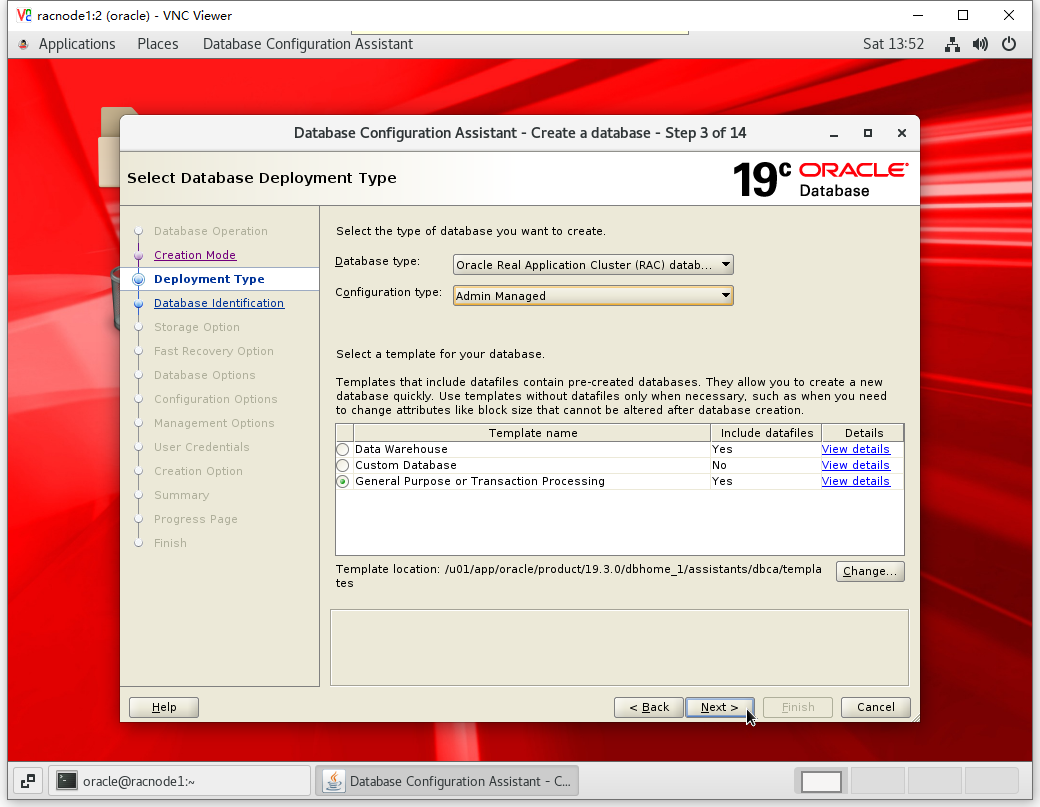
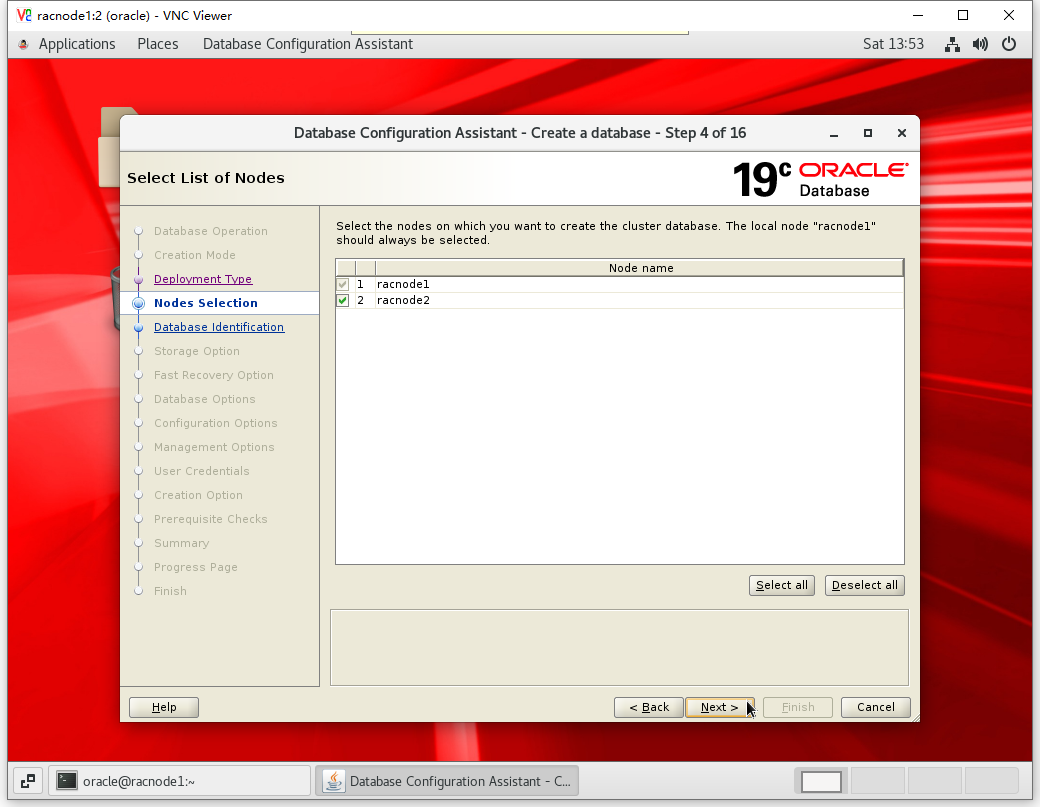
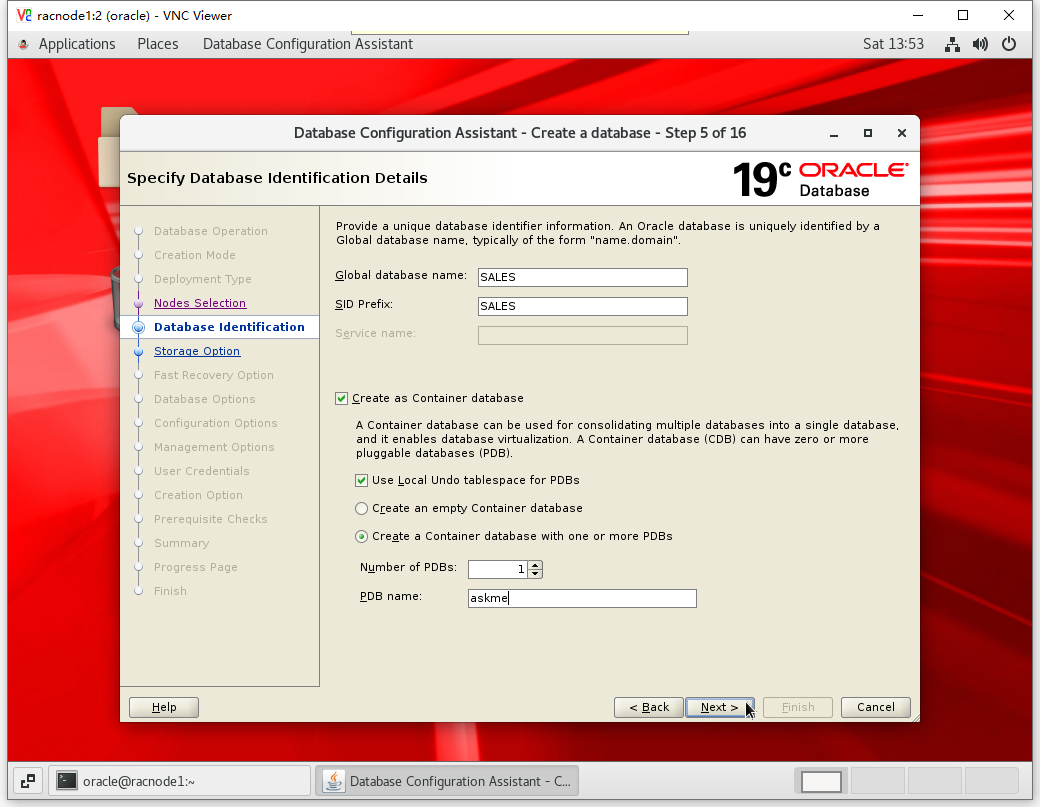
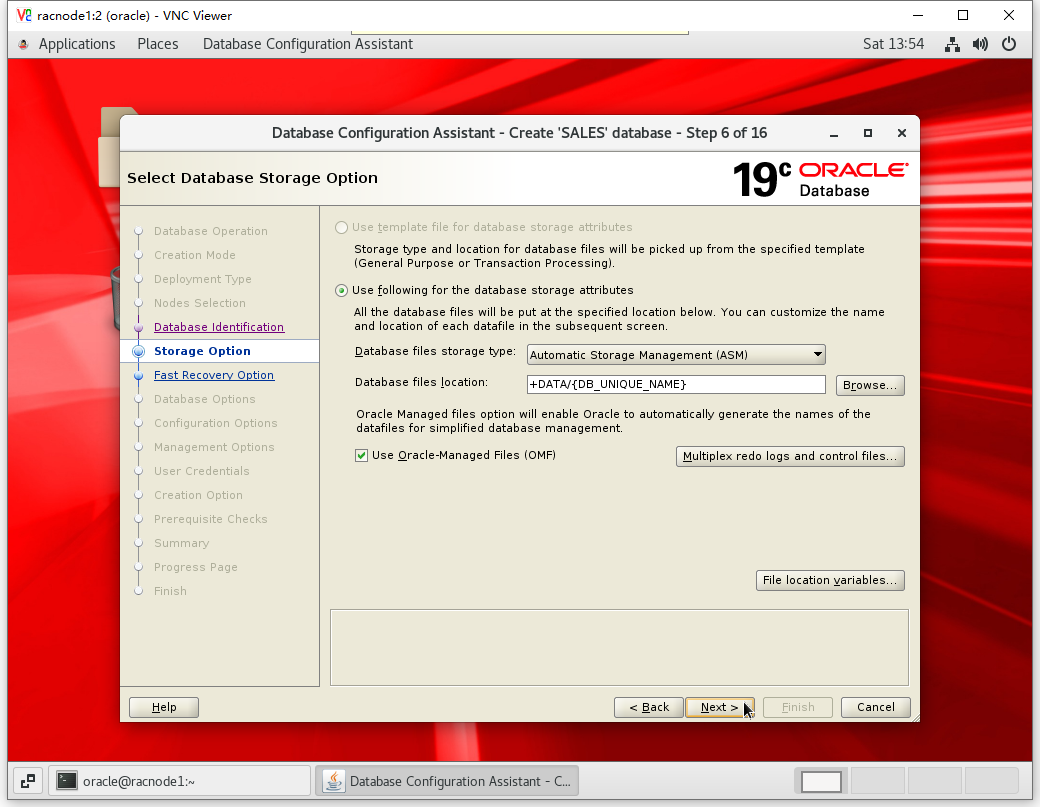
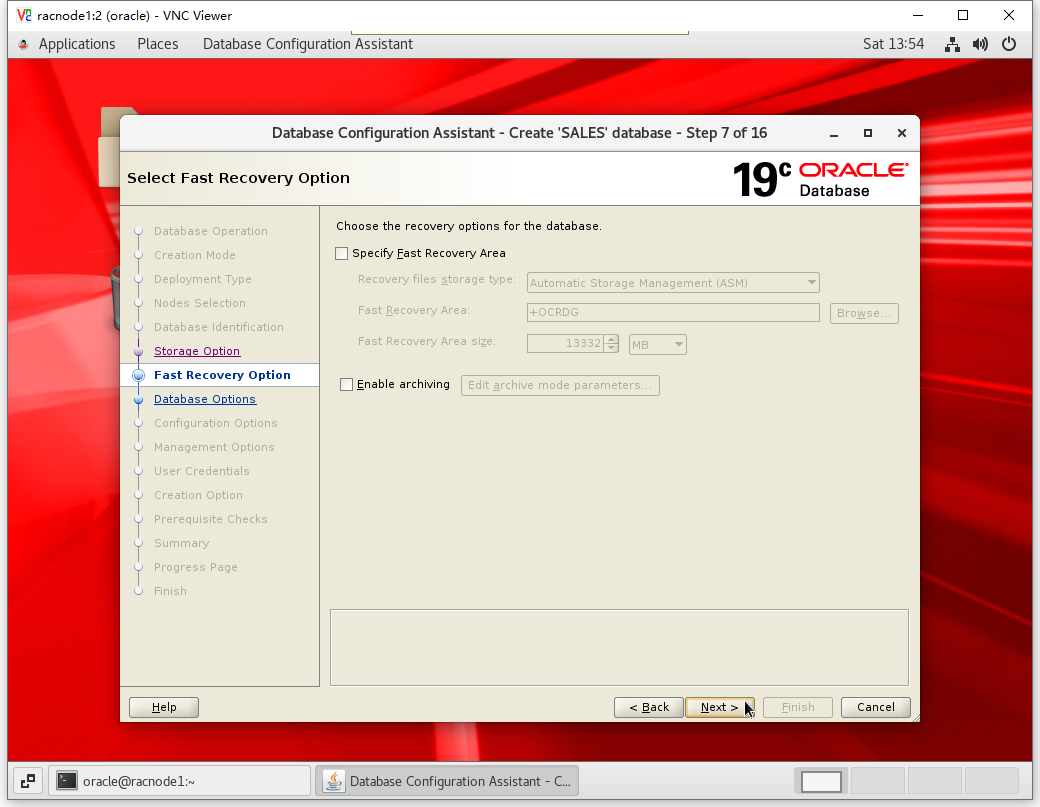
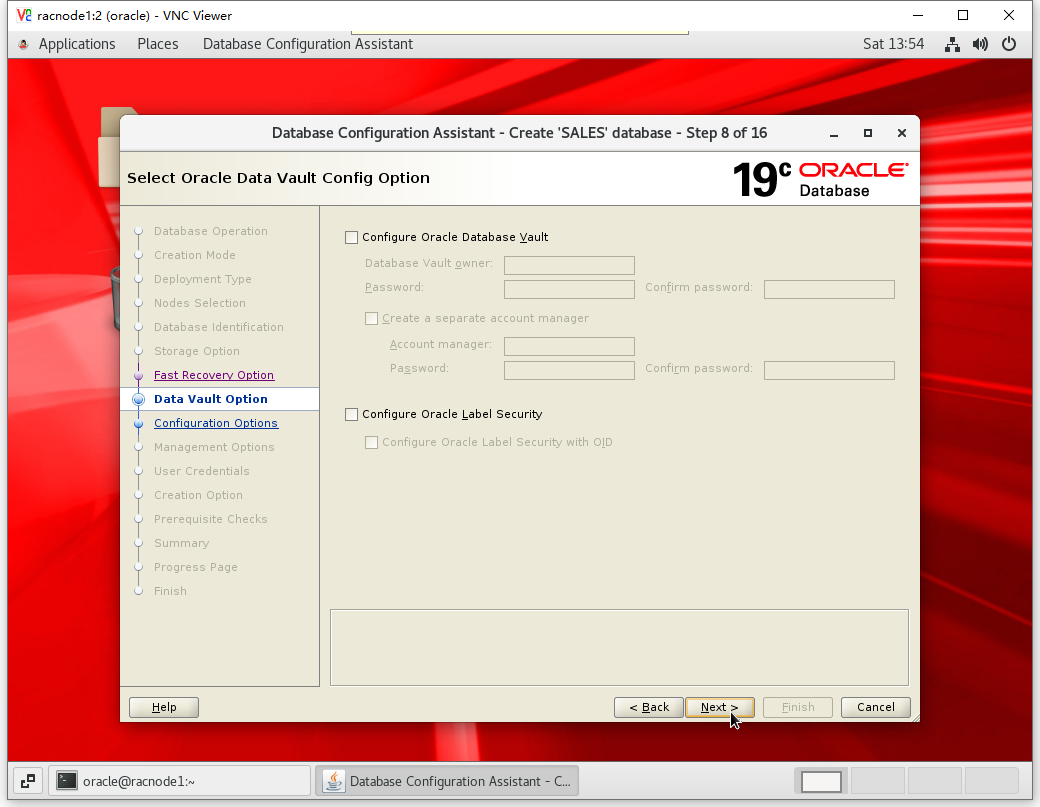
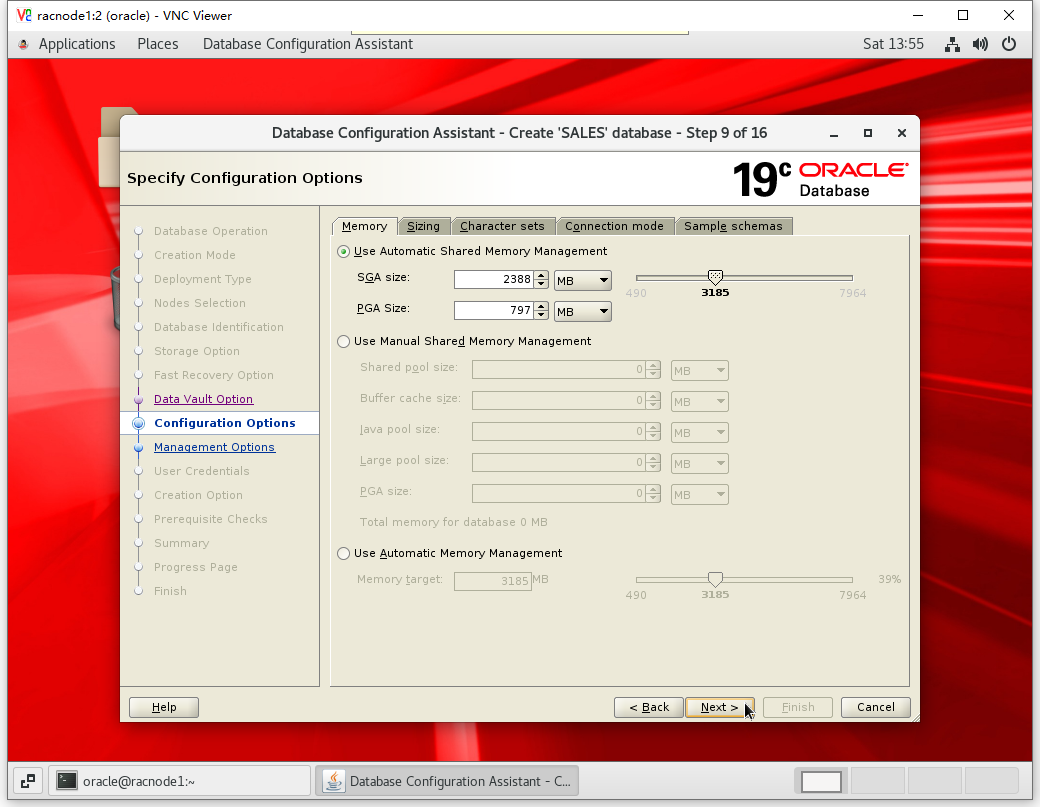
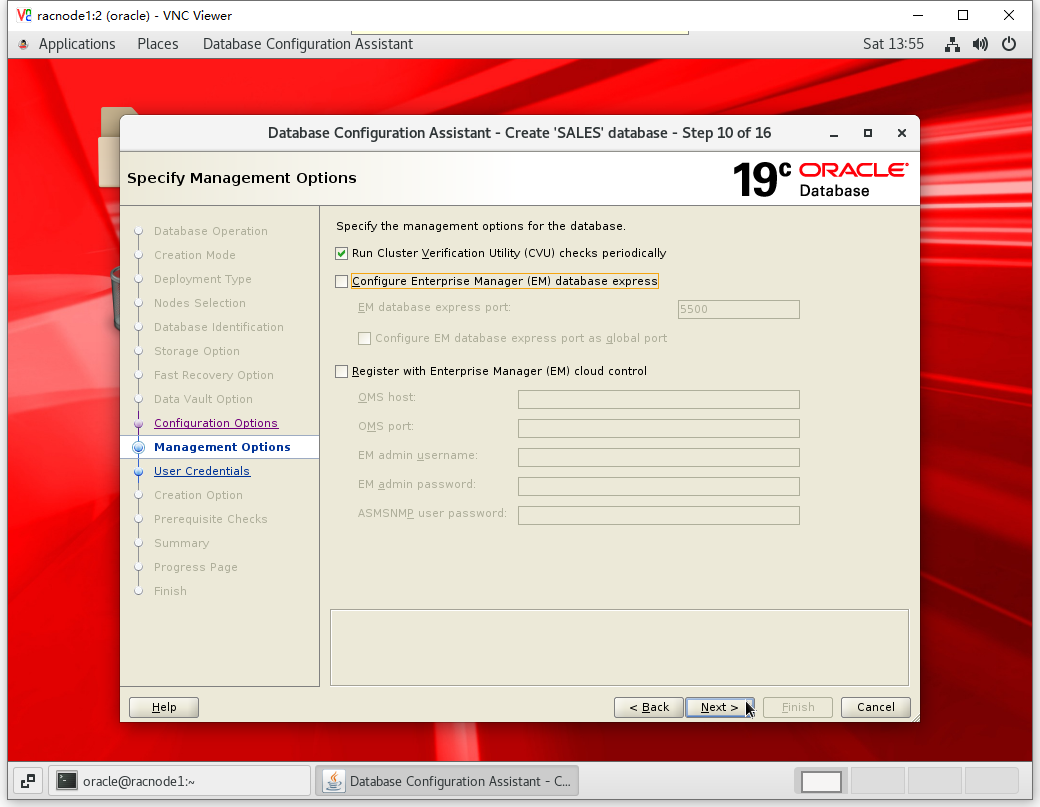
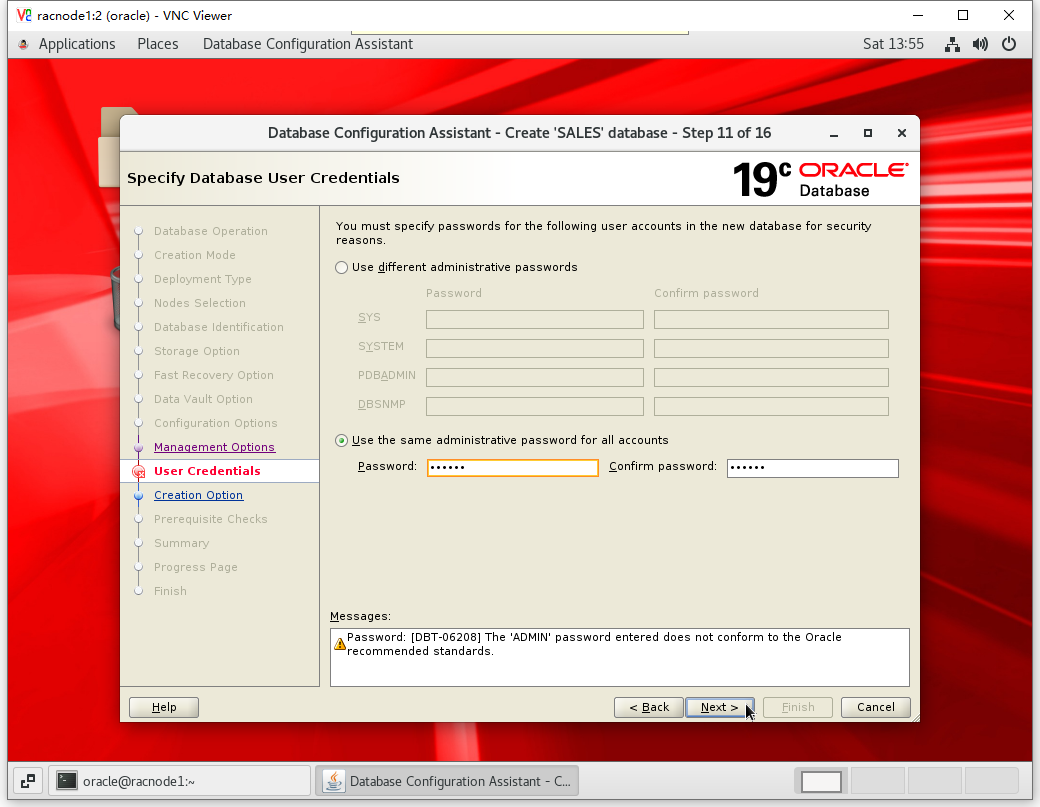
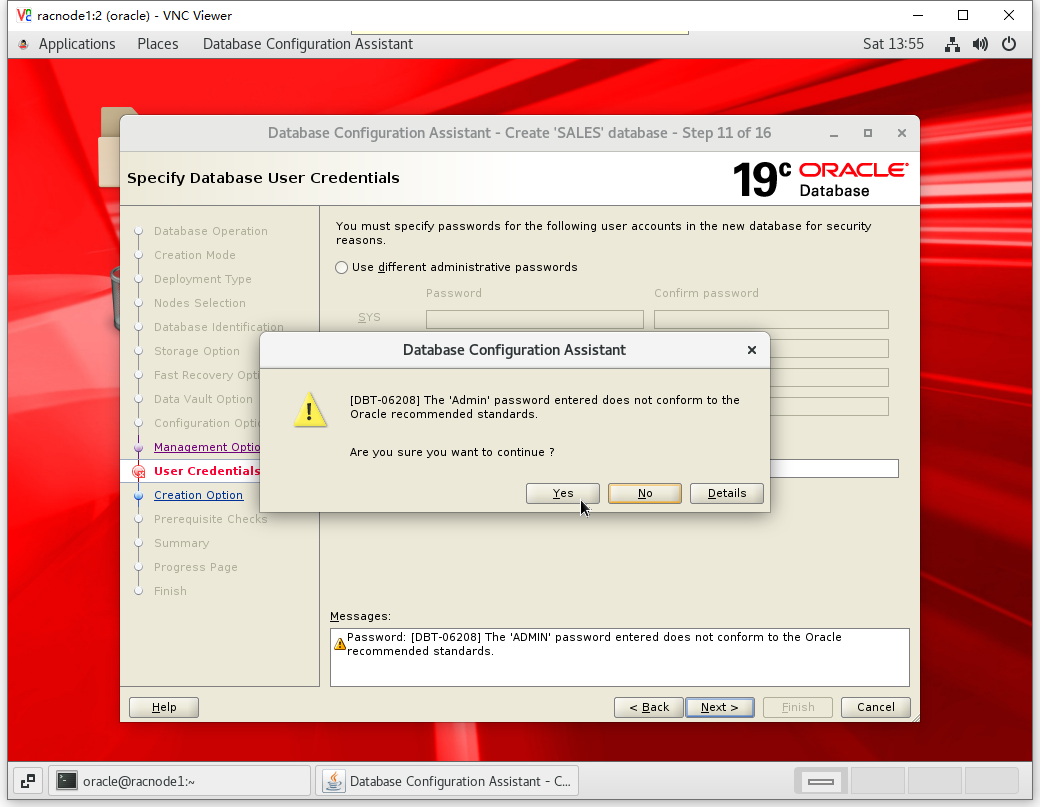
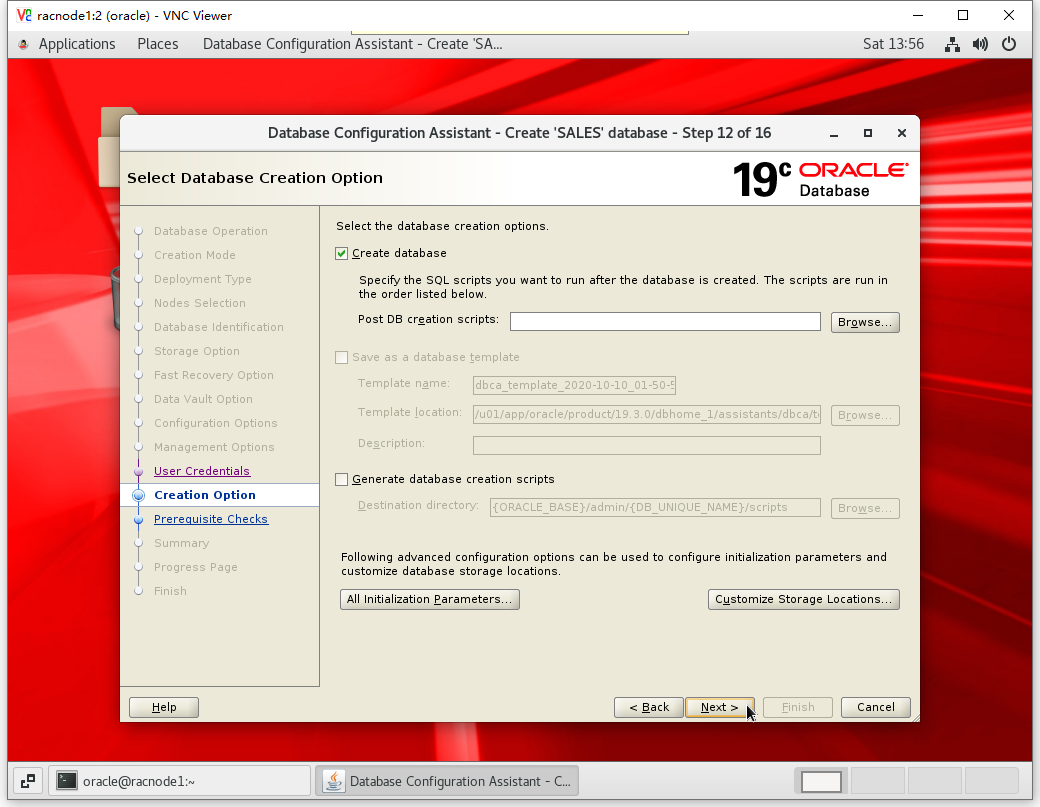
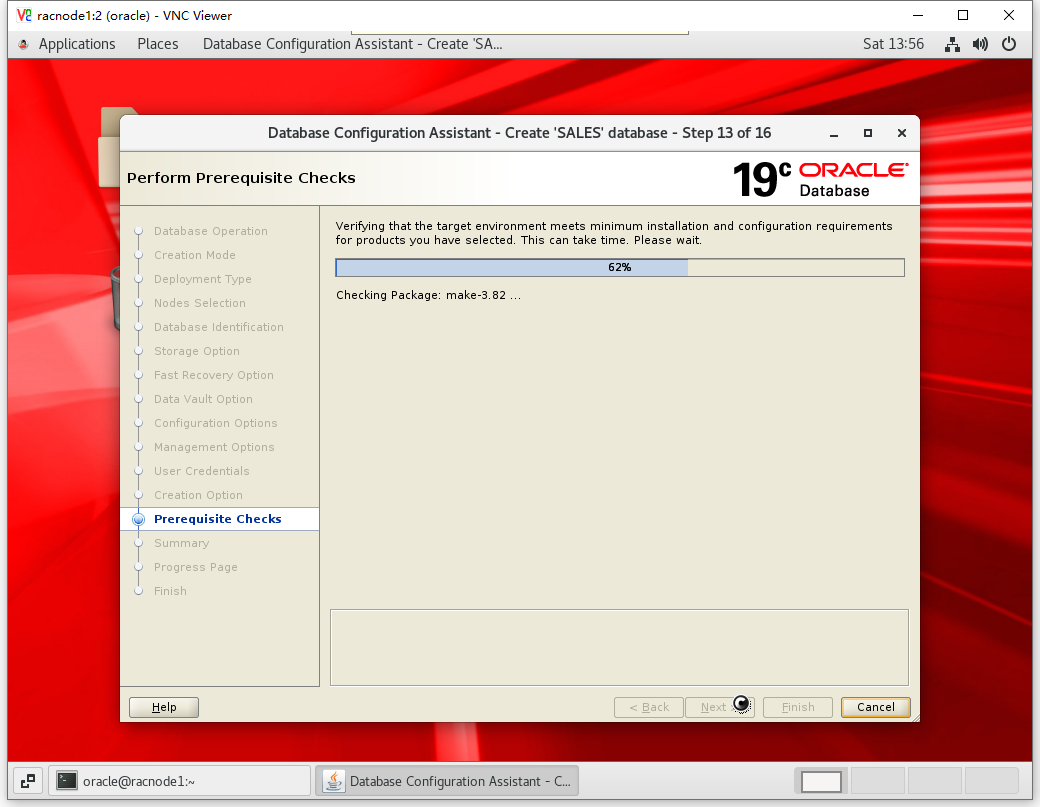
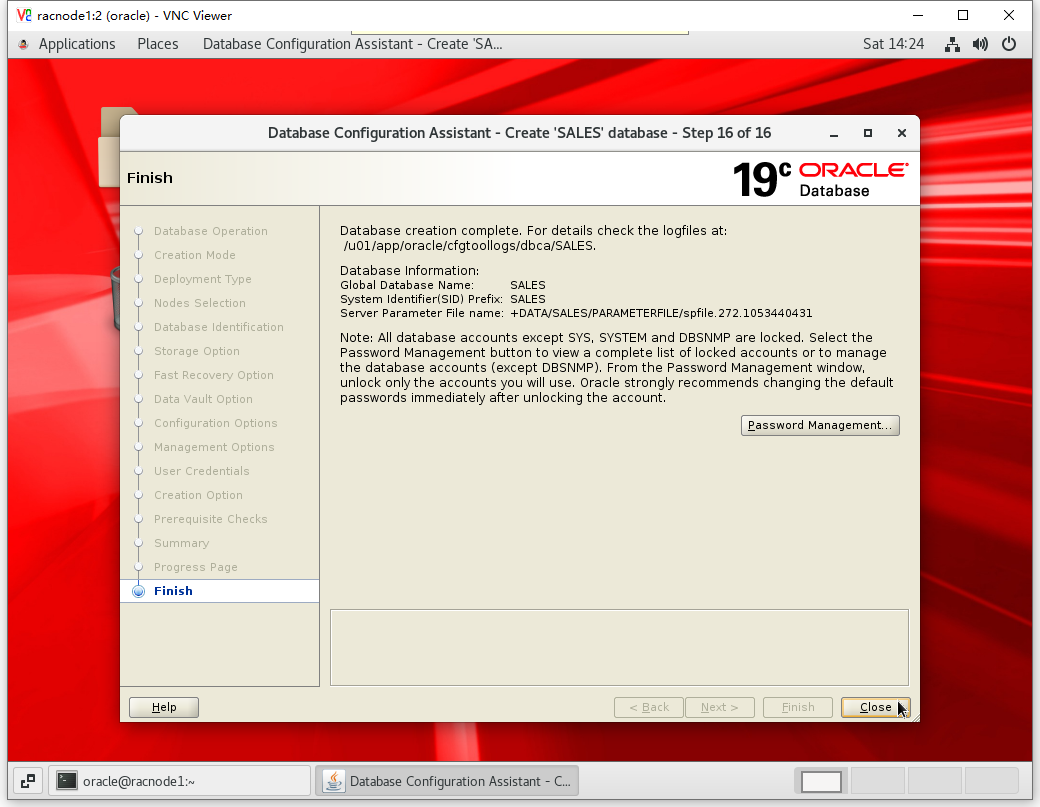
8.5 创建数据库
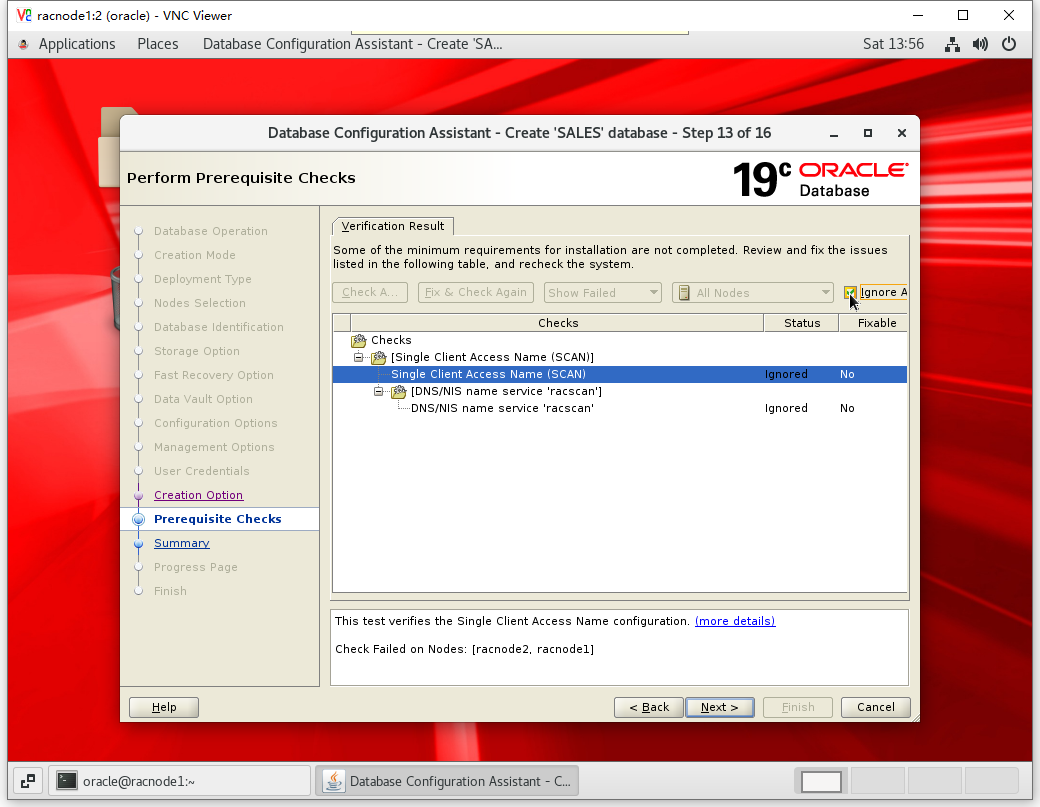
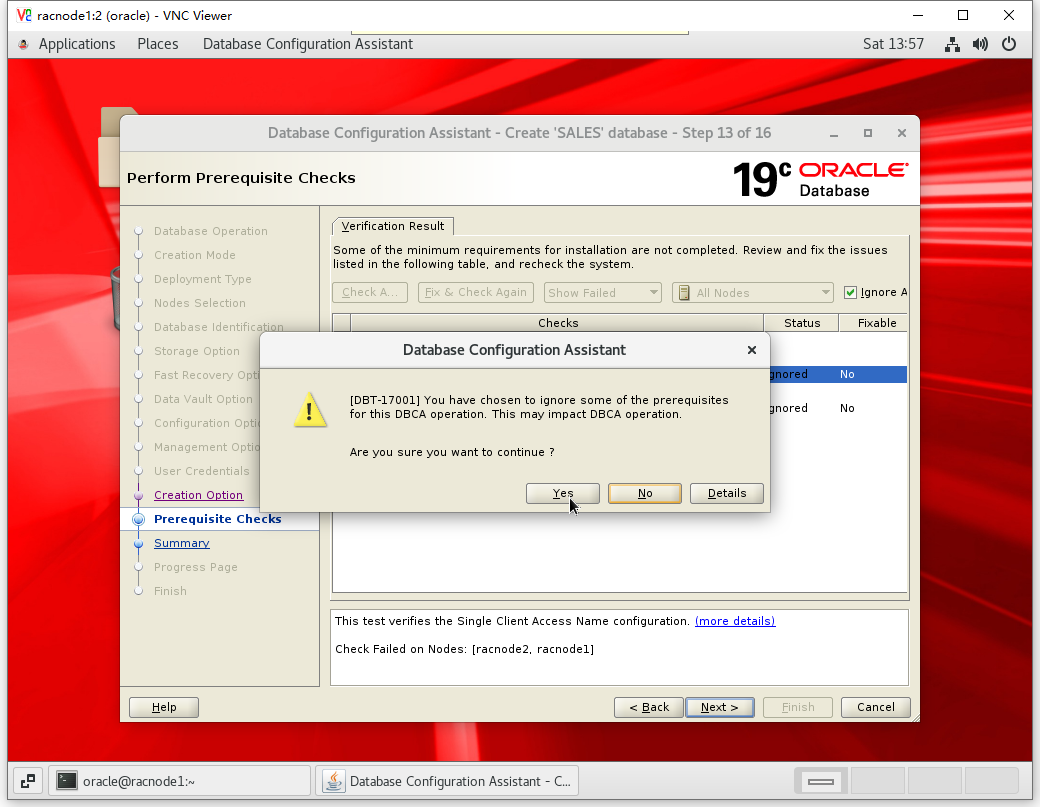
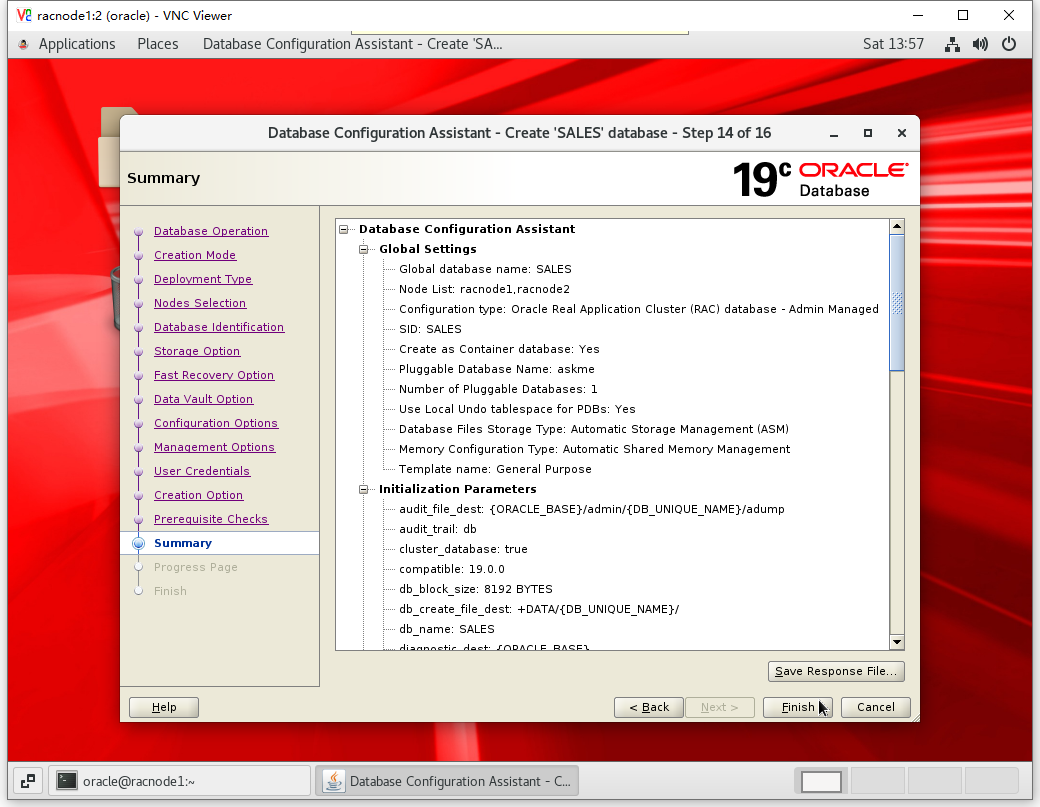
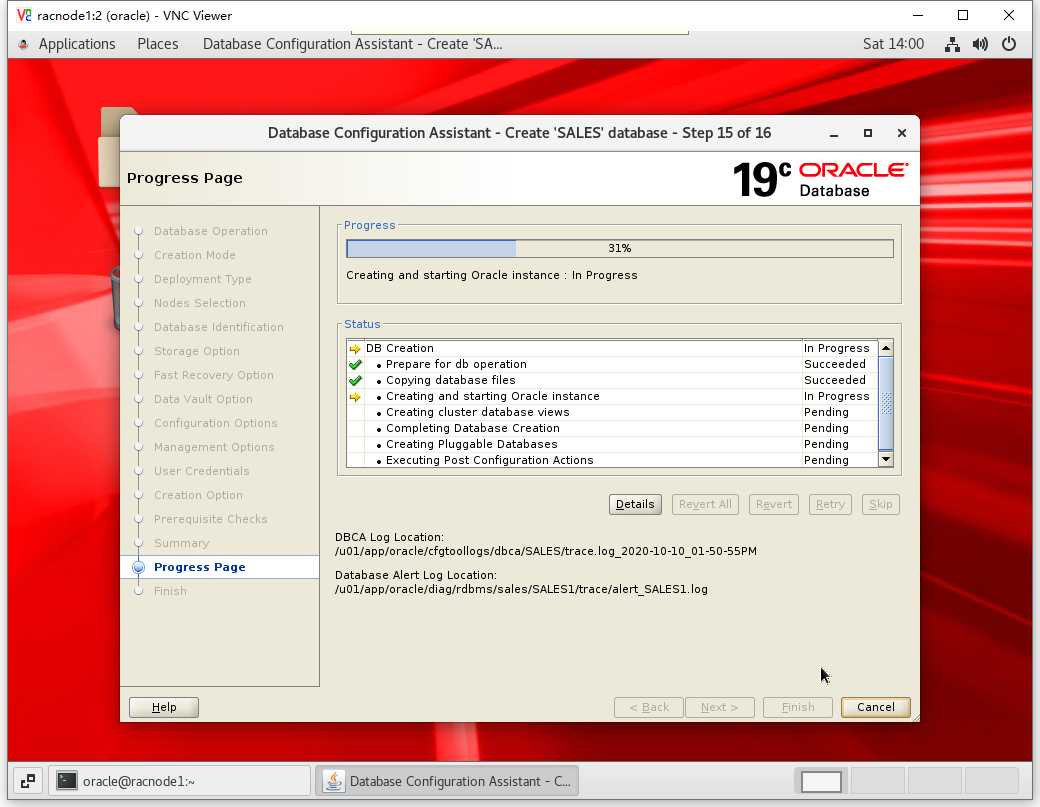
[oracle@racnode1 ~]$ dbca


发表评论